
views
- Easily see your computer's name in "Settings > System" for Windows 10 and 11.
- If you're using macOS Ventura or later, go to "System Settings > General > About" to see your computer's name.
- If you're using macOS Monterey or earlier, go to "System Preferences > Sharing" to see your computer's name.
Windows 10 & 11

Press ⊞ Win+I. This keyboard shortcut will open Settings. You can also launch this menu by clicking the gear icon in the Start menu.
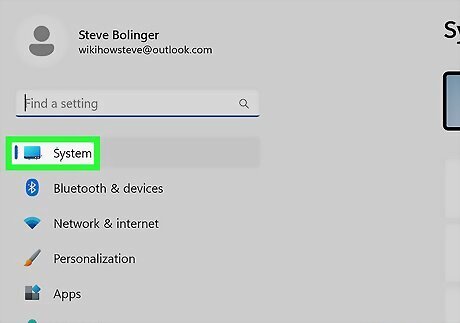
Click System. If you're using Windows 11, this is an option in the panel on the left side of the window. If you're using Windows 10, you'll see this centered in the window.
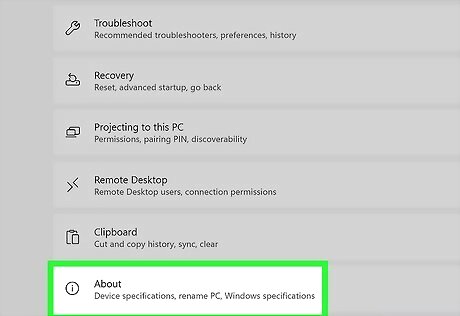
Click About (Windows 10 only). Skip this step if you have Windows 11.
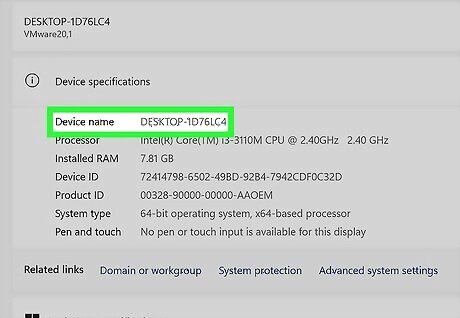
Find your computer's name. It'll be under "Device specifications" or at the top of the window. You'll also see information like your processor, installed RAM, and your device ID. Click Rename PC if you want to change the name. You can also see the same information in the Control Panel under "System & security > System." For Windows 8, press Win + X and click "System" to see your computer's name. For Windows 7, go to the Start menu, right-click Computer and click Properties. See the computer's name there.
macOS Ventura & Later
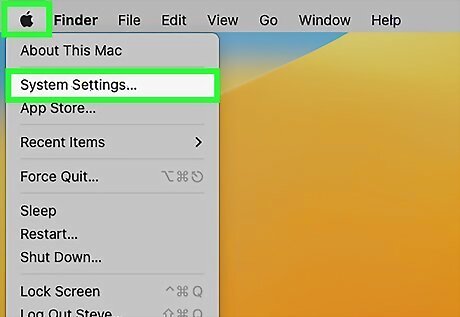
Open System Settings. Click the Apple logo in the Apple menu, then click System Settings.
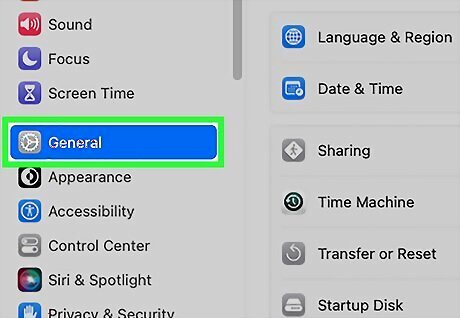
Click General. It's next to a gear icon.
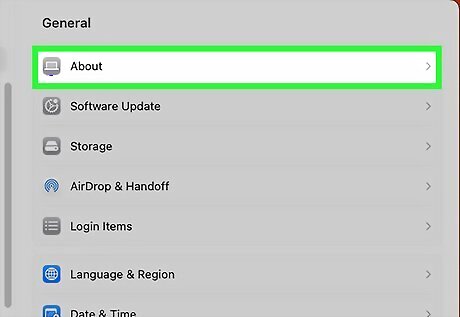
Click About. It's an option on the left side of the window and might be active by default.

See your computer's name. You'll see information about your computer listed here. You can also get here by clicking Mac Apple Apple > About This Mac > More Info.
macOS Monterey & Earlier

Open System Preferences. Click the Apple logo in the Apple menu, then click System Preferences.
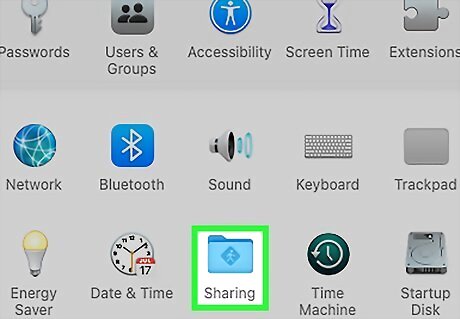
Click Sharing. It's next to a file icon that has a gear on it.

Find your computer's name. You'll see this at the top of the menu.


Comments
0 comment