views
- Boil water for 1-3 minutes to kill pathogens before drinking it.
- Mix 6-8 drops of bleach per gallon (2 drops per liter) of water, then let it stand for 30 minutes before drinking it.
- To filter particles out of water, attach a portable camping water filter to a bottle, then squeeze the bottle to pass the water through the filter.
Boiling Water for Drinking

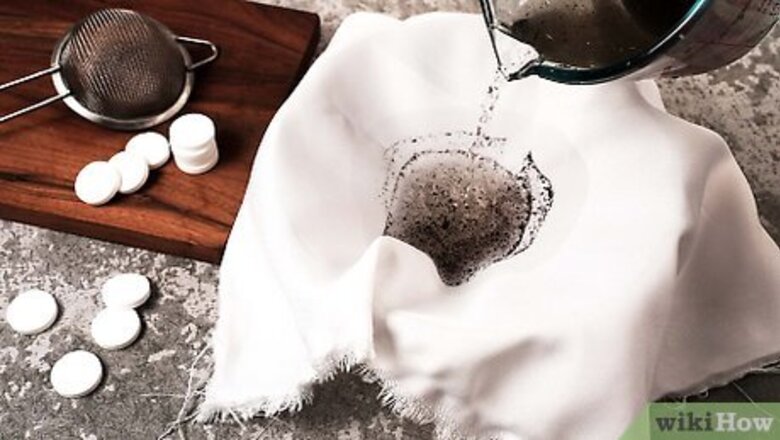
Collect water and filter it with a cloth, towel, or water filter. Do this for cloudy water from a lake, stream, or well. Collect the water in a container, then place your filter over a second container and pour the water through the filter. This removes particulates like soil, sticks, insects, and other large items from the water. If you only have one container for water, hold your filter over the container, then dip the container into your water source. Allow the water to pass through the filter as it fills the container. You can skip this step if you are purifying clear water from a faucet or similar water source.
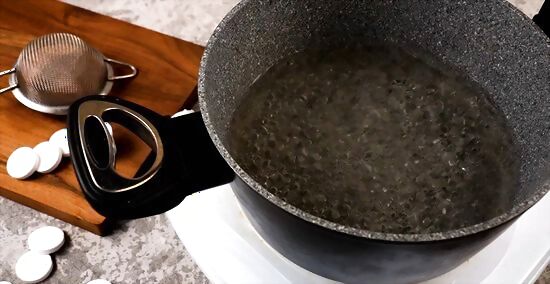
Bring your water to a rolling boil for 1-3 minutes. If your elevation is below 5,000 feet (1,000 meters), such as on a mountain or region like Colorado, boil your water for 3 minutes. If you’re closer to sea level, boil your water for 1 minute. The boiling will kill bacteria, viruses, and other pathogens. Water boils at a lower temperature at higher elevations. Always boil water for 3 minutes above 5,000 feet (1,000 meters) to ensure you kill all the pathogens. Boiling does not remove other contaminants like salts, metals, fuel, toxic chemicals, and radioactive materials. Use bottled water if the water in your region contains these contaminants.

Allow the water to cool and store it in covered containers. Use clean plastic bottles or jugs with lids. Store your water in a cool place (50°F –70°F or 10°C –21°C), away from direct sunlight and toxic substances like gasoline or pesticides. Replace your water every six months. Store at least 1 gallon of water per person for drinking and washing. Store extra water for pregnant people, pets, or in hot climates such as deserts.
Disinfecting Water with Chlorine Bleach

Buy regular chlorine bleach labeled for water sanitation. Choose bleach that contains 6% or 8.25% of sodium hypochlorite—you can find this information on the product label under “Active Ingredients”. Make sure the product label contains instructions for water purification. Do not use unscented or color-safe bleach, or bleach with added cleaning chemicals. These cannot be used for purifying water. You can also purify water with iodine or chlorine dioxide tablets. However, the amounts needed vary between manufacturers, and iodine can be harmful to pregnant people or folks with thyroid problems.

Add clear water to a container. Add at least 1 liter (0.26 gallons) of water, or fill the container completely if it holds a specific quantity, like a 1-gallon (3.8 L) jug. If your water is cloudy, filter it first using a cloth, shirt, or coffee filter. This will remove particulates like dirt and insects. You can also allow cloudy water to settle in the container, then filter the top layer of clear water through.

Use an eye dropper to add bleach to your water. The exact number of drops depends on the amount of water in your container and the concentration of sodium hypochlorite in your bleach. Double-check the “Active Ingredients” section of the product label on your bleach to determine if the concentration is 6% or 8.25%, then follow the instructions below: If using 6% bleach, add 8 drops of bleach per 1 gallon of water (or 2 drops per liter of water). If you don’t have an eyedropper, add ⅛ tsp. of bleach per 1 gallon of water (or 0.15 mL of bleach per liter of water). If using 8.25% bleach, add 6 drops of bleach per 1 gallon of water (or 2 drops per liter of water). If you don’t have an eyedropper, add a little less than ⅛ tsp. of bleach per 1 gallon of water (about 0.1 mL of bleach per liter of water).

Stir the bleach into the water and let it stand for 30 minutes. After 30 minutes, the water should have a slight chlorine smell. If it doesn’t, add the same quantity of bleach again, mix it in, and let the water sit for another 15 minutes. The water will be safe to drink. Bleach cannot remove salts, metals, toxic chemicals, and other pollutants from water. Stick with bottled water if your water source has been contaminated with pollutants.
Filtering Water to Remove Particles
Buy a water filter that can be screwed onto a soda bottle. Make sure the filter has an “absolute pore size” of 1 micron or less. Opt for a water filtration kit designed for camping, since these are lightweight and easy to use. You can buy a water filtration kit online or from a local camping supply shop. Make sure your filter specifies an “absolute” pore size of 1 micron or less. Filters labeled “1 micron” or “nominal pore size of 1 micron” are not sufficient. An “absolute” pore size of 1 micron means that all pores in the filter (the passages where water passes through) are 1 micron in size or smaller. 1 micron = 1/25,000th of 1 inch (1/10,000th of 1 cm). These filters remove particulates and microscopic parasites, but they may not remove bacteria and viruses.
Fill a plastic soda bottle with unfiltered water. Avoid dark, muddy water, but don’t worry if the water is a little cloudy or contains particulates. If your water source is muddy, use a cloth or coffee filter to strain the water into the bottle. If your kit comes with a bag for collecting water, use it to collect unfiltered water.
Attach the filter to the soda bottle. Place the filter on the top of the bottle, then screw it on as if it were a bottle cap. Screw it tightly and turn the bottle over to make sure no water leaks from behind the filter. Screw it tighter as needed until the leaking stops. For kits with water bags, attach the filter directly to the bag.
Gently squeeze the bottle to filter the water. Avoid squeezing too hard to prevent the water from leaking from behind the filter. The water will squirt from the nozzle at the tip of the filter. This water is now purified and safe to drink. You can also hold the bottle upside down to allow the water to sink through the filter via gravity. If using a water bag, squeeze and roll the bag to move water through the filter.
Collect the purified water or drink directly from the filter. Fill a jug, water bladder, or separate water bottle with purified water. Or sip from the filter’s nozzle if you’re thirsty enough. Once the bottle attached to the filter is empty, remove the filter and let it dry, or collect more water for purification. Make sure to use separate containers for collecting and storing water. Otherwise, you may re-contaminate your filtered water.
Using Sunlight to Purify Water in Emergencies
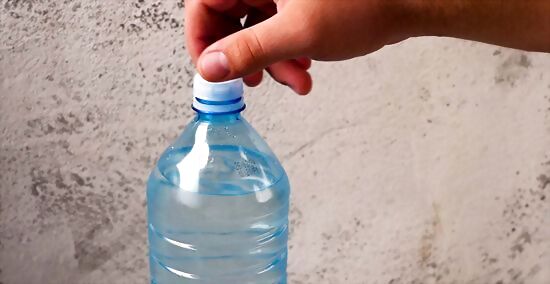
Fill 4-5 clear plastic bottles with water. Opt for long, thin, clear plastic soda bottles or water bottles with screw caps. Make sure your bottles have a diameter of 4 inches (10 cm) or less. Remove product labels and any other materials wrapped around the plastic. Screw the caps tightly to prevent leaking. Leave 1 inch (2.5 cm) of air at the top of the bottle. Don’t fill it completely with water. Make sure your water is clear and free of particulates. If your water is cloudy, filter it first with a coffee filter or cloth, then add it to the water bottles.
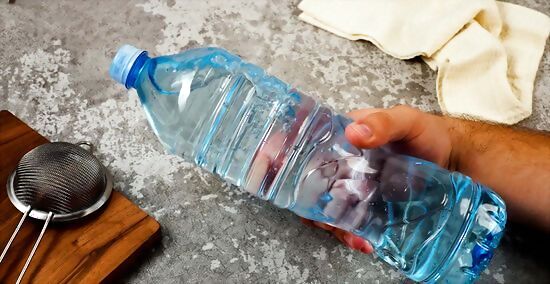
Shake the bottle to mix air into the water. The oxygen from the air will react with the UV radiation from the sunlight. This will help kill pathogens in the next steps. Shake each bottle vigorously for 10 seconds. If there’s less than 1 inch (2.5 cm) of air at the top of your bottles, pour out some of the water to leave room for air. Then reseal the bottle and shake vigorously.

Lay the bottles on their side in sunlight for 6-48 hours. For bright sunny days, leave the bottles in full sunlight for 6 hours. For cloudy days, leave them for a full 48 hours (2 full days). The UV radiation from the sun will slowly kill pathogens in the water. After 6 hours in full sunlight (or 48 hours in cloudy weather), the water is safe to drink.
Using an Ultraviolet (UV) Water Purifier to Kill Pathogens
Obtain a portable electronic UV water purifier. Buy a portable UV “probe” purifier that can be dipped into water, allowing the UV light to kill any pathogens. You can buy portable UV water purifiers online for $120. Note that these are battery-powered and require regular charging. Homeowners can also install household UV purification systems. These connect directly to your plumbing, supplying you with potable water 24/7.
Fill a water bottle with 0.5 L (0.13 gal) of water. Choose clear water with few or no particulates. Avoid adding more than 0.5 L (.13 gallons) of water, since your UV device can only purify a small volume of water at a time. Some UV purifiers allow you to specify a quantity of water to be purified. Check your device’s settings and adjust the quantity of water as needed. Filter cloudy water with a cloth or coffee filter before adding it to the bottle. Cloudy water blocks UV light, preventing purification.
Activate your UV device and dip it in the water. If your device has a timer, leave it in the water until it turns off. Otherwise, leave it for one minute. Avoid removing the device too early or you’ll have to start the purification cycle over again. The water is safe to drink after one minute, or after the device automatically turns off. As with most water sanitation methods, UV purification can’t remove toxins or metals from your water. Opt for bottled water if you suspect your water source is contaminated.







Comments
0 comment