
Old Caliper Removal

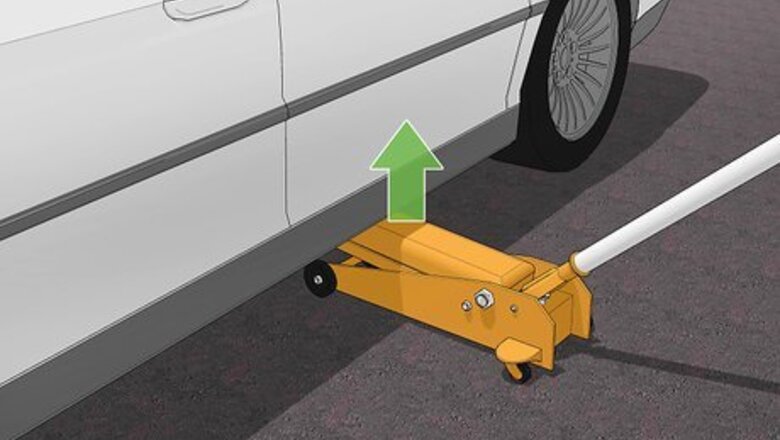
Raise your vehicle off the ground to place jack stands under it. Place your jack under the side of your vehicle so the main lift arm is against your vehicle’s frame. Crank the jack to lift the side of the vehicle until the wheel you need to remove is off of the ground. Once you raise your vehicle, position jack stands under the frame so the vehicle doesn’t drop or slip. Don’t try to work on your vehicle if it’s only supported by the jack since it may not be secure and could slip. Make sure your vehicle is parked on a flat, level surface when you jack it up. If you’re worried about your vehicle rolling, put blocks in front of or behind the wheels still touching the ground.
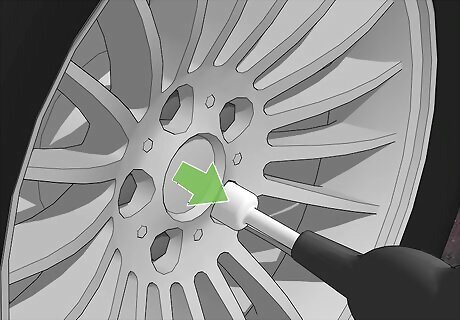
Take off the wheel that’s in front of the brake caliper you’re replacing. Use a tire iron or a ratchet to loosen the lug nuts holding the wheel in place. Once you remove the lug nuts, grab both sides of the tire and carefully pull it straight off of the bolts holding it in place to expose the brake assembly. If you have trouble removing the lug nuts from your vehicle, spray them with a lubricant to help loosen them from place.
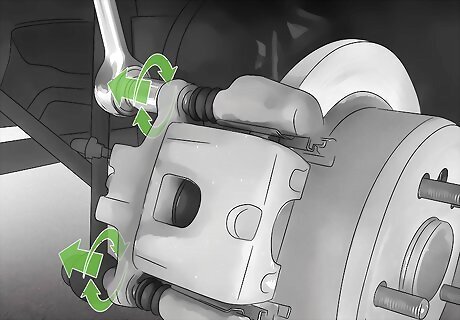
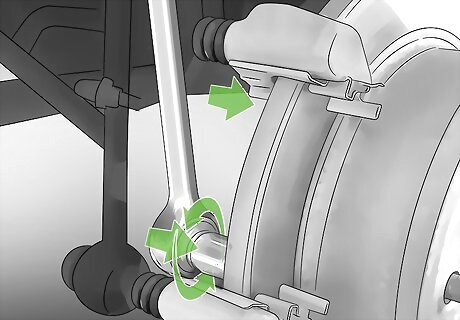
Remove the 2 bolts on the back of the caliper with a ratchet. The caliper is the large metal piece that clamps around the brake rotor, which looks like a large metal disc. Locate the 2 bolts on the back of the caliper that attach to the springs on the side. Fit the end of a ratchet on the bolts and rotate them counterclockwise to loosen them from place. If you can’t get enough leverage to loosen the bolts from the back of the caliper, then attach the socket to a longer breaker bar so you can get more power. You can buy breaker bars from your local hardware store.
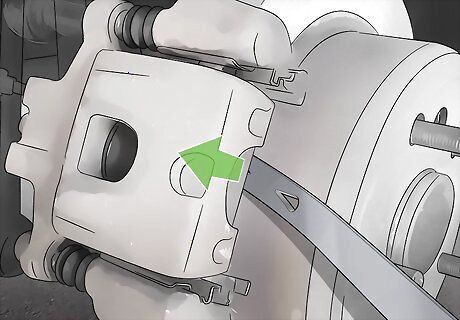
Pry the caliper off of the brake pads with a screwdriver. Once you loosen the bolts from the back of the caliper, the center part will come loose. Try pulling the caliper up and off of the brake rotor first. If you can’t remove the caliper by hand, then place the end of a flathead screwdriver between the brake rotor and caliper. Pull the screwdriver handle up to lift pry the caliper off of the brake pads. The caliper will still be attached to your vehicle by a hose leading to your brake’s main cylinder. Leave the caliper attached to the hose for now since it could leak brake fluid otherwise.

Remove the brake pads from the caliper bracket. The brake pads are the rectangular-shaped pieces on either side of the rotor that were covered by the center portion of the caliper. Pull the brake pads straight out from their housings on the bracket to remove them from the brake assembly. Check the thickness of your brake pads when you remove them. If they’re less than ⁄4 inch (0.64 cm) thick, then replace them as well so you can stay safe while you’re driving.

Take out the 2 bolts holding the caliper bracket in place. Locate the 2 bolts on the backside of the caliper bracket that are on the top and bottom. Use your ratchet to rotate the screws counterclockwise to loosen them from place. Once you remove both bolts from the back, carefully lift the bracket up off of the brake rotor to remove it. Use a breaker bar if you can’t get a good amount of leverage to loosen the bolts. The caliper bracket may slip once you remove the second bolt, so hold it in place with your free hand so it doesn’t fall and get damaged.
New Caliper Installation

Get a new brake caliper that’s compatible with your vehicle. Search for a brake caliper that matches your vehicle’s year, make, and model. Choose a caliper that includes a bracket so you don’t have to match the hardware to your old one. Make sure that the caliper is the same style as your old one or else you’ll also need to replace the calipers on your other wheels. You can buy new calipers online or from auto part stores. A new caliper usually costs between $25-50 USD. Standard calipers have 1 piston in them that pushes against the brake pads to slow down your vehicle. Performance calipers have multiple pistons to apply pressure on your brakes quickly and evenly.
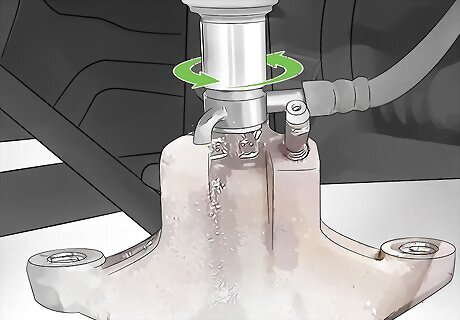
Unscrew the banjo bolt on the caliper that connects to the brake hose. The banjo bolt is on top of the main caliper piece and attaches to the hose leading to the brake’s main cylinder. Grip the bolt with your ratchet and rotate it counterclockwise to disconnect the hose from the old caliper. Once you remove the old caliper you can throw it away. You may be able to recycle your old caliper at an auto repair shop. Call one ahead of time to see if they can get rid of it for you.

Secure the hose onto the intake port on the new caliper. Look for a large hole right next to a small hole on top of the new caliper. Position the banjo bolt attached to the hose so the threaded part is in the large hole and the end of the elbow-shaped piece on the side is in the small hole. Screw the banjo bolt clockwise by hand to secure it in place before tightening it with your ratchet. If the hose or bolt leaked any brake fluid, wipe it clean with a shop cloth before screwing it into the caliper to prevent any corrosion from occurring.
Screw the caliper bracket against the brake rotor. Position the bracket included with your caliper on the brake rotor in the same place as the old one so the bolt holes are on the backside. Feed the bolts through the holes on the bracket and hand-tighten them until you can’t rotate them anymore. Use your ratchet to tighten the bracket back in place so it doesn’t move or shift around. Apply an anti-seizing fluid on the bolts before screwing them in if you want to remove them easier next time you need to make repairs on your brakes.
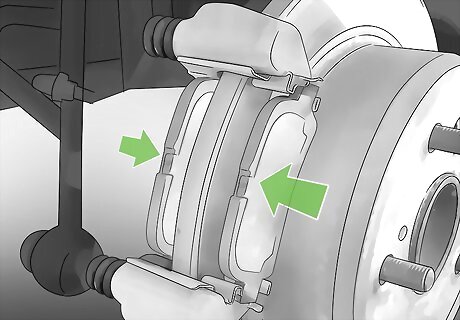
Slide the brake pads onto the front and back of the caliper bracket. You can use the same brake pads that you had before or you can buy new ones if they need to be replaced. Slide the ends of the brake pad into the slots on the top and bottom parts of the bracket until it contacts the brake rotor. Position the other brake pad on the backside of the rotor so it’s secure in the caliper bracket. Make sure you install the brake pads so the padded side is against the rotor. Otherwise, you may damage your brake system.

Attach the new caliper to the bracket so it fits around the brake pads. Position the caliper so the side with the piston is on the backside of the brake rotor. Set the caliper over the brake pad assembly and slide the bolts through the holes on the top and bottom. Tighten the bolts by hand until you can’t spin them anymore before securing them with your ratchet. Check that the caliper doesn’t move around after you secure it in place or else it could come loose when you’re driving.
Bleeding the Brake System
Loosen the cap on the main brake cylinder under your vehicle’s hood. Open your vehicle’s hood and look for a plastic reservoir that’s labeled “Brake Fluid” or “Main Cylinder.” Unscrew the plastic cap on top of the main cylinder so you can see the brake fluid inside. Consult the vehicle’s user manual if you can’t find the brake cylinder. Loosening the cap will help the brake fluid drain quicker to make bleeding your brakes easier.
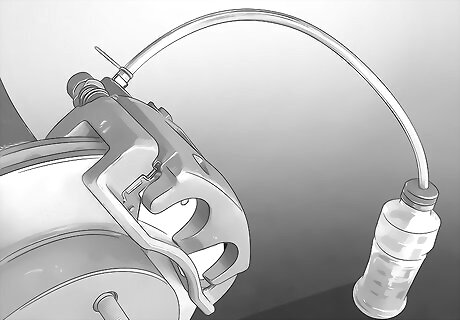
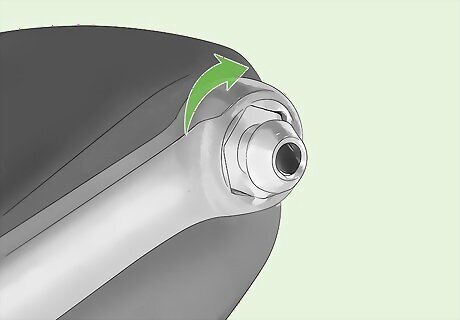
Connect a clear plastic hose between the bleeder valve and a bottle. Look for the metal bleeder valve on the backside of the caliper close to where the hose connects on top. Push the end of a clear plastic hose onto the end of the bleeder valve so it’s airtight. Run the other end of the hose to a resealable glass bottle or jar so the fluid can drain into it. Don’t use an opaque hose since you won’t be able to see the air bubbles forming. Avoid using a hose that fits loosely over the bleeder valve since it could allow air in.
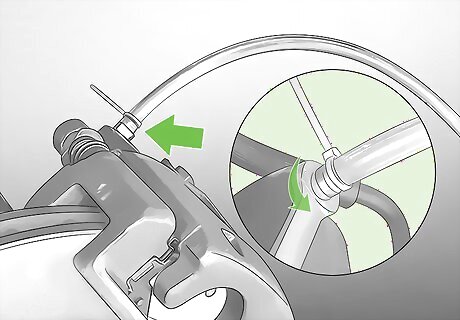
Open the bleeder valve on the caliper until it starts leaking brake fluid. Position the end of a spanner wrench on the hex nut on the bottom of the bleeder valve and slowly rotate it counterclockwise to loosen it. After a few seconds, you will notice some brake fluid leaking out of the valve into the hose. The bleeder valve helps remove air from the caliper so your brakes work properly.

Ask a helper to pump the brake pedal until you don’t see bubbles in the hose. While your vehicle is parked and turned off, have a helper press down on the brake pedal multiple times to pump the air out of the caliper. Have them continue pumping the brakes until you don’t see any air bubbles coming into the hose from the caliper. Tell your helper to hold the brakes down before tightening the hex nut around the valve. Air in your caliper could make your brakes feel soft and you may not get as much stopping power as you normally would. You may need to refill your cylinder with brake fluid if it runs out.

Reattach the wheel to your vehicle. Once you’ve bled the brakes, position your wheel back onto the bolts and push it on as far as it can go. Secure the lug nuts by hand by turning them counterclockwise. Then use your tire iron to tighten the lug nuts until you can’t turn them anymore to ensure the wheel’s secure.
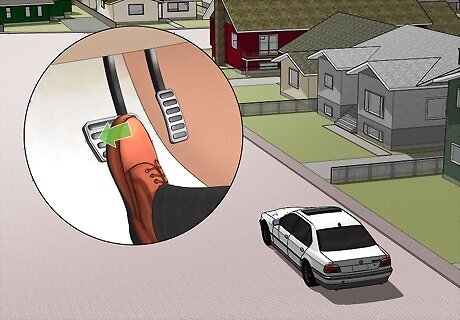
Take your vehicle for a test drive to make sure the brakes work properly. Start your vehicle, and drive it slowly down a quiet neighborhood street to test the brakes. Press on the brake pedal to make sure the caliper works properly and doesn’t make any noise while you’re driving. Don’t drive too fast while you’re testing your brakes just in case something were to go wrong.


Comments
0 comment