
Running a Quick Cleaning

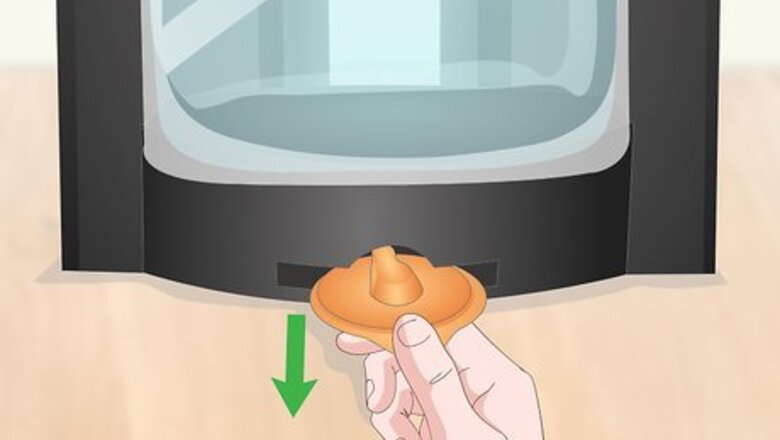
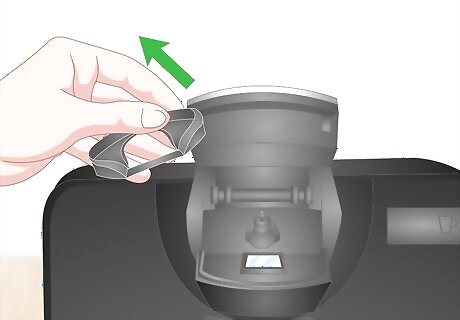
Find the yellow or orange cleaning disc in your machine. Every Tassimo coffee machine comes with one. You'll put this disc in the coffee pod slot so that your machine knows you're cleaning it instead of making coffee. It's often hidden in a slot at the back near the bottom, but it could be in another area of your machine, based on what type you have. Look for a hidden slot that has a yellow or orange disc sticking out. Pull the disc out. If you can't find where the disc is located, check the instruction manual that came with your machine. You'll need this disc to clean your machine. If you lost it, you can buy a replacement part online.

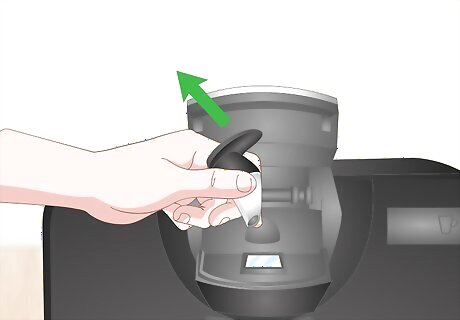
Set the disc into the brew head. The brew head is where you normally stick your pods. Open it up, and set the cleaning disc inside. Make sure the barcode on the disc is facing down toward the barcode reader. Close the brew head. The brew head is located at the top front. Lift up the cover to place the disc inside.
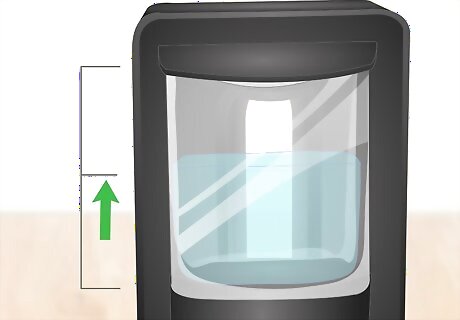
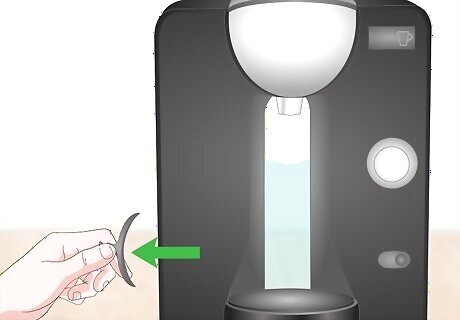
Make sure the tank is at least half full. Pull out the tank, as it comes completely away from the machine. Fill it up with water and then set it back in place. If you prefer, you can just use a cup or other container to fill the tank while it's still in the machine. You'll be running water through the machine, so it needs to have enough for the process. Half a tank is more than enough for a quick cleaning, as you'll only be running the water through once. If you want to run the water through more than once, you may need to fill it up a bit more.

Set a container underneath the pour spout in the front of the machine. You need something to catch the water as it comes out of the machine. You can use a large mug if you'd like or a glass measuring cup that holds at least 9 fluid ounces (270 mL).
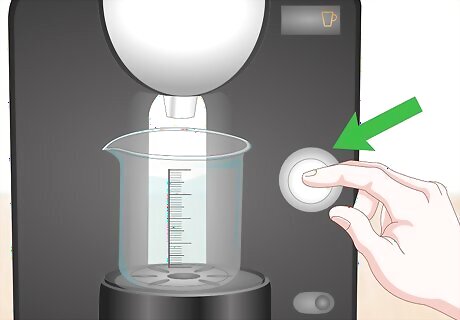
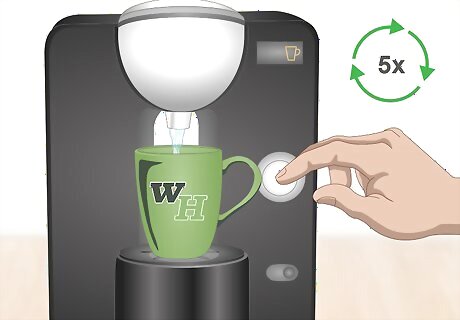
Press the start button located on the front right of the machine. This is the same button you press when making your coffee. Simply hit it once, and the machine will pour hot, fresh water through itself to start the cleaning process. On some machines, you may notice an orange cup blinking on the front, indicating the machine is cleaning itself.
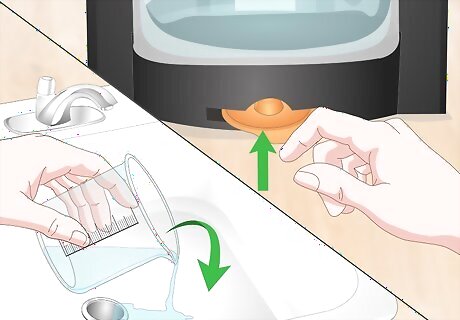
Pour out the water and return the disc to its holder. When the water stops coming out the front, the process is finished. Open the brew head to take out the disc; be careful, as it will be hot! Stick it back into its holder for next time and pour out the water that came from the machine. If your machine had a blinking orange light in the shape of a cup, the cleaning process is over when it stops blinking and stays solid orange.
Descaling the Machine
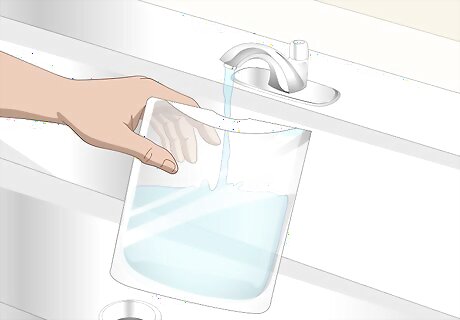
Fill the tank with water. Remove the tank so that you can add water to it from the sink. If you prefer, you can just use a cup or other container to add water to the tank instead of taking it out of the machine. Try to descale the machine about every 400 cups you make. You can estimate when to do it based on how many cups you drink a day.

Add 2 descaling tablets to the tank. Just drop them into the water. You may need to stir them around a little to make sure they completely dissolve in the water. If you took the tank out to fill it, put in back in place now. You can find descaling tablets online or in some big box stores.

Find the service disc and set it in the brew head. The service disc is an orange or yellow disc with a barcode. It's usually in a slot on the machine. Check at the back of the machine near the bottom first. When you find it, open the brew head and place the disc in with the barcode facing down. The brew head is located at the top front. It's where you put your coffee pods. Unfortunately, you won't be able to descale your machine without the disc. If you lost it, you can buy a replacement part online.
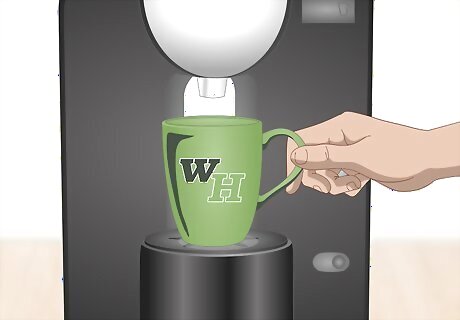
Set a container under the spout to catch the water that comes out. You can use a large coffee mug or really any container that can take the heat. Make sure it holds at least 17 fluid ounces (500 mL) so it doesn't spill over. The descaling process will spew out more water than the quick-cleaning process.
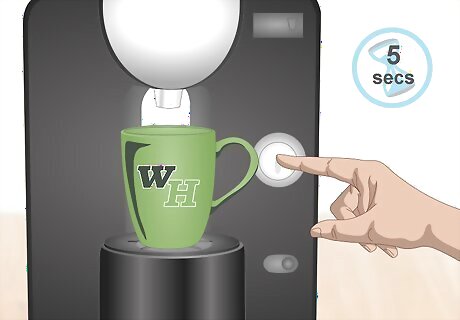
Push down on the button on the front and hold it in place for 5 seconds. It's very important to keep holding the button, as that tells the machine you want to descale rather than just do a quick cleaning. At this point, an orange light on the front may start blinking, though it depends on your machine. This is the same button you use for making your coffee or doing a quick cleaning.
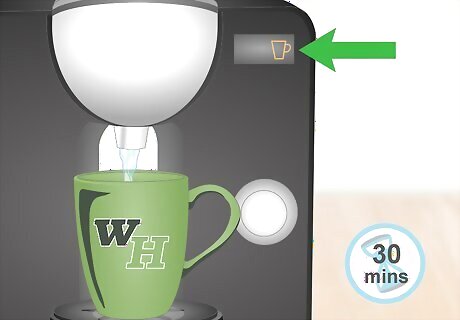
Come back in 30 minutes to check on the machine. The descaling process takes longer than the quick-cleaning process, and there's no need to keep an eye on the machine. When it's done, the orange light will be on continuously (not blinking) on the front. Pour out the descaling water when the machine is done with the process.

Rinse out the water tank and fill it up again. Pour out any water left in the tank and then clean it with soap and water to get rid of the descaling solution. Fill the tank up completely again and set it back in place. Make sure to rinse the tank thoroughly so you don't leave soap or descaling solution behind.
Run the quick cleaning cycle 5 times. Press the button on the front quickly, starting a quick cleaning session; you don't need to hold it down for 5 seconds. Let it run through the cycle completely. Repeat the process 4 more times to get rid of the descaling solution in the machine. Empty the container underneath out between cleaning sessions so you don't overflow it.

Remove the service disc and set it back in its slot. Open the brew head at the front to take out the service disc. Be careful, as the disc will likely be hot. Slip it back into its holding spot for next time. Refill the tank so you're ready to make coffee!
Cleaning the Parts

Pull out the drip catch at the bottom for cleaning. Simply grab a hold of the drip catch and pull it gently out. Then, it will usually come apart into 2 sections, the lid and the basin. Scrub it with soap, water, and a sponge or simply place it in the dishwasher for cleaning. Make sure to turn your machine off before taking parts off. If you're not sure how your machine comes apart, check your manual or look online for your particular machine.
Remove the backing to the cup holder if yours comes off. This part is the one that forms the curve behind your cup when you set it in place. It can get dirty from coffee splashes, so in some machines, this just pulls out. Brace your hand against the machine and use your other hand to pop it out. Scrub it down in the sink with soap and water or place it in the dishwasher for cleaning. If it doesn't seem to want to come out, simply wipe this area down with a damp rag and a bit of dishwashing soap.
Unhook the pod holder in the brew head. Open the brew head at the front, and you should see a clip that holds pods in place. It may raise up when you lift the brew head. Pull on it gently and lift up to unhook the clips at the back. You can scrub this down or put it in the dishwasher. Always check your manual to see which parts come out and which ones are dishwasher safe.
Pop out the nozzle/piercing unit to clean it. Lift up the brew head at the front, which is where you put your coffee pods. Press up on the nozzle underneath the brew head, and it should pop up into the brew head. Reach in and take it out. In most machines, this comes apart into 3 pieces; pull off the part at the bottom and then the other section pops apart, too. You can scrub these with a cleaning brush or simply pop them into the dishwasher for easy cleaning. Make sure to pay attention to how they come apart so you can put them back together.
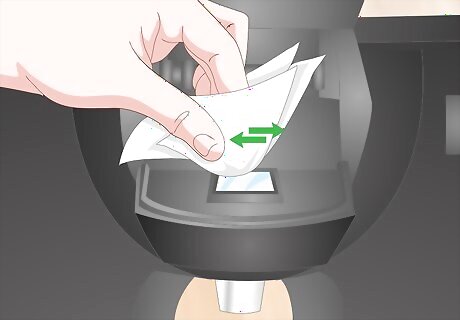
Wipe down the barcode reader. Look inside the brew head at the front. You'll see a piece of glass underneath where you place the pods. That's the barcode reader, and it can become dirty, making it difficult for your machine to read the pods. Clean it off before putting everything back. Don't forget to wipe down the outside of the machine with a damp rag and a bit of dishwashing soap.

Put all the pieces back in place. Once everything is clean, put all the pieces back in place. Make sure to reassemble all the pieces the way they came apart, including the nozzle/piercing unit. When you're done, your Tassimo is ready to use!


Comments
0 comment