views
X
Research source
, mainly designed for power users. It is quite helpful for developers wanting to test their apps on different environments. Since it is a sensitive set of settings and has the potential to cause damage to the device, it is hidden by default. This article will guide you through the steps to enable Developer mode on your smartphone!
Enabling Developer mode (Through Settings)
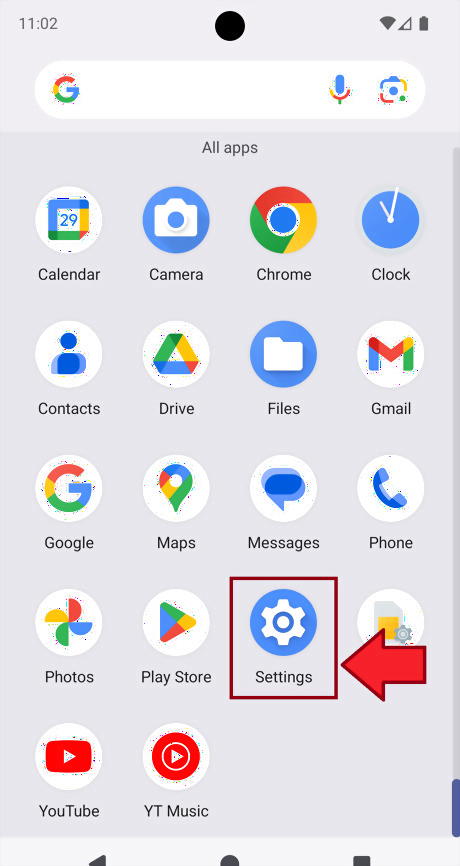
Open the Settings appAndroid 7 Settings App. Its icon usually looks like a cogAndroid 7 Settings. To do this, swipe up to open the app drawer. Then scroll down until you find the app. Click on it to open your device's settings. You may also type Settings directly in the Search barAndroid 7 Search to search for the app. On some launchers, there's a button that leads to Settings on the top-right corner of the swipe-down menu.
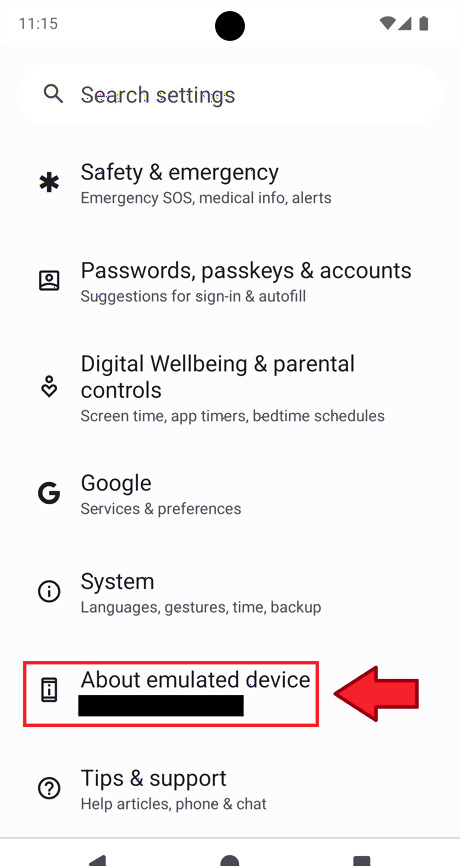
Go to the "About phone" setting. This option is usually used to know all the information about your phone, such as Android version, International Mobile Equipment Identity (IMEI), etc. If you are running an emulated instance, look for an option called "About emulated device".
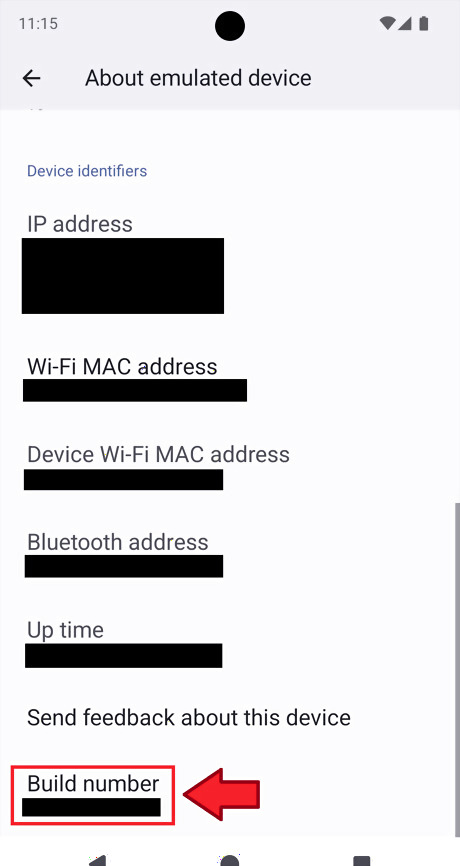
Find your build number. Depending on your device, it may be hidden behind an extra menu called "Version", or under a subheading called "Device identifiers" or similar.
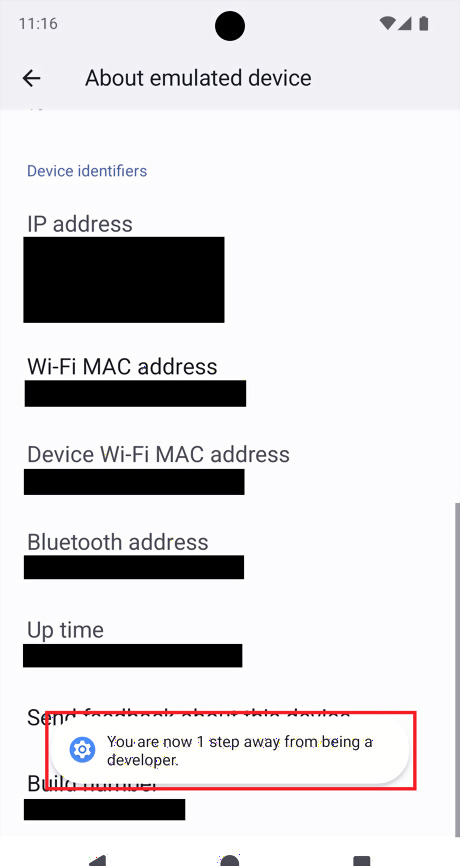
Click on the build number 7 times. As you approach 7 clicks, you will start seeing a message telling you about the progress (usually "You are now X step(s) away from being a developer."). If developer options are already enabled on your device, you will see a message called "No need, you are already a developer.".
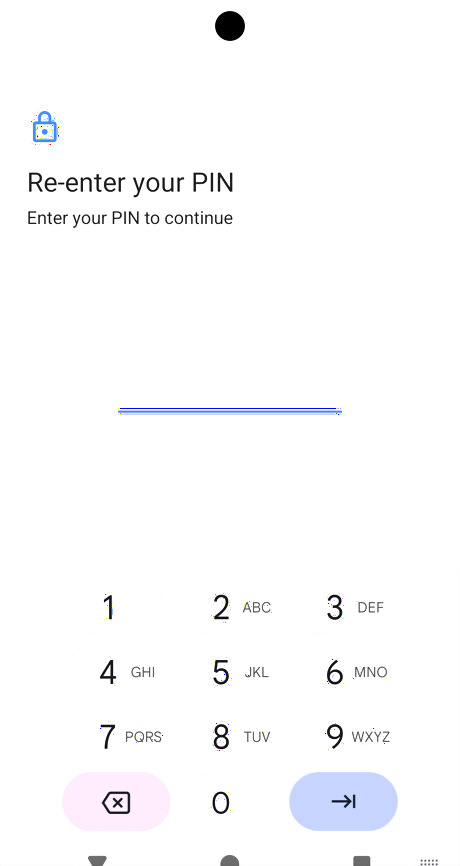
Enter your device's password to confirm. Since developer options include a very sensitive set of settings, extra confirmation is required to enable these settings. If your device does not have a password, you shall not be shown this interface and will not have to perform this extra step.
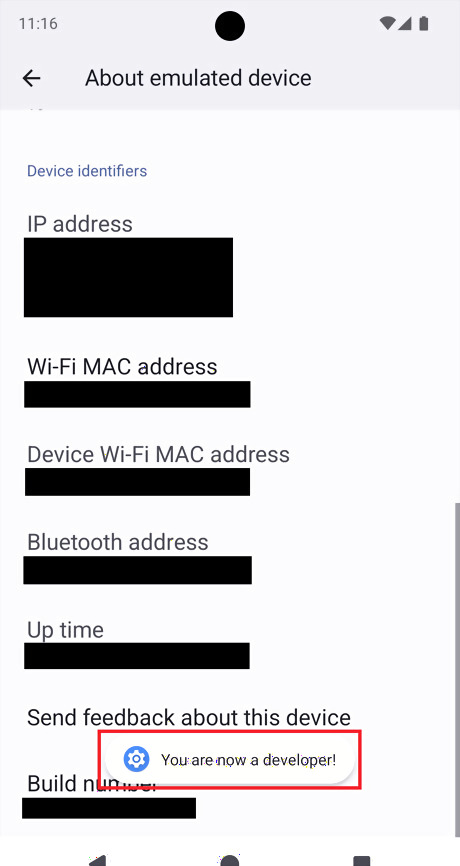
Look for confirmation. A message saying "You are now a developer!" will show on your device. This means that developer mode has been enabled on your device and you may now access developer options. Click on the back buttonAndroid 7 Arrow Back on the top-left corner to return to the main Settings page.
Enabling Developer mode (Through ADB)
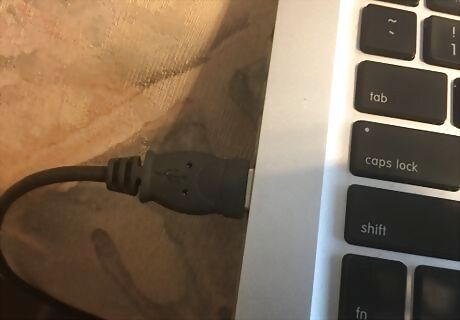
Connect your Android to your Laptop/PC. Ensure that ADB is set up and running. Note that to enable Developer mode through Android Debug Bridge (ADB), developer options have to be enabled on the device for the computer to recognize it. So, this method is not that practical and is just given for reference.
Run the command adb shell settings put global development_settings_enabled 1 in the terminal. Developer options should be enabled on your device after doing so.
Accessing Developer Options
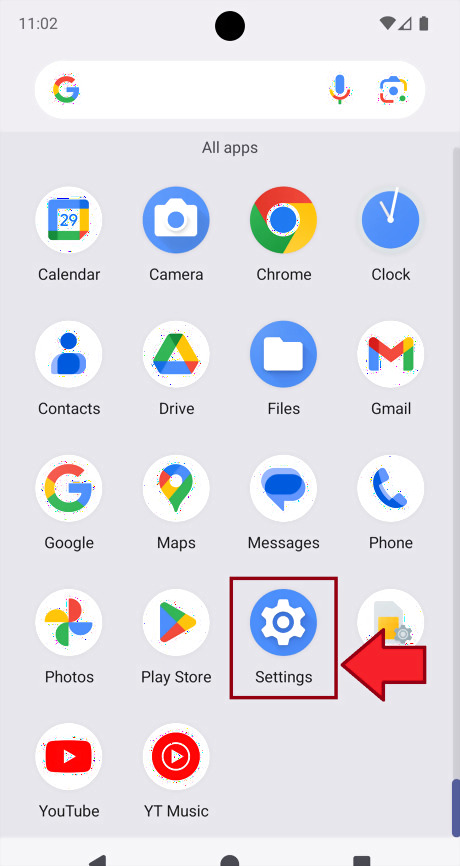
Open the Settings appAndroid 7 Settings App. Its icon usually looks like a cogAndroid 7 Settings. To do this, swipe up to open the app drawer. Then scroll down until you find the app. Click on it to open your device's settings. You may also type Settings directly in the Search barAndroid 7 Search to search for the app. On some launchers, there's a button that leads to Settings on the top-right corner of the swipe-down menu.
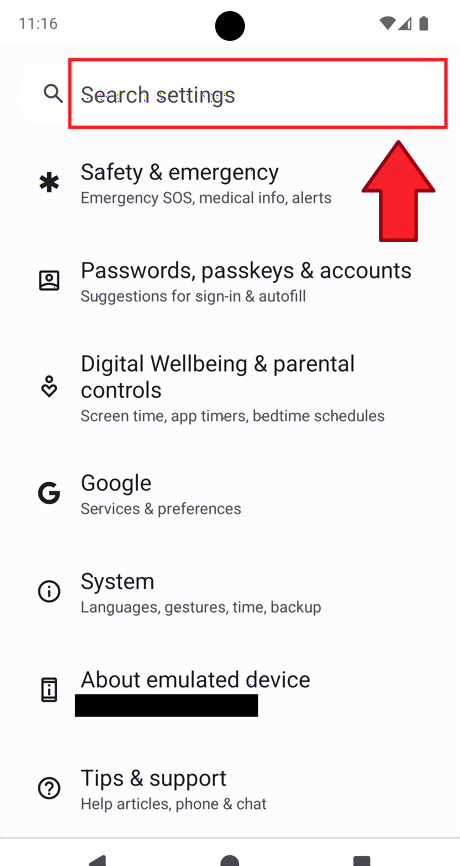
Search developer options on the Search barAndroid 7 Search at the top. Alternatively, you can access developer options directly by going to Settings > "System" > "Developer options".
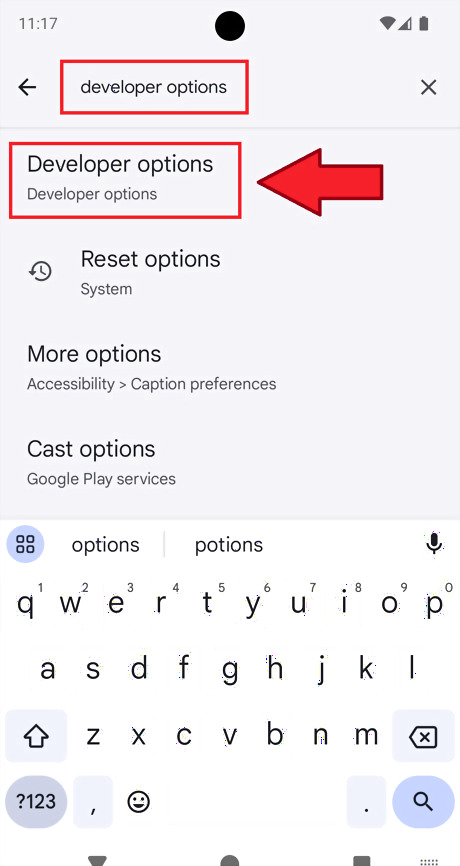
Click on "Developer options". It should be the first result in the search. You will then be taken to the developer options main page.
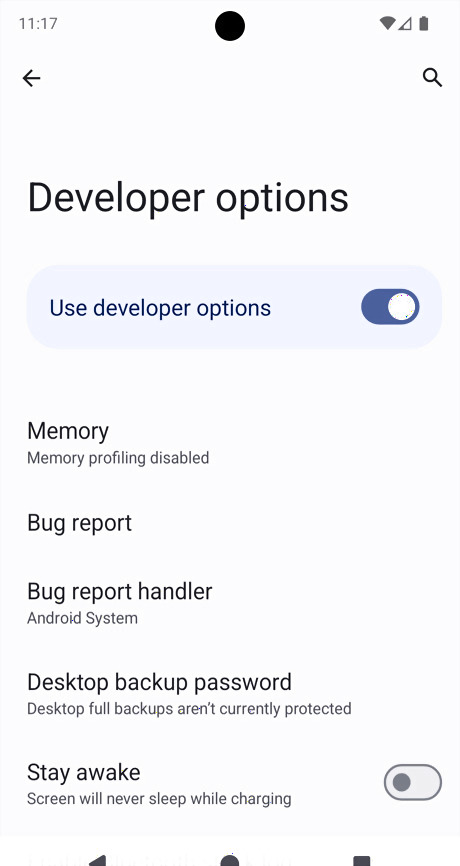
Understand that you are in developer mode now. It contains a lot of sensitive settings, which if used incorrectly have the potential to cause a huge amount of damage to your device. Exercise extreme care while navigating through the options and try to avoid any misclicks.


Comments
0 comment