
Marking Where to Hang the Picture
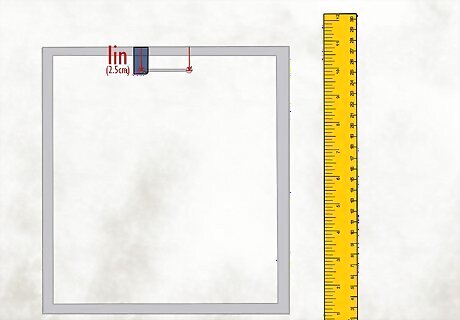
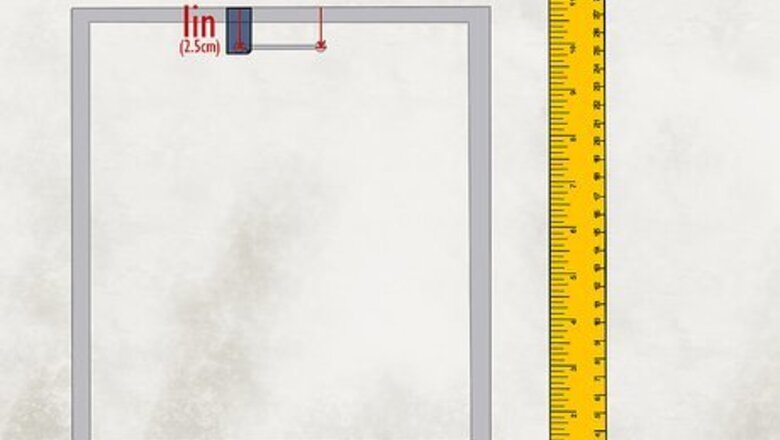
Measure the distance from the keyhole slots to the top of the frame. Look at the back of the picture and lay the end of a tape measure or ruler right over one of the keyhole slots. Take note of the distance from the slot to the edge of the frame. On most frames, this distance is anywhere from 1 inch (2.5 cm) to 3 inches (7.6 cm). This is going to be the “gap” distance that you’ll need to use later on when you’re determining exactly where to insert the nails or screws into the wall.
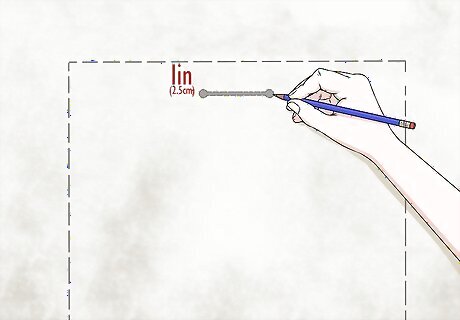
Use a pencil to make 2 marks on the wall where you want the top edge to be. Put a yardstick onto the wall where you want the top of the frame to be. Make a light mark on the wall with a pencil in 2 spots (1 on the left and 1 on the right). To double check your placement, hold the painting up and align the top edge of the frame with these marks. If you’re not satisfied with the placement, erase the marks and try again.

Slide the yardstick down by the gap distance and make 2 more marks. Align the yardstick with the marks denoting the top edge of the frame and then slide it down by the distance between the slots and the top edge of the frame. Use a pencil to make 1 more mark on the left and 1 on the right (to denote the height on the left and right where you’ll be inserting the nails or screws). Make sure to hold the yardstick parallel to the ground so the painting or photograph isn't lopsided. It’s okay if it’s not perfectly parallel but it’s good to be precise from the get-go (especially if you’re someone who notices even the slightest tilt). If you want to double check that the height is level on both sides, use a tape measure to measure the distance from each of the marks you made to the ground. If they’re equal, the picture will be perfectly parallel to the ground.Tip: If you want the picture to be at perfect eye-level (like in museums and art galleries), hang it so that the center is 57–60 inches (140–150 cm) up from the floor. However, you can hang it higher or lower depending on your style. Hanging it higher can make your ceilings look taller and hanging it a little low is a good choice if you’re making a hodge podge display with other pieces of art.
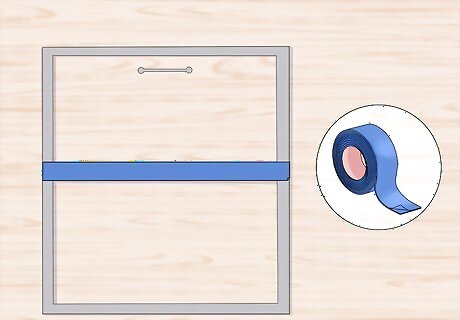
Lay painter’s tape across the width of the picture on the back. Stick one end of blue painter's tape onto the corner of the frame and run it horizontally across to the other edge. Cut or tear it off right at the end so the tape is the exact same length as the frame. If you need to trim the first end of the tape you stuck down, do that now. That way, the tape is exactly the same width as the painting or photograph. Don't use duct tape or any type of tape that's ultra-sticky because you'll need to be able to stick it to the wall and take it off without ripping off the paint.

Place the tape strip over the narrow ends of the slots and make 2 marks. Restick the tape to the back of the frame so that the bottom edge is fully covering the slots (the round part and the narrow part). Use a pencil to draw a circle directly over the narrow ends of the slots. This is going to be your cheat sheet for where to make the holes in the wall. Use a light pressure so you don't punch a hole through the tape.

Stick the tape on the wall and extend the marks where the keyhole slots are. Unstick the tape from the back of the picture and stick it horizontally onto the wall so the bottom edge of the tape sits right on top of the 2 marks you made (to denote the height of the slots on the left and right sides). Place the tip of your pencil on the marks on the tape and draw a straight line down off of the tape and onto the wall. Put an “x” on each line just below the edge of the tape so the height of each nail will be even. Take the tape off when you're done and throw it away. Use a very light pressure with the pencil so you can erase it if you decide to move the painting or photograph later on. You'll be nailing in the screws right where you made those marks so double-check that's a good height for the picture and that it's parallel to the ceiling and floor. If you’re a stickler for precision, run a tape measure from the floor to the markings to make sure they’re the same distance from the floor.
Hanging the Picture
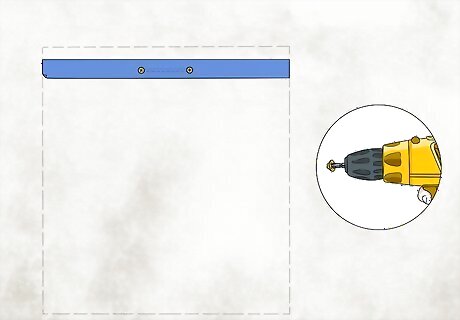
Insert nails or screws into the wall where you made the marks. Hold the sharp end of the nail or screw right on top of where you made the last pencil marking (to mark the round opening of the keyhole slot) and use a hammer or power drill to drive it into the wall. Don’t drive it in all the way—leave the head of the nail or screw about 0.4 inches (1.0 cm) away from the wall so it can latch onto the slot. Do this again for the other keyhole slot. Hold the nail between your thumb and index finger and start making light taps on the head of the nail to hold it in place. Then remove your steadying fingers and hammer it in a little harder. If you're using a screw, work the tip of a screwdriver into the drywall until you have a nice little indentation. Then place a drywall anchor on the tip of the screwdriver and turn it to the right until the head is flush with the drywall. Place the screw into the center of the anchor and turn it to the right the head is ⁄4 inch (0.64 cm) away from the wall. If your walls are concrete, you’ll need to make a shallow pilot hole first with a masonry drill bit. Use a nail or screw that has a head small enough to fit into the slots and large enough so that it won't slip out of the elongated end of the slot. To test for a good fit, put the head of the nail or screw into the keyhole slot and slide it back and forth, slightly pulling it upward to make sure it holds.Warning: Always put on protective eyewear before you start using a power drill. Take off any loose clothing or accessories (like ties or jewelry) and tie your hair back if you need to.
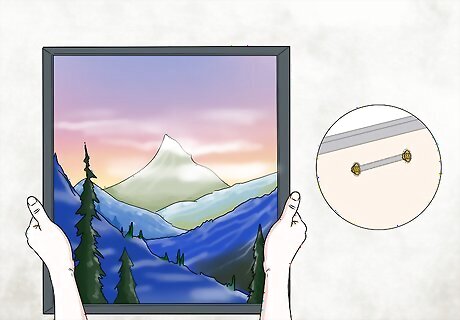
Hang the picture on the screws. Look at the back of the picture to see exactly where the slots are and try to match them up with the screws. Hold the frame flat against the wall just to the side of where the screws are and move it around in small increments until you feel the screws catch onto the slots. If the keyholes are close to the edge of the frame, grab the picture on either side so you can feel where the holes are with your fingers. That way, you can guide the screw or nail heads into the holes a little easier. Be careful not to scrape the picture against the wall with a lot of force—you don’t want to scratch your walls! Whichever side the round end of the keyhole is on is the side where you should first position the picture when you're trying to hang it. That is, if the round openings are on the right side (from your current view as you’re holding the picture up), start by holding it slightly to the right of where you marked them to be on the wall and vice versa.
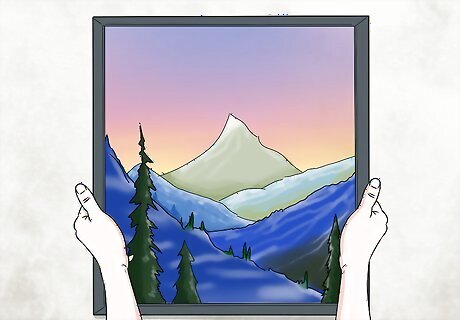
Center the painting or photograph on the wall to find the perfect placement. Carefully slide the picture left or right until you’re happy with how it looks. If the round keyhole openings are on the right side of the picture (from your current perspective), don't slide it too far to the left because it could cause the screw to come loose. If the round openings are on the left, be careful not to slide it too far to the right. If the frame's horizontal keyholes have bulbous holes at both sides, be careful not to slide it too far to the right or left because the screws might slip out of the slots.


Comments
0 comment