views
X
Research source
Making the Ball Mill
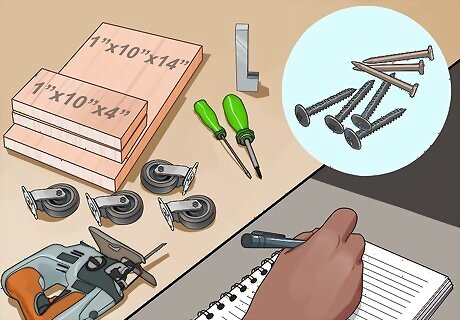
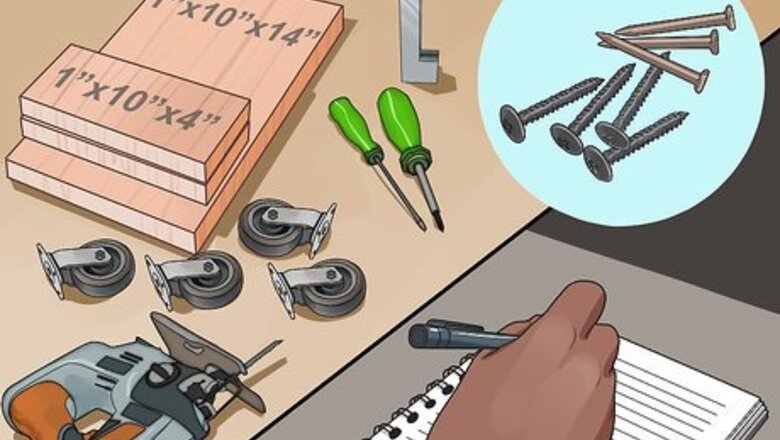
Gather the necessary materials. Making a ball mill is a relatively simple process, but there are quite a few materials needed. A lot of the supplies can be recycled from other projects and found in junk piles, but some may need to be purchased. Once you have the following materials, you can start building (1 in = 2.54 cm): Wood screws Four small caster wheels A cylindrical container with secure lid (a diameter of 3-5 inches and length of around 12 inches should be sufficient for milling) A 1”x10”x14” wooden platform (you may need a smaller or larger platform if your cylinder is smaller or larger) Two 1”x10”x4” pieces of wood Screwdriver Rubber belt (diameter that is at least an inch larger than the container) A jigsaw 12V DC motor with fine tooth pulley motor attachment (can be scrapped from an old printer) Motor mount A small piece of scrap metal A DC power supply
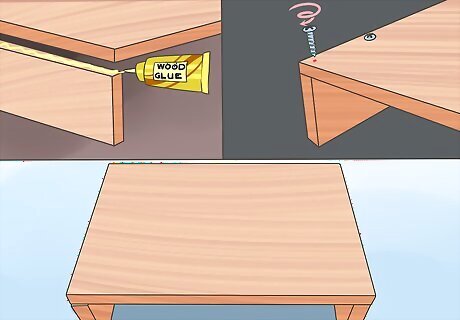
Make the base. The wooden base will serve as the support for the ball mill. It can be made by resting the wooden platform on top of the two 1”x10”x4” (2.54cm x 25.4 cm x 10.16 cm) pieces of wood. Place one smaller piece on either end of the platform and screw them in place using four wood screws evenly spaced across. Position the wood pieces so that the base sits at a height of 4” (10.16 cm). You can secure the wood pieces in place with some wood glue before using the screws to make it more sturdy.
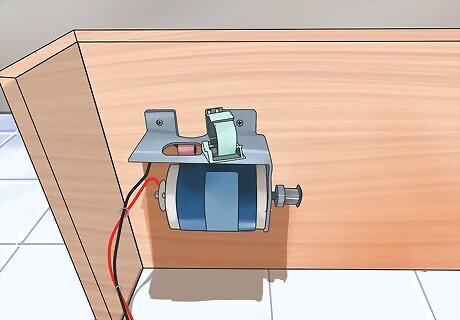
Mount the motor on the bottom of the wooden platform. You want to attach the motor to the underside of the platform. The motor will be attached to the belt which will cause the cylinder, or drum, to rotate. Attach the motor in the center of the platform about 1 inch from the left side. The motor should only fit into the mount in one position. Position the motor in the mount and screw one side of the mount in place. Leaving the other side of the mount unattached allows the motor to hang down increasing the tension and keeping the belt from slipping.
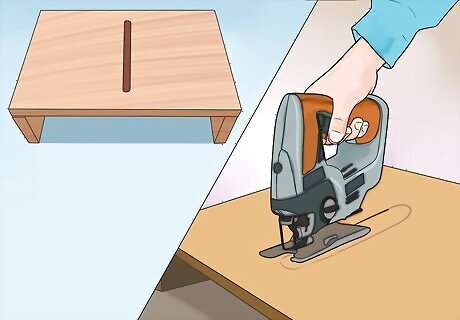
Cut a slit through the wooden platform above the pulley attachment. With the motor mounted you can clearly see where the pulley attachment ends. Mark the platform just above where the motor arm ends and cut a long, narrow slit that is just wider than the width of the belt. The belt will be connected to the motor that will be mounted underneath the platform. It will be fed through the slit to wrap around the container and cause it to spin. Remove the motor before making the cut to avoid damage to the motor arm. You want the slit to be large enough for the belt to spin without touching the sides of the slit. Trace the width of the belt and add about 1/8” (32 mm) to either side. Use a jigsaw to cut out the slit. Use caution when working with a jigsaw. Wear protective eyewear to avoid damage from flying bits of wood.
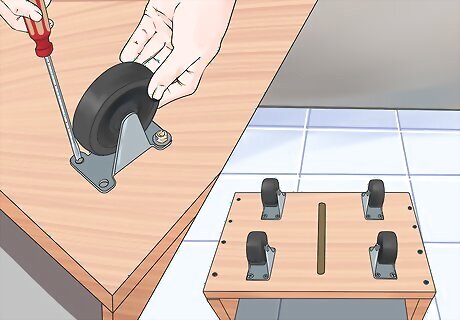
Mount the caster wheels to the platform. Determine the best location for the caster wheels by placing them on top of the platform and setting the cylinder on top of the wheels. The casters will help the cylinder rotate. Adjust the wheels until the cylinder sits about ½” (13 mm) above the top of the platform. With the casters properly placed, screw them in to attach.
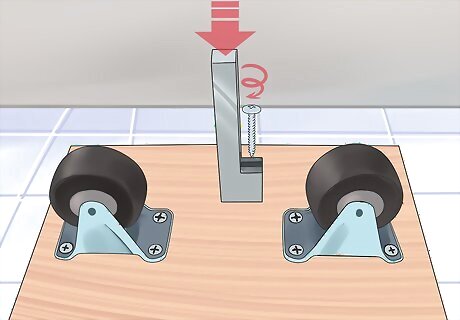
Attach the scrap metal as a container stop. With the cylinder sitting on top of the wheels, you can determine the best place to mount your scrap metal. The scrap metal will serve as a stop to prevent the cylinder from sliding out of the belt as it rotates. Screw down the scrap metal about 1/8” (32 mm) away from the edge of the cylinder. A good shape for this piece is a thin rectangle: about 4”x1”x1” (10.16 cm x 2.54 cm x 2.54 cm). If the cylinder slides while the instrument is running, it will be stopped from sliding out by the scrap metal. An alternative to scrap metal would be a piece of wood or thick plastic.
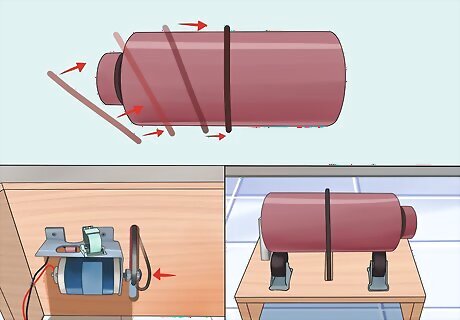
Slide the belt and container into place. Slip the belt through the slit in the platform so that it hooks onto the pulley attachment of the motor arm. Keeping the belt hooked, slide the cylinder through the belt onto the casters. If everything has been constructed properly, the belt should be taut against the cylinder. If the belt is not taut, you may need to lower the height of the motor arm or raise the casters. The belt length itself cannot be adjusted, so if the belt is too big, you will need to get a smaller belt.
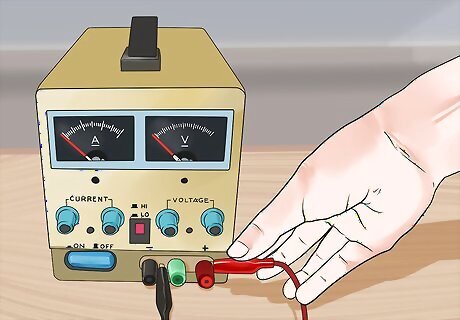
Attach the motor to the power supply. The motor should have a black and a red wire coming out of it. Using wires with alligator clamps on the end, attach the red wire to the positive end of the power supply and the black wire to the negative end of the power supply. If you mix up the wires, that’s okay. The ball mill will still work, the motor will just rotate in the opposite direction. Use caution when using the power source. If you’re unsure about the electronics, ask a friend who has more expertise before using it.
Using the Ball Mill
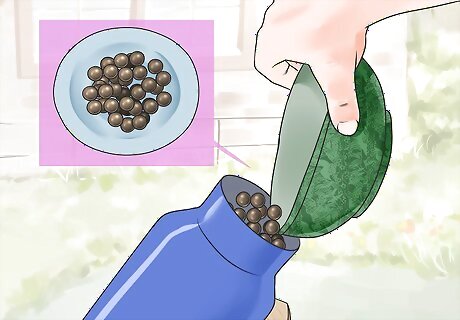
Fill the container with small metal balls. Most people prefer to use steel balls, but lead balls and even marbles can be used for your grinding. Use balls with a diameter between ½” (13 mm) and ¾” (19 mm) inside the mill. The number of balls is going to be dependent on the exact size of your drum. For a cylinder drum of the size used above, about 40-60 balls should be sufficient. Larger drums will require more balls. A good rule of thumb is to fill the container about 1/3 of the way with the balls.

Add the chemical you need to grind. You can fill the container with as much of the substance to be ground as you’d like. You simply need to leave enough room for everything to be able to move around. Keeping the container about 2/3 full should be good. It is possible to overfill the container, so experiment with your own personal ball mill to test its limits. Secure the lid tightly in place when everything has been added. With the container full, you are ready to slide the container into the belt. Do not grind explosive or flammable chemicals, especially with metal balls. The tumbling motion can cause the balls to spark and catch fire.
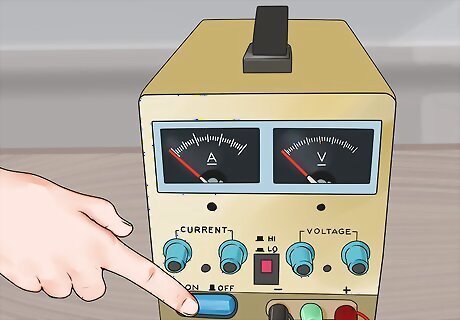
Turn on the power supply. Start with the power supply set to 12 volts. You can use the power supply to fine tune the rotation by changing the voltage. You want the cylinder to spin fast enough to grind up the chemical, but not so fast the balls doing the grinding stick to the sides of the cylinder from centrifugal force. The best voltage may change depending on the weight of the chemical that you are trying to grind.
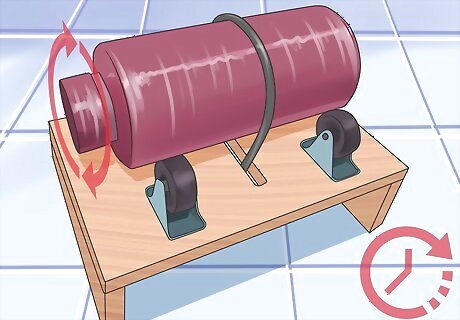
Let the mill run for a few hours. It takes time to grind up your chemical into a fine dust. Because the ball mill is quite loud, store it in a closet or the basement while it is running. Check on it periodically to make sure everything is running smoothly. After a few hours check the consistency of your chemical. If it is not fine enough for your liking, put it back in the grinder and let it run longer. When you are done, pour the contents through a sieve to remove the steel balls and any pieces that didn’t get ground finely.






Comments
0 comment