
Using a Quick & Easy Method

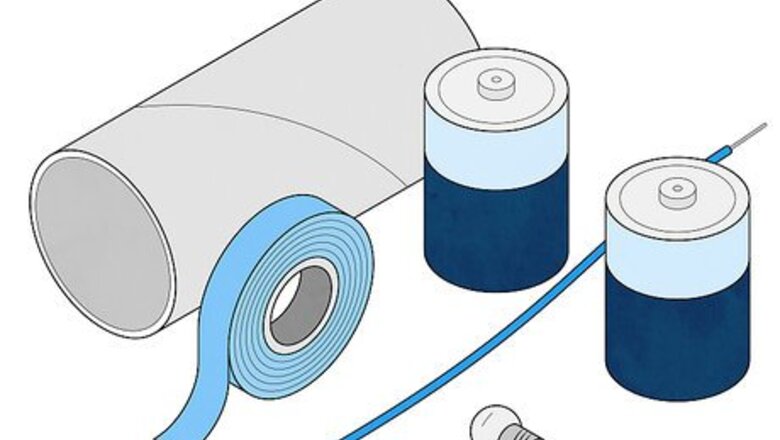
Gather your supplies. Clear an area to work in and invite the kids and family to come watch you manipulate electricity with your bare hands. You'll need: An empty toilet paper roll (or lightweight cardboard rolled into a small tube) (2) D batteries Tape (electrical tape works well) 5" (12.5 cm) long piece of wire (if you're using a speaker wire, use the copper kind) 2.2 volt light bulb (different bulbs are an option, but it may or may not work as well. A bulb from a string of Christmas lights works quite effectively.)
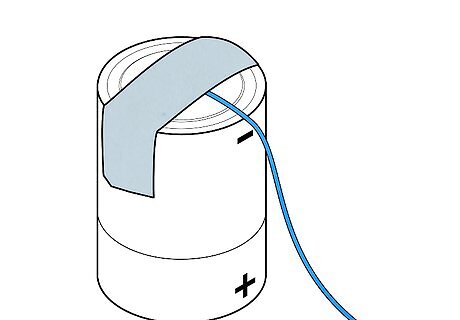
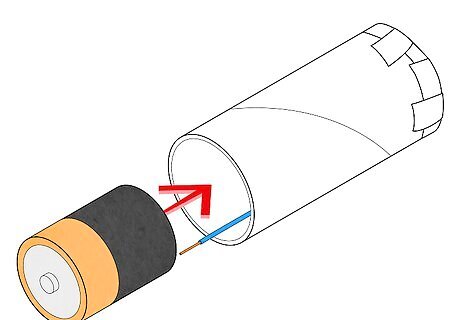
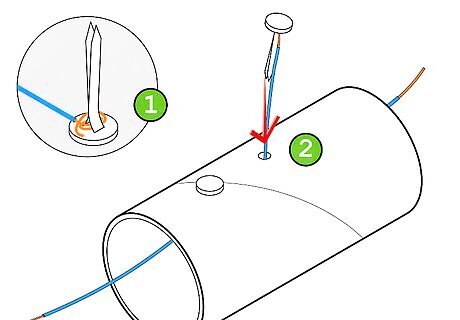
Tape the wire to the negative ( - ) end of one of the batteries. Make sure it's snug and not going anywhere, or your light will end up flickering. You could use tin foil instead of wire, but it's a little less dependable and harder to work with.
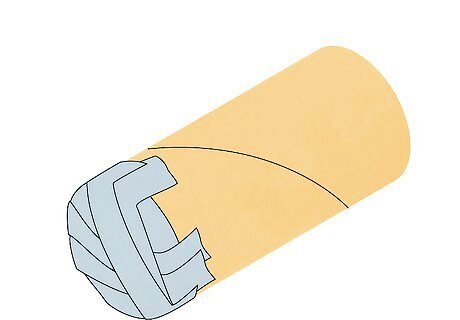
Tape the bottom of the toilet paper roll/cardboard well so that it is completely covered. You don't want any light to sneak through, dissipating its strength -- that would be one poorly working flashlight.
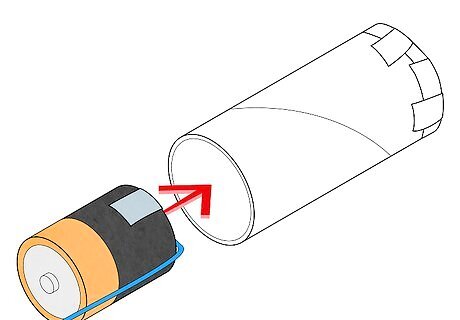
Insert the battery, wired end first, into the toilet paper roll. Even though the wired end is facing the taped bottom of the roll, the other end of the wire should be sticking out of the open end. If the wire isn't sticking out enough to come around the edge of the battery, you need to shorten your tube.
Insert the next battery, negative side first. Its negative side will meet the positive side of the battery, which is already inside. This connection continues the flow of electricity from back to front, ultimately lighting up your device.
Tape the bulb to the top of the battery. Be confident there's an adequate direct connection between the two surfaces (basically, make sure it's sturdy). Make sure you can still see the bottom half of the bulb.
Light up your flashlight. With the wire, touch the silver part of the bulb. If it doesn't light up after a few tries, check the tips below for troubleshooting. If it does function, now you have a working flashlight with an on/off feature.
Utilizing an Alternate Method
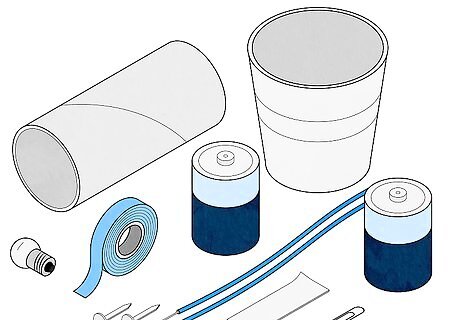
Gather your materials. It's time to beckon the MacGyver within you and get started. 2 D cell batteries (separate) 2 5" pieces of number 22 insulated copper bell wire (1" of insulation stripped off both ends) Cardboard tube cut to 4" in length PR6, or number 222, 3-volt flashlight bulb 2 brass fasteners (brads) 1" x 3" cardboard strip Paper clip Tape Bathroom-size paper cup
Attach a brass tab to the end of each wire. Wrap it around to secure it. Punch the tabs through the same side of the cardboard tube, but with the wires coming out of different ends. The pointy ends should be sticking out of the tube. This'll be used to serve as part of the on/off switch.
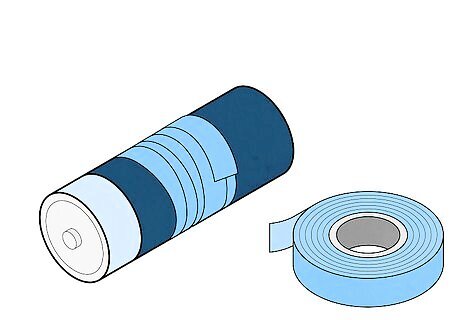
Tape your two D batteries together. Make sure the positive of one end is on the bottom of the negative end. Your battery should double in length, not width. Make sure they're firmly attached to each other and slide the batteries into the tube.
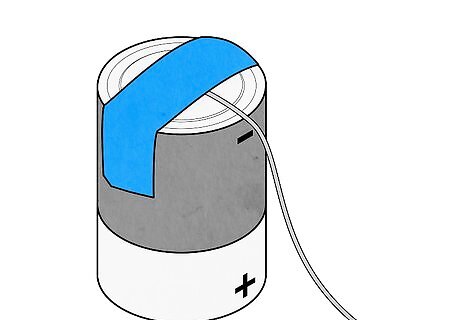
Tape the wire on the negative end to the battery. The negative end is the flat one. Masking tape is sufficient for this.
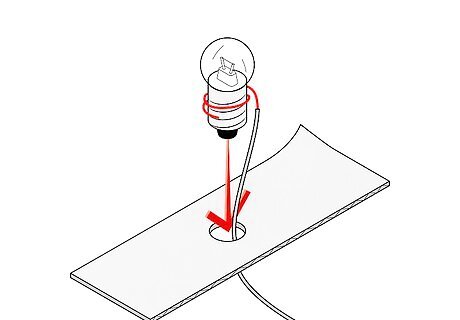
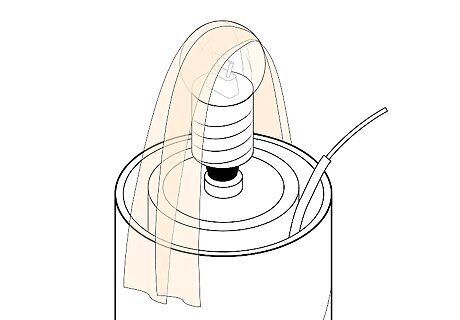
Cut a hole in your small cardboard strip. Place the wire on the positive end through that hole and wrap that wire around the bulb. Place the end of the bulb into the hole so it can be supported by the cardboard. Place tape around the base of the bulb and cardboard to keep it secure to the wire. It should start flickering on at this point.
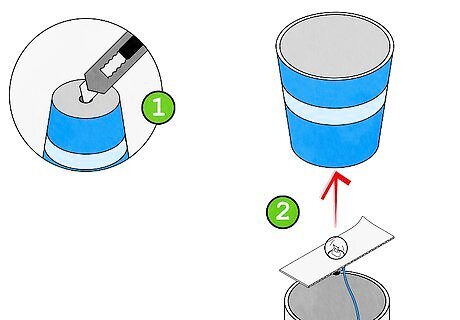
Cut a hole in the bottom of a paper cup just large enough for the bulb. Place the bulb into the hole and secure the cup to the cardboard base with more tape.

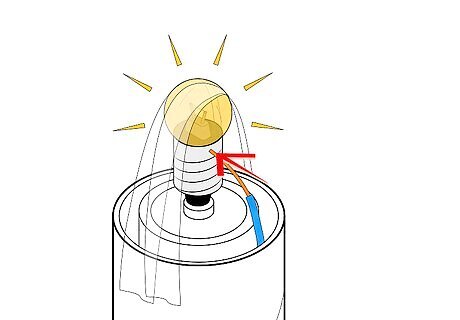
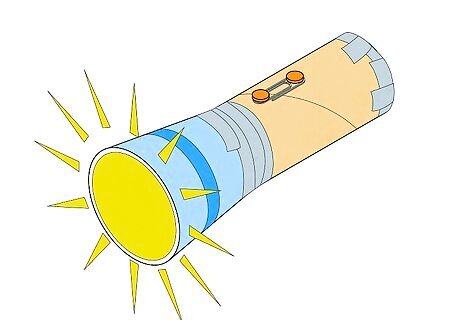
Insert a paperclip or soda tab in between the two brass tab ends. When the paperclip is touching both, it conducts electricity and turns your flashlight on. If the paperclip is moved, your flashlight will turn off. Voila! You can use a soda tab instead of a paperclip, too!
Finished.


Comments
0 comment