

Preparing the Muffin Pan

Prepare the muffin pan. The muffin pan will only ever be useful for this project, so be sure to use one that can be drilled, not your favorite muffin pan! Drill a small hole in the bottom of each muffin cup.

Place the muffin pan on top of the broiler pan. You will be cooking the formed bacon inside the muffin pan. The hole will allow the grease to drip out and into the broiler.
Rolling the Bacon into Rosebuds
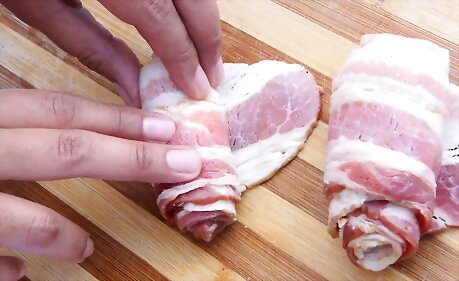
Make your rosebuds with the raw bacon. Don't worry––it's really easy. Simply lay one piece of bacon on a clean flat surface and roll up. You have a rose!

Place the rolled bacon in one muffin cup and repeat the process until the tin is full.
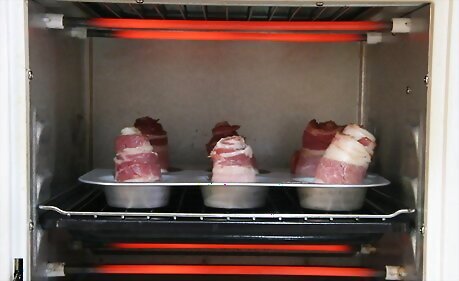
Place the bacon roses in a 375ºF/190ºC oven. Bake for approximately 30 to 40 minutes or until crisp.
Making a Bunch of Bacon Roses
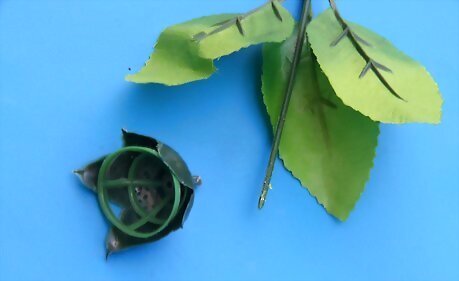
Remove the flower portion from the fake roses. Pull back on the green backing from each rose, then separate it into individual parts. Return the green piece that surrounded the fake flower to the stem by either pushing it back downward. Or, if it came loose and cannot be pushed back on, use green gardener’s tape to hold it in place. Then, tape a wooden chopstick to each stem, so that the stem will be strong enough to hold the bacon. Make Bacon Roses Step 8Bullet1.jpg

Arrange these stems in either a vase or inside a decorative box. If using a box, line it with parchment paper first, to absorb any remaining grease.
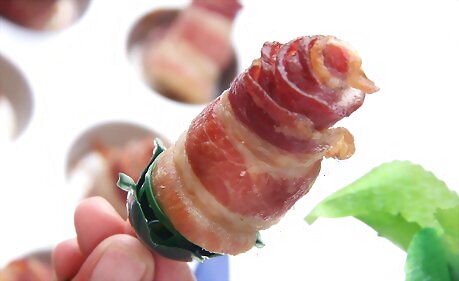
Slide the cooled bacon rosebuds onto the waiting stems. Continue to make enough to create your arrangement.

Serve. Give to someone special or place on the table for everyone to share. Enjoy your bacon roses!


Comments
0 comment