
Playing as a Survivor
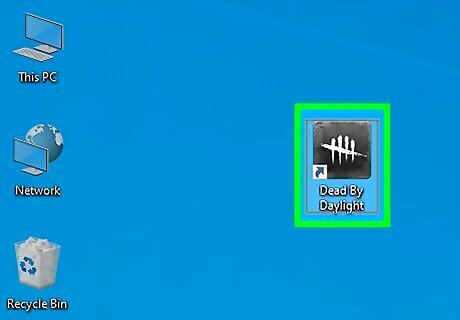
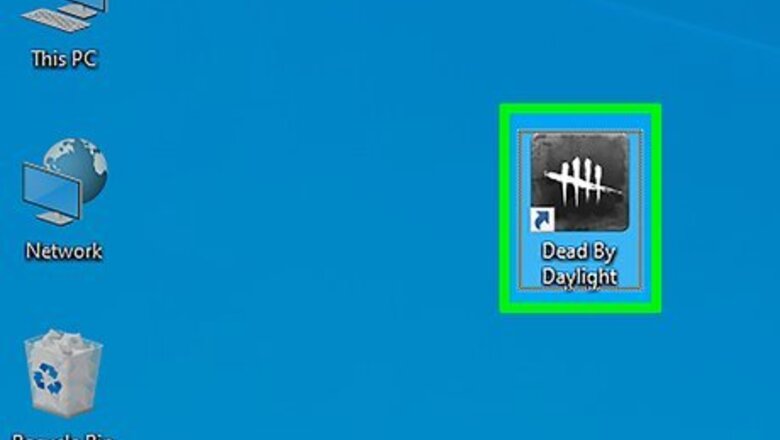
Start the game. Click or tap the Dead By Daylight icon on your computer or smartphone, or select the Dead By Daylight cover art on the home screen of your game console.
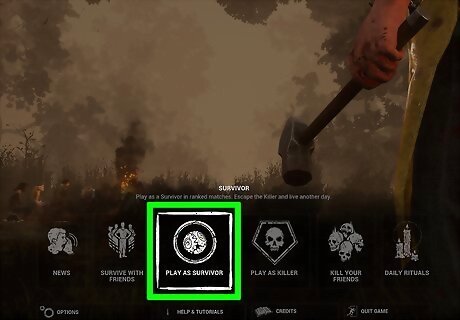
Select Play as Survivor from the title screen. As a survivor, you will play with three other survivors. Your goal is to activate the generators to open the gate or hatch. Then you can escape. When you first join a game, you will be placed in a lobby while you wait for other players to join. Alternatively, you can select Survive with friends to play with your friends over a local area network or online. You can also select Quick Play to quickly join a game as a randomly assigned role.
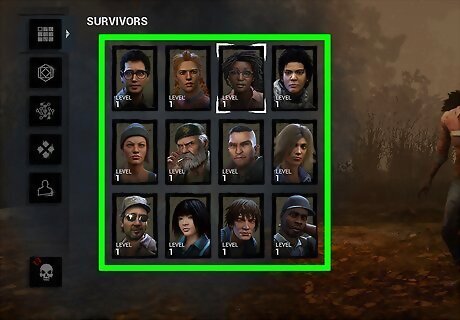
Choose a survivor. To choose a survivor, select the icon that resembles 9 squares in a grid to display the list of survivors. It's in the upper-left corner. Then click the survivor you want to play as. All survivors have the same abilities, but each survivor has a different set of perks that make them unique.
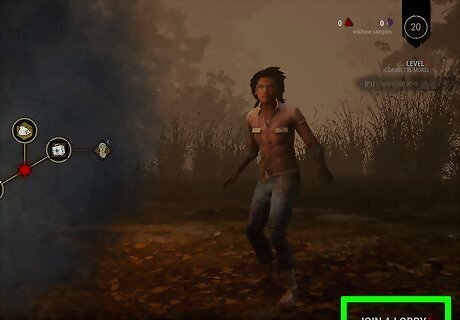
Select the Join a Lobby button. It's in the bottom-right corner. When three other survivors join, the game will go into a sixty-second countdown. The game will force all players to ready in the last five seconds of the countdown even if someone isn't ready. If you aren't ready, leave the lobby. You can view your ping in the bar on the bottom right, which measures your connection to the killer.
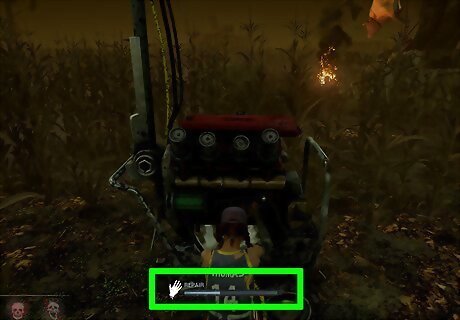
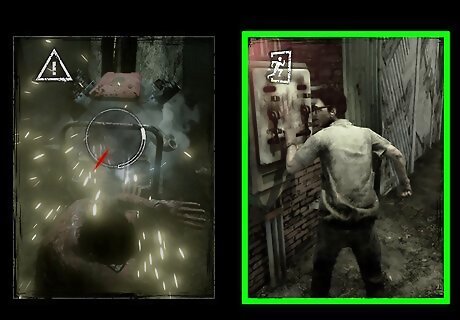
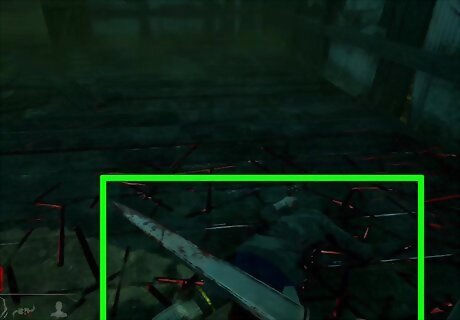
Repair generators. There are 7 generators on each map. Survivors need to repair 5 of them before the two exits open up and allow the survivors to escape. On outdoor maps, generators have a pair of lights above them. On indoor maps, there is a flashing chandelier in the same room as the generator. To repair a generator, walk up to it and press and hold the left mouse button, or the right trigger button. There will be periodic skill checks during the repair process. Skill checks: While repairing a generator, there will be a few skill checks. You will hear a warning sound before a skill check. During the skill check, a circle with a red line on the side will flash on-screen. The red line will quickly move around the circle. You need to press the button indicated in the center of the circle when the red line is in the area marked by the 2 white lines for a successful skill check. If you do not press the button when the red line is in the right area or if you allow the red line to make a complete circle around, you will fail the skill check. This will slow your repair progress and leave an audio clue for the killer to find your location.
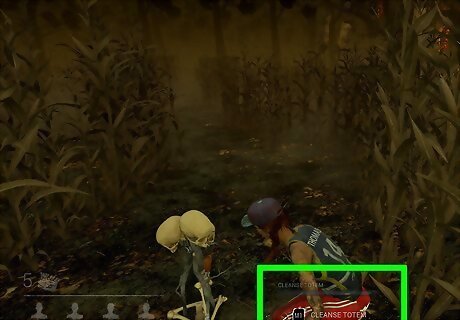
Complete side objectives. Side objectives are tasks such as looting chests, cleansing totems, and sabotaging hooks and traps, etc. You gain bloodpoints for completing various tasks during a game. Bloodpoints can be used to upgrade and improve your characters. It's best to take your situation into consideration before completing side objectives and make sure the killer isn't around or patrolling the area.

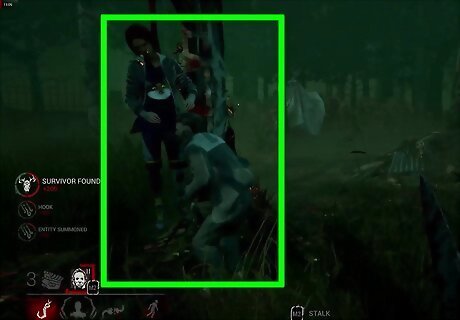
Heal and rescue hooked teammates. If you come across teammates placed on a hook, or caught in a trap, press the spacebar or right shoulder button to rescue them. You can also heal teammates that are in the dying state by standing over them and pressing the spacebar or right shoulder button. If you find yourself in the dying state as a survivor, press and hold the left mouse button, or the right trigger button to recover your HP. That way when any teammates come to heal you, they will have less work to do.
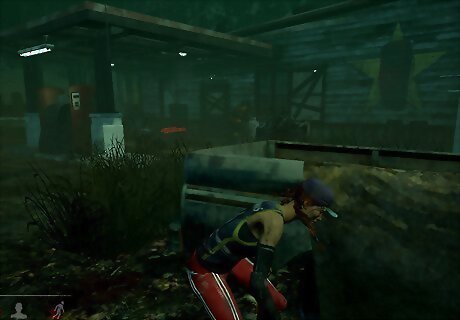
Escape from the killer. When the killer is near, you will hear music and a heartbeat. Escaping from a chase can often be stressful, which ruins your concentration. Learning how to keep a level head when you hear the audio cues. Remember that the killer's view is in first-person while survivors play in third-person view. This gives survivors a better view. Use this to your advantage. Keep the camera on the killer while fleeing from them. Loop in the opposite direction they are chasing you from. Look for walls that have a window or pallets that haven't been dropped while fleeing from the killer. Vaulting is an effective way to extend a chase for a small amount of time. Simply sprint at the window and press the spacebar or right should button when prompted to vault through the window. If you are sprinting, you will vault more quickly than if you are walking at normal speed. Killers normally vault windows at half your speed, so they will most likely go around the vault rather than over it. Be aware that vaulting a window quickly will trigger a noise prompt for the killer if they aren't in a chase. Use pallets to your advantage. Press the spacebar or right shoulder button to throw down a colored pallet when running past it. After a pallet is dropped, survivors can vault over it. Quickly vaulting over the pallet will create a noise notification. The pallet cannot be reused, once the killer breaks it. Dropping a pallet when the killer is in the right area will stun them for a brief period of time This adds to the time before they can resume the chase. Hiding is a high-risk, medium reward tactic. It can be incredibly effective if paired with other chase tactics. Hiding can allow you to avoid the chase entirely but can allow the killer to get a free hit on you if they spot you before you can put some distance between yourself and them.
Escaping through the exit gates. When all the required generators have been repaired, the option to escape becomes available. Two exit gates will light up. They can be seen through walls for a short amount of time. A survivor will need to perform an interaction on the attached levers to open the gates. Once the exit gate is open, it stays open. Killers will often travel between the two exit gates to try and prevent escape. Running out of the exit gates will change your status to a unique 'escaped' image on the HUD. You will then view your score on the scoreboard. Escaping through the hatch: The hatch is an emergency escape option that can become available before the exit gates are open. It spawns when the number of generators completed, plus the number of survivors dead is equal to 5. It opens when there is one survivor left or a survivor uses a key to open it.
Playing as a Killer

Start the game. Click or tap the Dead By Daylight icon on your computer or smartphone, or select the Dead By Daylight cover art on the home screen of your game console.
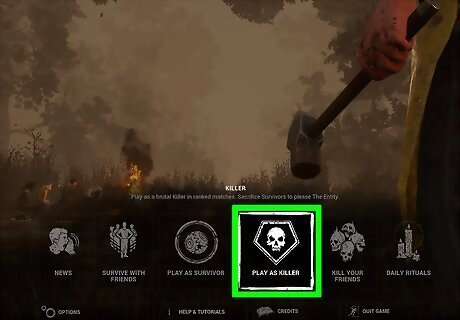
Select Play As KIller. This allows you to create a new lobby where you will play as the killer. Players will join your lobby as survivors. Alternatively, you can select Kill your friends to play with your friends online or over a local area network.
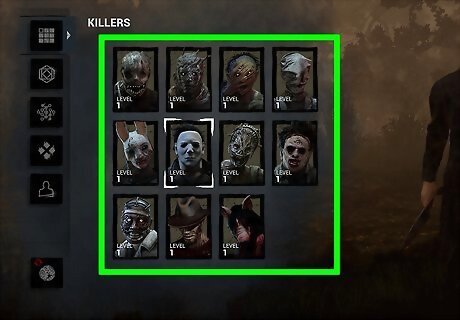
Choose a killer. To choose a killer, click the icon with 9 squares in a grid in the upper-right corner to display a list of killers. Then select the killer you want to play as. Killers do differentiate in stats and abilities. The killer you choose will affect your playstyle, so view the descriptions of each killer's power and look at their unique perks.

Select the Create a Lobby button. It's in the bottom-right corner. When four survivors join, the game will go into a sixty-second countdown. The game will force all players to ready in the last five seconds of the countdown even if someone isn't ready. If you aren't ready, leave the lobby. You can view your ping in the bar on the bottom-right, which measures your connection to the server.
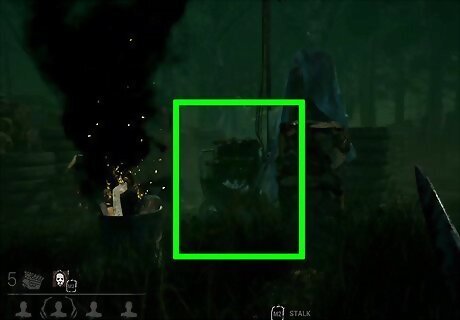
Investigate trails. Investigating trails is a surefire way of continuing a chase or finding your next survivor. Look for signs that point to a survivor, and investigate audio and visual clues. When survivors run, they leave a trail of glowing orange scratch marks that last for about four seconds before fading away. After you've injured a survivor, they leave pools of blood that last slightly longer than scratch marks. These pools of blood may be hard to follow but can be brightened with certain perks and add-ons. If your headphones are of high enough quality, you can hear survivors breathing and hear cries of pain if they are injured. Injured and uninjured breathing can be amplified with perks. Environmental clues such as partially worked on generators, disturbed crows and suspicious movement are indicators that a survivor is in the area.
Down survivors. A healthy survivor can take two hits from your main weapon before they go down. They will be placed in a dying state where they will only be able to crawl on the ground. Certain perks allow you to kill a downed survivor by standing at their feet and pressing the attack button.
Patrol the generators. Since the primary goal of survivors is to repair the generators and power up the exit gates, patrolling the generators is the easiest way to find survivors and sabotage the work they have done. You can tell how much repair a generator has had by the amount of noise that comes from them.
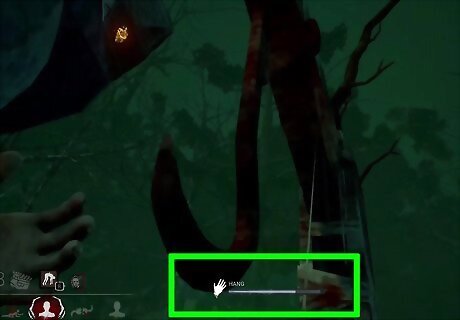
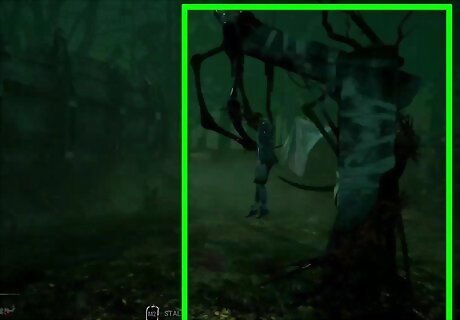
Place survivors on hooks. Once on the ground, you can press the spacebar or the left shoulder button to pick up a survivor and carry them to a hook which is now highlighted in red. Stand next to a survivor and press the drop button to place them on the hook. Hooking a survivor is one of the main objectives in the game and therefore grants the most amount of points. While carrying a survivor, they can wiggle and escape your grasp. The amount of time it takes for them to do this depends on their perks. Get them to a hook as quickly as you can. Survivors can rescue other survivors off hooks. A survivor can be hooked a maximum of three times before they die for good. Hooks can be sabotaged by survivors. This makes them temporarily unusable. The only hooks that can't be sabotaged are the ones in the basement.
Sacrifice survivors. The goal of the killer is to sacrifice all four survivors. A survivor must be placed on a hook 3 times before they are sacrificed to The Entity.
Stop survivors from escaping. Once survivors have 5 generators powered on, two gates open allowing the survivors to escape. The killer can see the gates when they are opened. Go to the gates and stop the survivors from escaping. The escape hatch is an alternative means of escape for survivors. The killer can close the escape hatch and force the survivors to find the exit gates.
Improving Your Characters
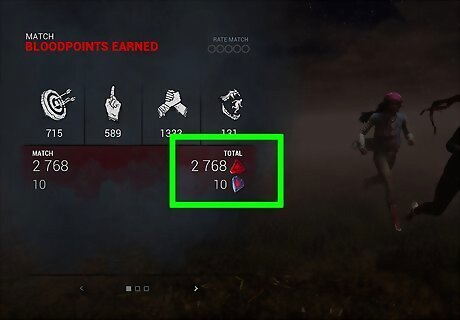
Complete tasks during matches to earn bloodpoints. As you play online matches, you will earn an in-game currency called 'Bloodpoints'. You earn Bloodpoints playing as both survivors and killers. You can earn more bloodpoints by completing objectives during a match. These can be spent in your bloodweb on nodes to unlock consumables and upgrades for your character. The further you get through your bloodweb, the larger it will get.

Open the bloodweb. To open the bloodweb, select a survivor or killer from the title screen. Then click the icon that resembles a bunch of circles connected by lines in the menu to the left. This displays the bloodweb with all the nodes you can unlock. On Dead By Daylight Mobile, the bloodweb is replaced by the bloodmarket. It does not level up your characters. It offers 5 rows of nodes you can unlock. You must unlock nodes in the first 2 rows before unlocking nodes in the third row. You must unlock more nodes to unlock the 4th and 5th rows. The bloodmarket refreshes once you unlock all rows.
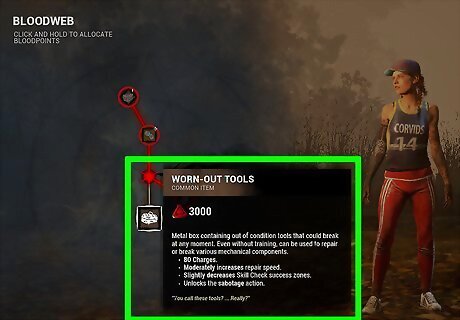
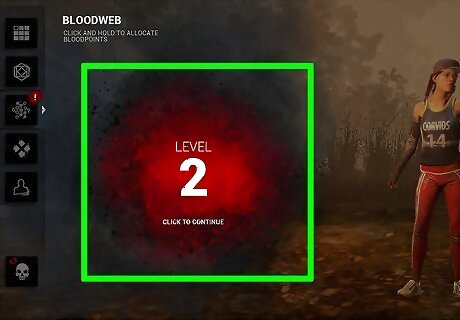
Select a node to unlock it. Use the mouse or the left analog stick to highlight the different nodes in the bloodweb. This displays a pop-up that says what the node is, how many bloodpoints it costs, and what it does. If you have enough bloodpoints to purchase it, click on it, or press "X" on Playstation, or "A" on Xbox or Nintendo Switch to unlock the node. Tier 2 and Tier 3 nodes have prerequisite nodes that must be unlocked first. The nodes connected to these higher tier nodes by a line must be unlocked first before the higher tier nodes can be unlocked. At level 10, The Entity will begin taking your unlocked nodes. It is a black haze that works through the lines in the bloodweb. Once The Entity takes a node, it cannot be unlocked. This forces you to prioritize the most useful nodes. If there is a higher tier node you really want, be sure to unlock all the prerequisite nodes as quickly as possible. The bloodweb caps out at level 50. At this point, the option to prestige will be unlocked. To prestige, click and hold the center node until the red bar completes a full circuit. Prestiging your character allows rarer nodes to spawn in the bloodweb. It also gives one special customization. You can prestige each character a maximum of three times.
Increase your rank. Increasing your rank allows you to get matched with other players more suited to your skill level. When you start playing, your rank is 20, the lowest. The highest rank you can achieve is Rank 1, which puts you with the best killers and survivors. To increase your rank, achieve emblems to receive pips. The higher quality of the emblem, the more pips you get. If your emblem quality is low enough, you can actually lose pips, thus losing rank, so play safely. Every rank needs a certain amount of pips to progress to the next, and rank-ups will steadily get harder to achieve as you progress.

Unlock customizations. When you increase your player level through playtime, you are rewarded with Iridescent shards. From the title screen, select Store followed by Character List. Click on the character you want to buy cosmetics for. All cosmetics can be bought with Auric Cells, which is a premium currency that costs real money. Most outfits can be purchased through Iridescent shards with the exceptions of some very rare and rare outfits.
Learning the Controls
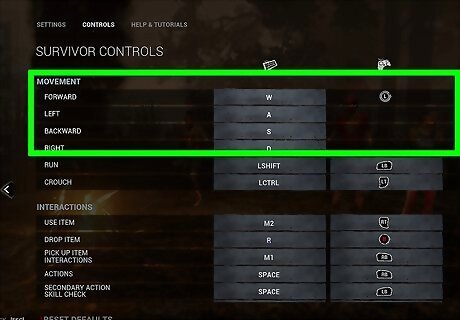
Use the left analog stick or W, S, A, and D keys to move. If you are using a game controller, use the left analog stick to move. If you are using a PC keyboard, press W to go forward, S to go back, A to side-step to the left, and D to side-step to the right.
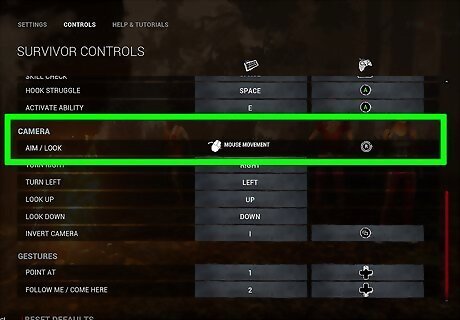
Use the right analog stick or mouse to move the camera or turn. As a survivor, you play in a third-person view with the camera giving you an over-the-shoulder view. Use the right analog stick on game controllers, or the mouse to adjust the camera view. If you are playing as the killer, you play in first-person view, allowing you to see through the killer's eyes. Use the mouse or the left analog stick to look and turn.
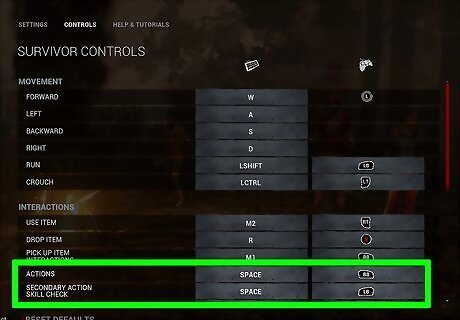
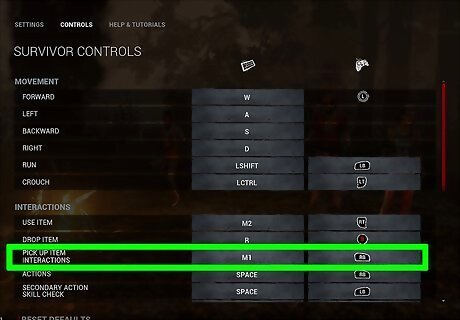
Press R1, RB, or Spacebar to pick up or interact with objects. If you are using a game controller, press the right shoulder button to pick up or interact with objects, or do actions. If you are using a PC keyboard, press the Spacebar on the keyboard. This includes vaulting over pallets and through windows, as well as picking up downed survivors, or damaging generators.
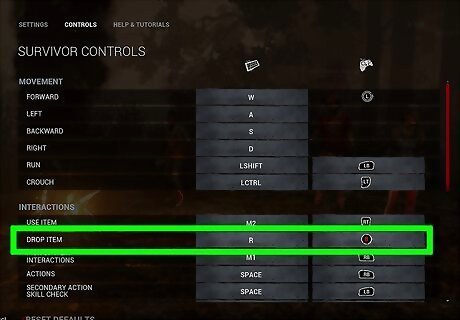
Press O, B, or R to drop an item. If you are using a game controller press Circle on Playstation, or B on Xbox or Nintendo Switch to drop an item. If you are using a PC keyboard, press R to drop an item.
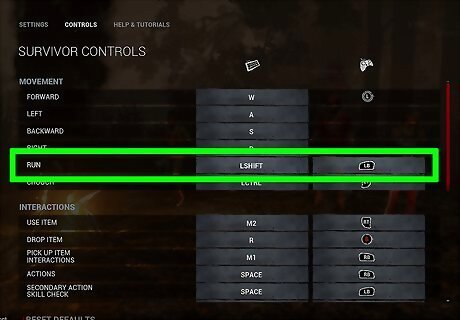
Hold L1, LB, or ⇧ Shift to sprint (survivor). If you are using a game controller, press and hold the left shoulder button to run while moving. If you are using a PC keyboard, press and hold the left Shift button to run while moving. You can only run when playing as a survivor. Running should only be used when attempting to escape a killer or in emergency situations. Running is incredibly noisy and causes your character to breathe heavily, even when they stop running. It also leaves long visual trails that the killer can see. You cannot escape from a killer just by running alone. A survivor's running speed is still slower than a killer's walking speed.
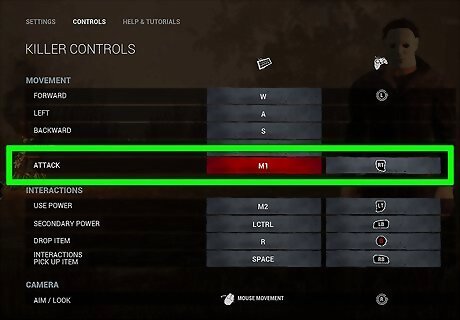
Press R2, RT, or the left mouse button to attack (killer). If you are using a PC, press the left mouse button to attack survivors. If you are using a game controller, press the right trigger button to attack. Only killers can attack. If a survivor is repairing, sabotaging, or unhooking a teammate, you can put them in a dying state instantly by attacking them at close range.
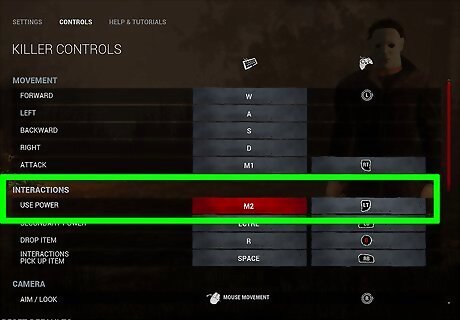
Press L2, LT or the right mouse button to use your power or secondary attack (killer). Most killers have primary and secondary attacks. If you are using a game controller, press the left trigger to use your power or secondary attack. If you are using a PC, press the right mouse button to use your power.

Press L1, LB, or Spacebar to use a secondary power (killer). Not all killers have a secondary power. If the killer you are playing with has a secondary power, press the left shoulder button on the game controller or the Spacebar on a PC to use your secondary power.

Press R2, RT, or the left mouse button to use an item (survivor). When playing as a survivor, you can equip certain items. If you are using a game controller, press the right trigger button to use an item if you are playing. If you are using a PC keyboard, press the left mouse button to use an item.

Press L2, LT, or Ctrl to crouch (survivor). You can only crouch when playing as a survivor. If you are using a game controller, press and hold the left trigger button to crouch. If you are using a PC keyboard, press the left Ctrl button to crouch. Crouching is slower, but a much quieter way of moving. A survivor will not trigger crows while crouching.
Press ✕, A, or the Right Mouse Button to use an ability (survivor). If you have an ability equipped as a survivor, press the X button on Playstation, or the A button on Xbox and Nintendo Switch to use it. If you are using a PC, press the right mouse button. You can also use this to struggle on a hook.


Comments
0 comment