
Planning Your Story
Brainstorm to generate and character plot ideas. You need to write out your ideas before you can develop them into a complete story. Try freewriting everything that comes to mind, or list out your ideas. Don’t worry about making sense. Just try to uncover possible ideas for your story. Brainstorm about your story idea, characters, setting, or scene ideas, depending on what comes to mind. You might make a mind map to develop your ideas in a visual manner.
Write the premise or summary of your story. Your premise is the basic idea for the story. You might start with just a sentence, but keep developing it until you have a short blurb. You might start with something like this: Two best friends are in a car accident, but only 1 girl is recovered from the car. Here’s an example blurb: Kait and her best friend Maria are thrilled when they’re invited to the party of the year. On their way home, however, Kait’s car slides on the wet road and crashes into a tree. When she wakes up in the hospital, Kait learns Maria wasn’t in the car. Now everyone believes Maria ran off with someone, but Kait knows her friend was with her on the night of the crash.

Create character sheets for your main and supporting characters. Write down your character’s description, personal details, traits, and likes and dislikes. Create a backstory for your main characters. Describe your character at the beginning of the story, as well as how they’ll change over the course of the story. Most importantly, identify what your character wants in the story. Character sheets can be as long or as short as you like. For a short story, you might create a brief outline for your supporting characters. You can find character sheet templates here: https://onestopforwriters.com/templates_worksheets.

Identify a central conflict. Your conflict should appear early in the story so your readers experience tension as they read. You’ll develop this conflict throughout the story, reaching the peak of the conflict at the climax. At the end of the story, your conflict should be resolved. Internal conflicts are between the character and themself. For example, the character may know what they are doing is wrong but struggle to stop. External conflicts occur outside the character. There are 3 main types: Person versus person: The main character faces an antagonist. For example, a girl confronts her bully. Person versus nature: The main character faces natural elements. For example, campers must survive in the forest during a terrible storm. Person versus society: The main character confronts issues in society or the rules of society. For example, a girl engages in civil disobedience to help change a law.

Establish your setting. Your setting is when and where your story takes place. Setting is very important for your plot because it will influence how your story looks and develops. For example, society and technology would differ greatly in a story told in the 1920s versus a story told in 2018. If you’re setting your story in a place or time period unfamiliar to you, do some research to learn more about it. This will help you when it comes to writing the theme of your story. It’s a good idea to look at photos of your setting, whether you use personal photos or pictures available online.
Crafting Your Story Arc
Jot down all of your scene ideas as they come to you. Don’t worry about making sense or putting things in order. Just get your ideas on paper. You might write down all of the exciting scenes first, then add more scenes as they come to you. Don’t try to force yourself to work in order. The more you get out on paper, the easier it will be to fill in the gaps.

Create an opening scene that hooks your reader. This scene should introduce your character and setting. Show your character in an everyday situation your reader can relate to. Hint at the story’s conflict by having your character face a related issue. This scene will act as your exposition if you’re following a traditional plot outline. For example, in the story about Kait and Maria presented above, you could open your story with Kait and Maria driving to the party. The car could slide on the pavement, causing Kait to struggle to gain control over the car.

Write out the inciting incident. This is the scene that kicks off your plot. It should occur early in the story, such as the first scene in a short story or the first few chapters of a novel. Make sure your inciting incident sets up the conflict. In a very short story, your hook and inciting incident may be the same scene. For example, the inciting incident in Kait and Maria’s story would be when the car crashes into the tree.
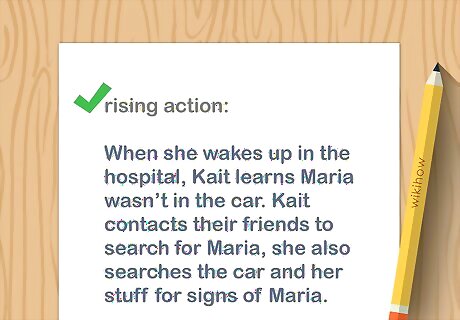
Build rising action to intensify the tension. Your rising action will begin after the inciting incident and carry your reader to the climax. It should slowly build the tension over the course of your story. It may be contained in 1 scene for shorter works, but longer works will include a lot of rising action. In a longer story, it’s a good idea to build moments of tension relief into your rising action to give the reader a break from the tension. For example, the rising action in Kait and Maria’s story might show Kait in the hospital, Kait talking to the police, Kait getting grounded from driving, Kait contacting friends to search for Maria, Kait searching social media for references of Maria, and Kait searching the car and her stuff for signs of Maria.

Write out your climax. Your climax is the peak of the story when your main character faces their conflict. This will be the emotional height of the story, as the tension has built as high as it will go. For example, the climax of Kait and Maria’s story might be when Kait discovers Maria’s cell phone under the seat of the car, convincing her she’s been right all along. Kait might steal her dad’s car to drive out to the area of the crash to look for Maria. As the police arrive, Kait might slip into the woods to search for her friend. Just as she’s about to get caught, Kait might spot her injured friend curled inside the brush.
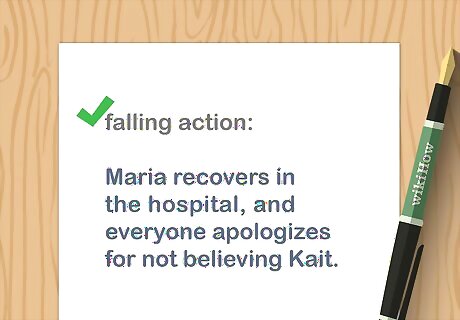
Identify scenes for your falling action. Your falling action presents the aftermath of your climax. It should be brief, leading the reader to your resolution. It serves to tie up your story plot. For Kait and Maria’s story, the falling action might include Kait getting help for Maria, Maria recovering in the hospital, and everyone apologizing for not believing Kait.

Craft a satisfying resolution to end your story. Your ending should leave the reader feeling like there are no loose ends. The ending doesn’t need to be happy, as many stories have unhappy endings. However, the reader should have a sense of satisfaction, knowing they got something out of the story. Kait and Maria’s story might end with them having a small gathering to celebrate Maria’s recovery.
Fill in gaps between scenes, if necessary. Once you have your basic story arc down, you might realize you have scenes that don’t clearly connect to each other. That’s okay! At this point, create connections to fill in those plot gaps. If you aren’t sure how to get from A to B at this point, make a note to go back to that spot. Then, move on. You can come back to the gap later.
Preparing a Plot Outline

Decide how detailed you want your outline to be. You might want to provide a 1 sentence summary of each scene, or you might want to write out everything that happens in each scene. It’s entirely up to you! Both strategies can be effective for creating a good plot outline. Remember, you can always add to your plot outline later, so don’t feel like you have to write out everything now.

Make an alphanumeric outline to organize the information. Alphanumeric outlines are great for creating layers of information, which make them perfect for plot outlines. A basic outline might consist of 1 or 2 layers, but you can include more layers if you’d like a more developed outline. Here’s the basic numbering system for an outline: Roman Numerals (I, II, III, IV, V) for main points. For example, this could be a 1-sentence scene summary. Capital letters (A, B, C) for subpoints. For example, you could list each action that takes place in a particular scene. Arabic numerals (1, 2, 3) for supporting details. For example, this might include important information you need to include or information about side characters. Lowercase letters (a, b, c) for minor details. For example, you might include characterization details you plan to include in the scene.

Start at the beginning of the story and work to the end. Since you already have your story arc written, this should be easy. List your scenes according to where they occur along your story arc. Number each scene appropriately as you complete your outline.

Write out a 1 sentence summary explaining each scene. These will make up the main points in your plot outline. Include each scene in the story. If you find a gap in your story, try to fill it in. If you aren’t sure how you plan to resolve it, include a main point stating what needs to happen to connect those plot points.

Flesh out your scenes if you desire. You don’t have to include details in your outline if you don’t want to. However, it can make it easier to write your story later, depending on your writing style. Here are some ways you can flesh out your scenes: List all characters who are in the scene. Write out every action that takes place in the scene. Note important details used for characterization, foreshadowing, building tension, etc.


Comments
0 comment