
- Remove the tire and loosen the old stud with a ball joint separator (preferred) or a sledgehammer. Rotate the wheel and slide the stud off.
- To install the new stud with a ball joint separator, insert the new stud into the hole in the hub and place the tool over both ends of the stud. Then, tighten.
- To install the new stud with a lug wrench, slip the stud into place on the hub, and add washers or a stud installer over the exposed threads. Tighten to secure.
Removing the Old Stud
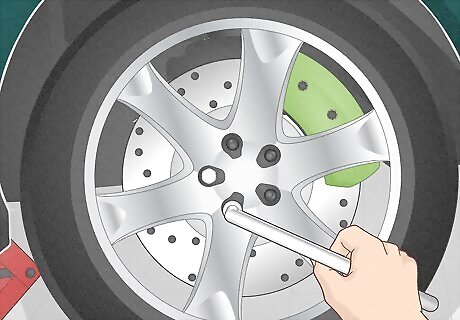
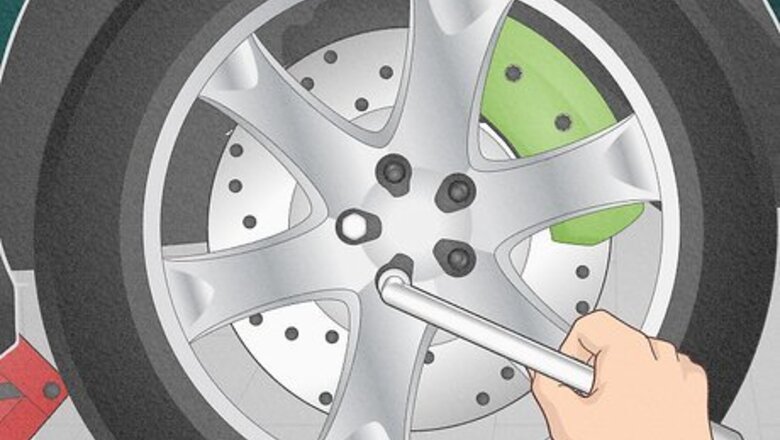
Unscrew the lug nuts and remove the tire. Yep—replacing a wheel stud starts out just like changing a tire: Park the vehicle on a level surface with the parking brake engaged. Use a lug wrench to slightly loosen the lug nuts. Jack up the vehicle until the affected tire is just off the ground. Unscrew the lug nuts and remove the tire by sliding it off of the wheel studs (also called lug studs).
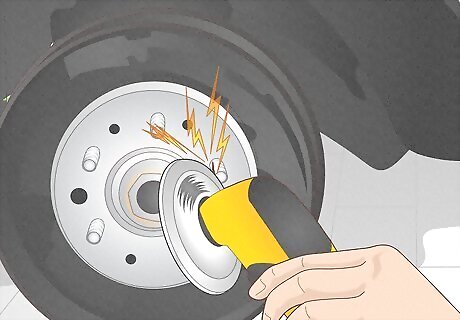
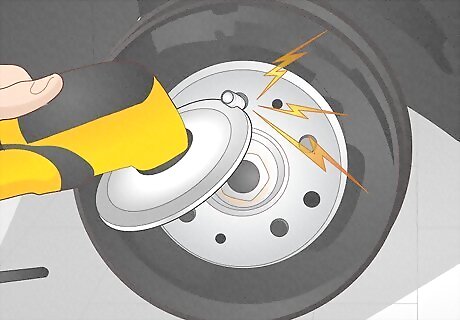
Cut off the deformed part of the old stud if necessary. In some cases, the bad wheel stud may be so bent or misshapen that you won’t be able to push it through the opening in the hub (the front face of the wheel that you see once you remove the tire). If so, install a cutoff wheel on an angle grinder and use the grinder to cut off the deformed section of the wheel stud. When using an angle grinder, always follow all the product instructions and safety recommendations. Wear safety equipment such as goggles or a face shield, earplugs, thick work gloves, long sleeves and pants, and work boots.

Dislodge the stud with a ball joint separator as your best option. Slip the forked end of the ball joint separator over the back side of the wheel hub so that the head of the stud is between the fork’s two tines. Set the other (non-forked) end of the separator over the exposed tip of the stud. Tighten the bolt on the other side of the separator to slowly squeeze the two ends (forked and non-forked) closer together. The squeezing process will eventually cause the head of the stud to pop free of its seat in the back side of the hub. You’ll know this has happened once the stud wiggles freely in its slot in the hub. This method is preferred versus using a sledgehammer because there’s no risk of accidentally damaging any part of the hub or wheel assembly. Repairing damage to this area can easily cost $350 USD or more. What’s the only real downside to this method? It takes a few minutes instead of a few seconds to get the job done.
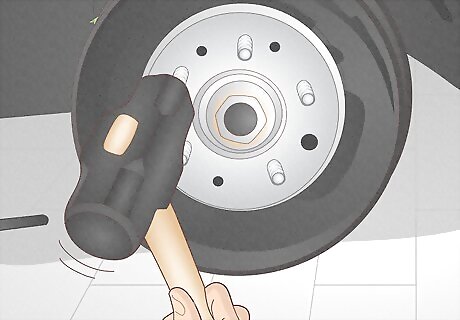
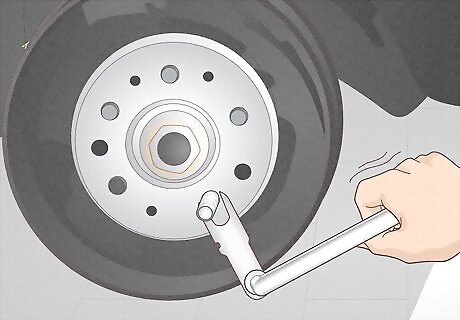
Loosen the stud with a sledgehammer as a less ideal alternative. This isn’t the method recommended by most pro mechanics, but it usually succeeds without major problems. Simply take a small sledgehammer and give the exposed part of the wheel stud a solid strike or two. This will knock the head of the wheel stud loose from its seat in the back side of the hub. You’ll know you’ve knocked the wheel stud loose once you’re able to jiggle it around in the hub. This method definitely saves a little time versus using a ball joint separator, but a missed hammer strike that damages the wheel hub components might cost you $350 USD or more in repairs!
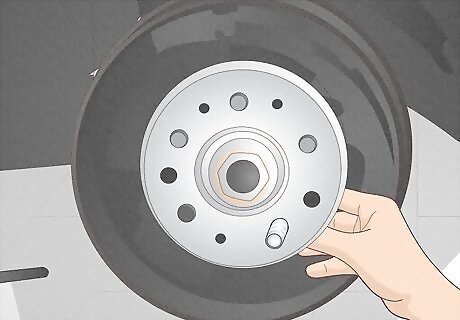
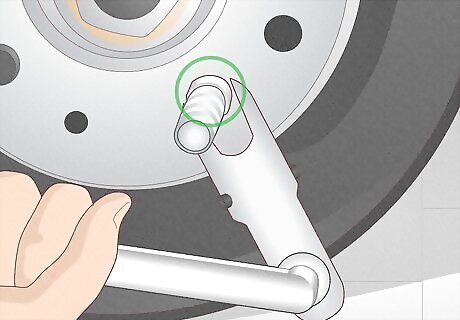
Rotate the wheel until you have room to slide out the stud. In most vehicles there isn’t enough room behind the wheel hub to slip the loosened stud out of place. However, by spinning the wheel around you’ll nearly always find a “sweet spot” which does in fact give you just enough room to slip the stud out through the back side of the hub. You’re probably asking yourself why some vehicles don’t have a “sweet spot” that lets you remove a stud without removing the entire wheel hub. Unfortunately, that’s a good question without a good answer!
Choose an imperfect alternative if you can’t slide the stud out. Yes, it’s a real bummer if you make it to this point and realize you don’t have a “sweet spot” that lets you slip the loosened stud out. So what should you do? You can put the wheel back on and head to a garage to get the repair done, or try one of these problematic but possible options: Use your angle grinder’s cutoff wheel to slice off the threaded end of the stud as much as is needed to be able to slip it free. However, you’ll still be unable to install a new full-length stud in this case. Snip through a section of the relatively thin metal shield that rests behind the hub, bend it back and out of the way, remove the stud, and then bend the shield back into place. The obvious problem here is that you’re damaging the shield that helps protect the inner workings of the wheel and axle. Remove the entire wheel hub so you can freely access the stud. This is a more complex maneuver that’s only recommended if you really know what you’re doing!
Installing a Stud with a Ball Joint Separator
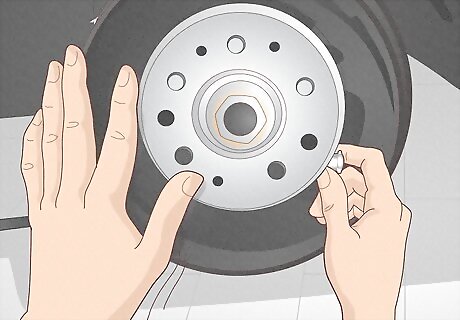
Slip the new stud through the hole in the hub. With the wheel hub positioned in the same “sweet spot” that allowed you to remove the old stud, feed the threaded head of the new stud straight through the hole in the hub. The stud will wiggle freely at this point because it hasn’t been seated in the back of the hub yet. Use your owner’s manual and/or contact the vehicle manufacturer to ensure you get a matching wheel stud. Alternatively, if the old stud is still in one piece, take it with you to an auto parts store to ensure you get an exact match.
Position the separator tool over both ends of the stud. Assuming that you used the ball joint separator to remove the old stud, you’ll simply need to flip the thing around! This time, set the forked end against the front of the hub so that the threaded end of the new stud is between the fork’s two tines. Set the other (non-forked) end of the separator right on top of the head of the stud on the back side of the hub.
Tighten the separator until the stud seats firmly into the hub. As you turn clockwise with your wrench on the tightening bolt, the head of the new stud will slowly but surely get pressed into its seat on the back side of the hub. Use your finger to confirm that the head of the stud is flush (even) with the back of the hub—once it is, your repair is complete. Now you can reinstall the tire and be on your way!
Installing a Stud with a Lug Wrench
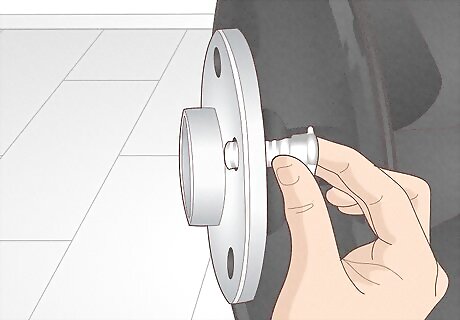
Feed the new stud through the hub opening. Keep the wheel lined up over the “sweet spot” that gave you the space needed to remove the old stud, then simply slide the new stud into the opening in the back side of the hub. The new stud will be a bit loose inside the opening for now, but that will change once you properly seat it into the back side of the hub. Assuming that you picked out a precise stud match—by consulting the owner’s manual, checking the vehicle manufacturer’s website, and/or taking the old stud to an auto parts store—it should slip into place easily.

Slip washers or a stud installer over the exposed threads. A stud installer is nothing more than a metal cylinder that slides over the stud threads to facilitate the seating process. It’s fairly inexpensive and the perfect size, but you can accomplish the same task by getting a stack of metal washers that are just big enough to smoothly slip over the threads of the stud. Use a roughly 1.75 in (4.4 cm) high stack of washers to replicate the size of a stud installer.
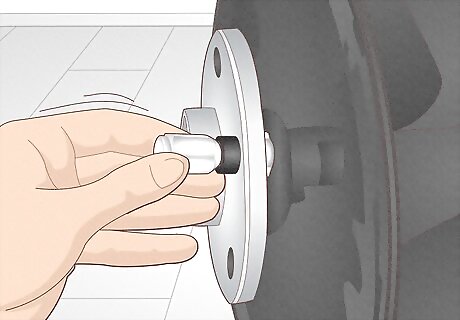
Secure a lug nut onto the stud by hand. Thread one of the vehicle’s existing lug nuts onto the end of the stud, then twist it clockwise until it’s up against either the stack of washers or the stud installer. Don’t use a lug wrench or other tool at this point since you’re more likely to cross-thread the lug nut and get it stuck on the end of the new stud.
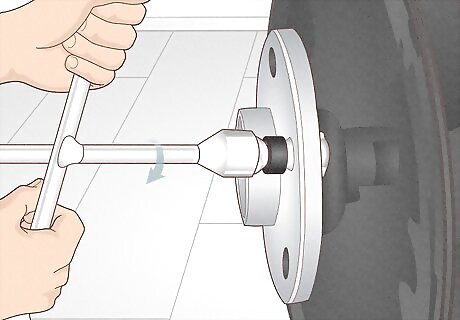
Tighten the lug nut with a lug wrench until the stud seats firmly. Turn the lug nut clockwise just like you would to secure a new tire in place. As it presses up against the stud installer (or stack of washers), it will draw the head of the stud into the seat on the back of the hub. The stud is fully seated once its head is flush with the back side of the hub—use your finger to confirm this. Once the stud is seated, simply turn the lug nut counterclockwise to loosen it, then unscrew it the rest of the way by hand. Slide off the washers (or stud installer), then reinstall the tire and secure the lug nuts in place as normal. Now you’re ready to hit the road with confidence!


Comments
0 comment