
Windows
Plug in your laptop. Because the reset process can take a while, it’s important to make sure you don’t run out of battery power.

Right-click the Windows Start menu. It’s usually at the bottom-left corner of the screen.
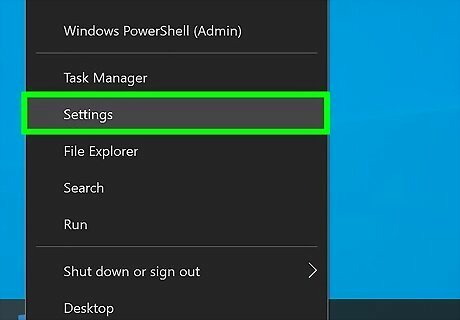
Click Settings.
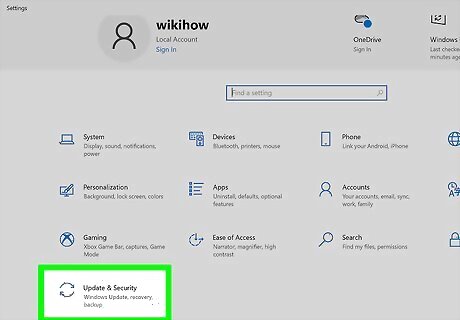
Click Update & security. It’s the icon with two curved arrows.
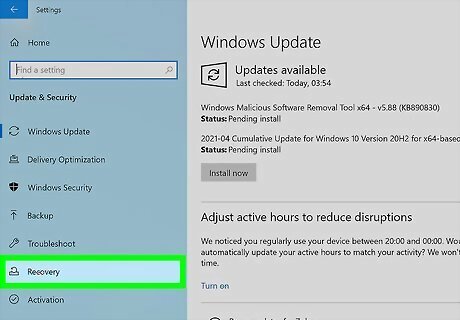
Click Recovery. It’s in the left column.
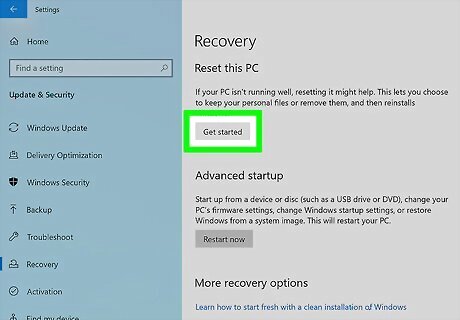
Click Get started under “Reset this PC.” It’s at the top of the main panel.

Select a file option. Choose Keep my files to delete all of the apps and settings without removing your personal data, or Remove everything to start with a completely fresh computer. If you choose to remove everything on the computer, be sure to make a backup first so you don’t lose any important files.
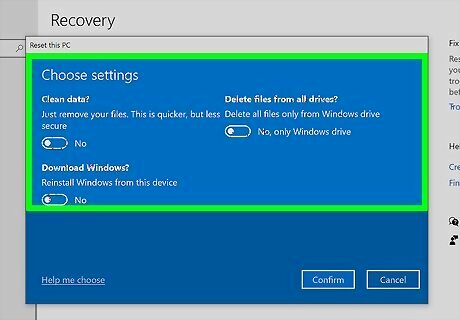
Select whether to format the disk. If you’re not worried about someone restoring your files, select Just remove my files to skip formatting the drive. If you’ll be giving away or selling the computer, select Remove files and clean the drive to ensure your personal data is completely removed.
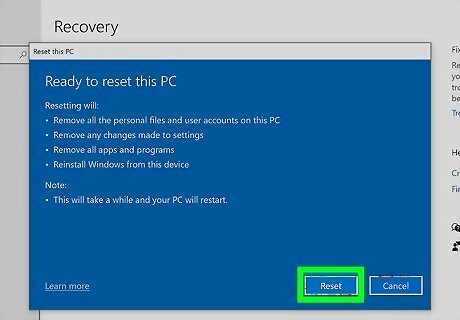
Click Reset. The computer will now restore to its original settings and delete the data you selected. If you chose to clean the drive, this process may take several hours.
macOS
Plug in your laptop. Because the reset process can take a while, it’s important to make sure you don’t run out of battery power.
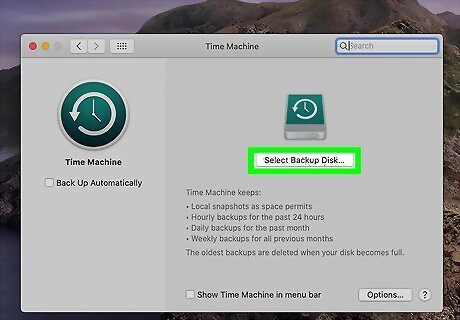
Back up your files to another location. If you don’t want to lose your personal data, see Back Up a Mac to learn how to use the built-in backup tools. Do not continue with this method until you’ve made a backup or know for sure that you don’t need one.
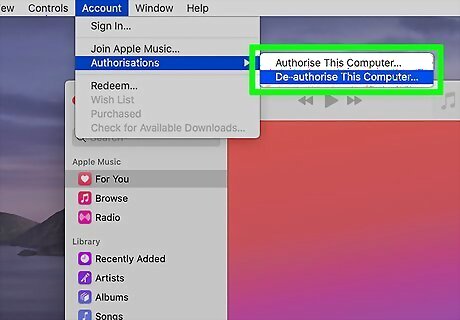
Deauthorize your Mac (macOS Mojave and earlier only). If you're running macOS Mojave (10.14.6) or earlier, you'll need to complete this step. If you have a newer version of macOS, just skip to the next step. To deauthorize your Mac: Open iTunes. Click the Account menu and select Authorizations. Click Deauthorize This Computer. Confirm your Apple ID and password.
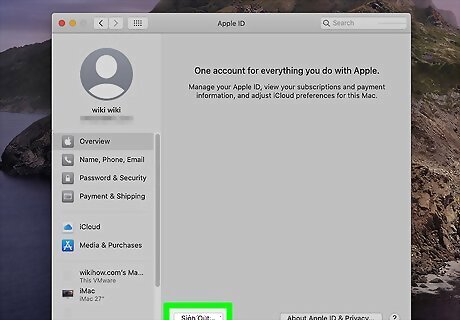
Sign out of iCloud. Here’s how: Click the Apple menu and select System Preferences. Click Apple ID (Catalina and later) or iCloud (Mojave and earlier). Click Overview in the sidebar (Mojave and later only). Click Sign Out.
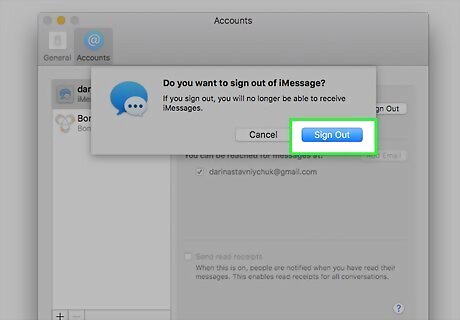
Sign out of iMessage. Here’s how: Open the Messages app. Click the Messages menu and select Preferences. Click iMessage. Click Sign Out.
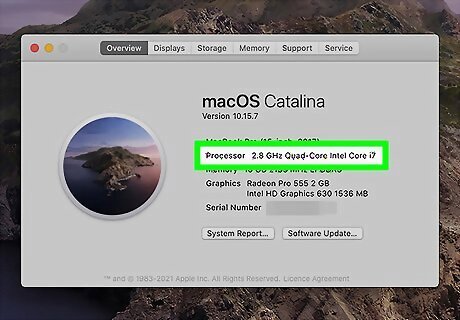
Find out whether your Mac has an Intel or Apple silicon processor. The steps to restore your Mac to its original factory settings are a little different depending on your processor. Here's how to check: Click the Apple menu and select About this Mac. If you see a line that begins with the word "Chip" and ends with a chip name (e.g., Apple M1), you have an Apple silicon processor. If you see a line that begins with "Processor" that shows an Intel processor name, your processor was made by Intel.
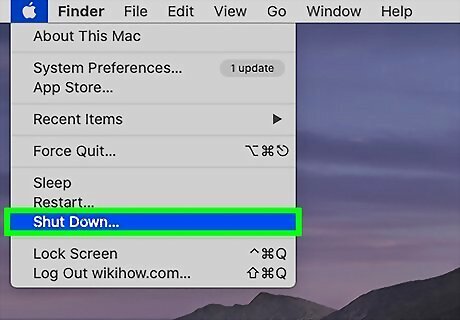
Shut down your computer. To do this, click the Apple menu and select Shut Down. This turns off your computer.

Boot your Mac into Recovery Mode. The steps are different depending on your processor: Intel-based Macs: Press the Power button on your Mac, and then press and hold Command + R on the keyboard. When you see the Apple logo, you can release your fingers. If you're prompted to sign in, sign in now. Silicone-based Macs: Press and hold the Power button on your Mac until you see an icon of a hard drive with a gear. Click the gear icon, select Continue, and then log in with your Apple ID if prompted.
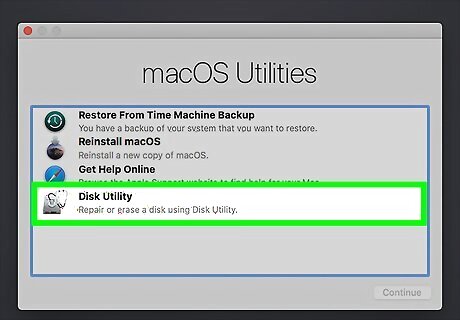
Select Disk Utility and click Continue. Now you'll see the drives that are connected to your Mac in the left panel.
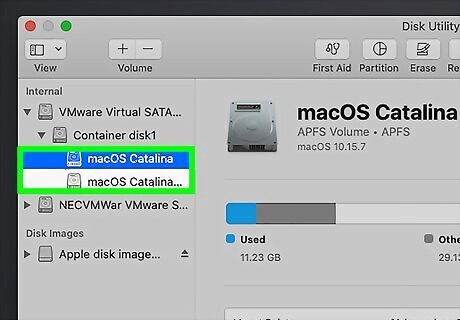
Click your MacBook’s startup disk. It’ll be in the list of drives in the left column. It’s usually called something like “Macintosh HD.” If your Mac has an Apple silicon processor and you've used Disk Utility to add internal volumes to your drive, those volumes will also appear. You'll want to delete them before you continue—just select each volume and click the minus button to do so.
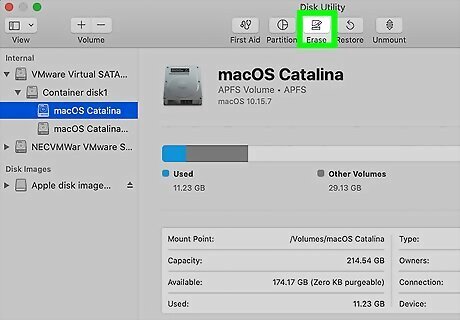
Click Erase. It’s near the top-center part of the window. This opens the Erase dialog, which gives you some options for formatting the drive. Since you're restoring to your original factory settings, you can keep all of the default options selected.
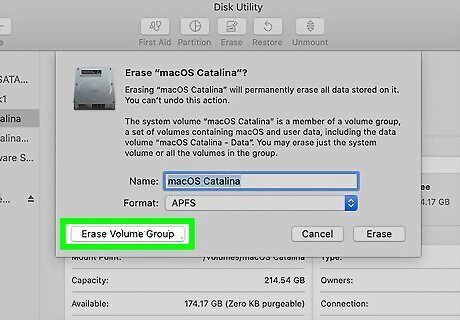
Click Erase Volume Group. It's at the bottom-left corner of the window. This will reformat your Mac's hard drive, which erases its data. If you have an Apple silicone processor, click Erase Mac and Restart when prompted. If you have an Intel processor, you'll need to erase any internal volumes that still exist. Look for any internal volumes in the left side bar (other than Macintosh HD). If any exist, delete them by selecting each volume and clicking the minus sign.

Reinstall macOS on your Mac. The steps are different depending on your processor: Intel-based Macs: Close the Disk Utility window to return to Utilities, click Reinstall macOS, click Continue, and follow the on-screen instructions. Silicon-based Macs: After your Mac reboots, select your preferences, connect to Wi-Fi, and activate your Mac as prompted. Then, select Exit to Recovery Utilities, choose Reinstall macOS, and click Continue to reinstall macOS.


Comments
0 comment