views
Testing with a Lightbulb
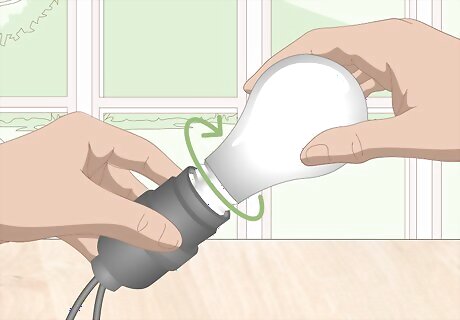
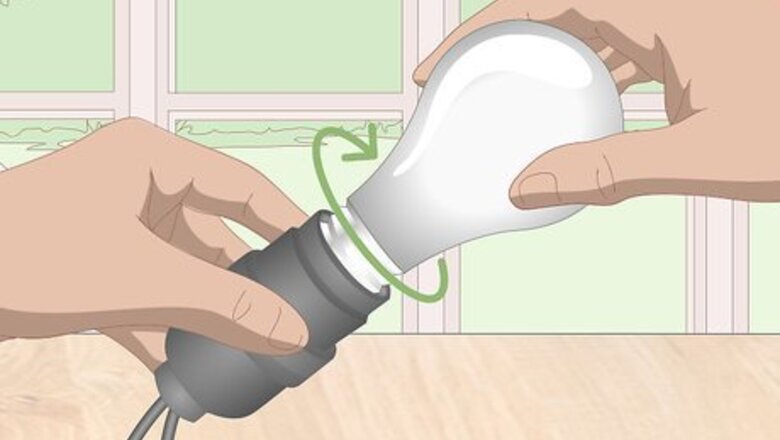
Screw a 100-watt bulb into a base socket. Look for a standard lightbulb that has a 100-watt output on it. Then check your local hardware store for a standalone base socket to screw your lightbulb into. Choose one that already has 2 wires attached to it so you don’t have to use your own. Position the end of the lightbulb inside the socket and rotate it clockwise to secure it to the base. Make sure the socket base is made to use with 100-watt lightbulbs. If the power rating is too strong or weak, then the test may not work.
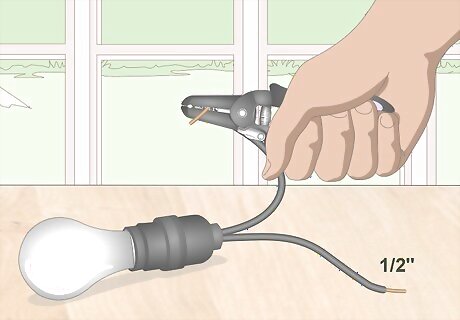
Strip ⁄2 inch (1.3 cm) off the end of each wire on the base. Find the matching gauge for the wire on the base using a pair of wire strippers. Clamp one of the wires in the slot so about ⁄2 inch (1.3 cm) sticks out from the other side. Slowly pull the wire toward you to cut through the insulation and strip it so the wiring is exposed. Repeat the process for the second wire on the other side of the base.Tip: If you don’t have a wire stripper, pinch the end of the wire between the blades of a pair of scissors. Pull the wire in the opposite direction of the section you want to strip to remove the insulation. Be careful not to squeeze too hard or else you’ll cut through the wires.
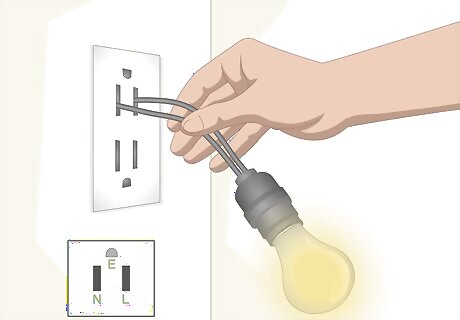
Push the wires on the base into the live and neutral ports of an outlet. Take either wire connected to the base and push the exposed end into the live port on your outlet, which is usually the smaller slot. Then take the second wire on the base and put it into the neutral slot, which is the larger port next to the live one. If your outlet is properly working, the lightbulb will immediately turn on. The light won’t turn on if the outlet you’re testing isn’t connected to power.Warning: Never hold a wire that’s exposed or has cracked insulation while it’s plugged in since you could shock or electrocute yourself.
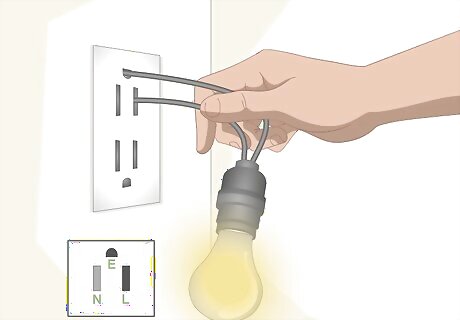
Plug the wires into the live and earthing ports to see if the lightbulb turns on. Pull both wires out from their ports to begin. Take one of the wires and place it in the earthing port, which is the third hole at the top or bottom of your outlet. Place the second wire in the live port again to see if the lightbulb illuminates. If the lightbulb has the same intensity as your first test, then the outlet is properly earthed. If the light doesn’t come on at all, then the outlet doesn’t have any earthing. If the light is dimmer than your first test, then your outlet has earthing on it, but it may be faulty. Contact an electrician to inspect your electrical system to find the source of the problem.
Checking Earthing with a Multimeter
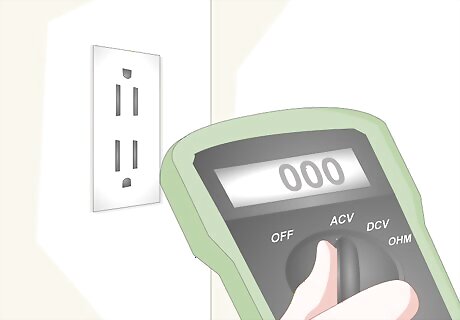
Set a multimeter to measure AC voltage. Multimeters can test various electrical components for voltage, current, and resistance. If you’re using an analog multimeter, turn the dial on the front to the letter “V” that has wavy lines next to it for AC power. If you have a digital multimeter, cycle through the settings using the buttons until you reach AC voltage. Choose the highest cutoff value for the voltage on the meter so you can get an accurate reading. You can buy multimeters online or from your local hardware store. Some multimeters may not have cutoff values listed on them. In that case, just switch the meter to the AC voltage setting and continue.
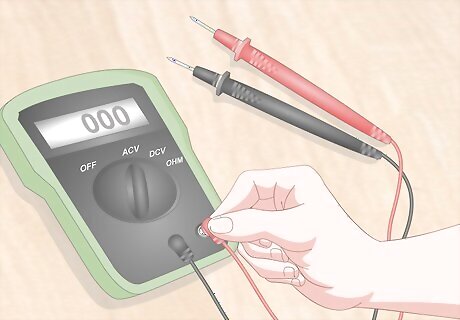
Plug the red and black leads into the matching ports on the multimeter. Your multimeter will have red and black leads that connect to the ports on the bottom of the machine. Attach the end of the red lead to the port labeled with “V”, “Ω,” or “+” and plug the black lead into the port labeled “COM” or “-” so you can check your outlet. Avoid swapping the leads since you could cause the multimeter to short circuit.Warning: Don’t use any leads that have cracks, damage, or exposed wires since you could get electrocuted while you’re testing your outlet.
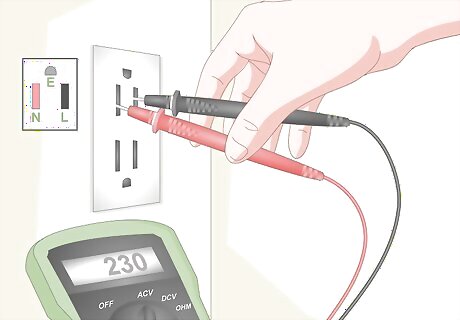
Take a reading while the leads are in the live and neutral ports of an outlet. Hold the leads by the insulation wrapped around them so you don’t get shocked while you’re working. Push the pointed end of the red lead into the neutral port on the outlet, which is usually the smaller slot. Then put the end of the black lead into the live port, which is the larger and longer slot on your outlet. Check the voltage reading on the multimeter and write it down. Start by testing your multimeter on an outlet that you know works so you can see what a normal reading looks like. The ports where you attach the leads may differ depending on the type of plug you’re using. For example, on a type D or M plug, the live port is on the bottom right while the neutral port is on the bottom left.
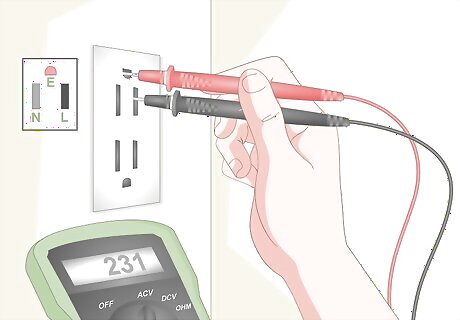
Check the voltage when the leads are inserted to the live and earthing ports. Take the red lead out from the neutral port and carefully place it inside the earthing port, which is either a circular or U-shaped hole on the top or bottom of the outlet. Check the reading on the multimeter to see how many volts travel between them. Write down the measurement so you can compare your readings. If your home has earthing, then the reading should be the same as or within 5 volts of the first reading you took. If the reading between the live and earthing ports is close to 0, then you don’t have any earthing on that outlet. If your outlet doesn’t have an earthing port, then it isn’t connected and does not have earthing.
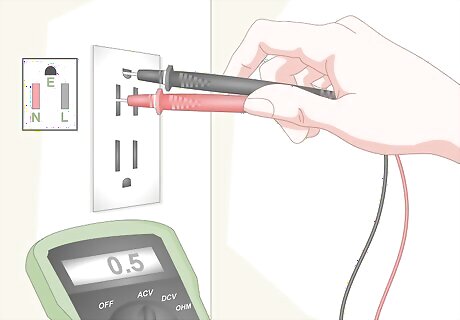
Test the voltage between the neutral and earthing ports on the outlet. Place the red lead in the neutral slot and the black lead into the earthing port to check the reading. The volts listed on the multimeter will be a small amount compared to the other readings you’ve taken. Write the third reading down so you know how much electricity is going between the ports. You don’t need to test the neutral and earthing ports if you’ve already determined you don’t have earthing on the outlet.
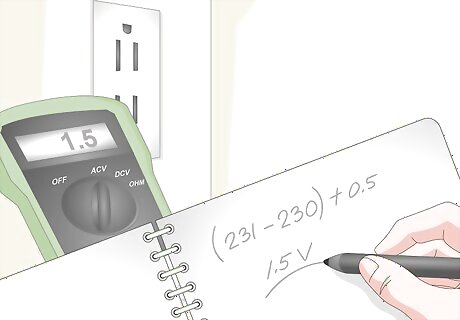
Calculate the total leakage on your outlet to see if it's less than 2 V. The leakage is the number of volts that transfer from your earthing port to the outlet. Subtract the first reading you took (live to neutral) from the second (live to earthing). After solving that, add the number of volts from your third reading (neutral to earthing). If the number is greater than 2 V, then your earthing may be faulty. Otherwise, the outlet is safe to use. For example, if your first reading was 230 V, the second reading was 231 V, and the third was 0.5 V, then your formula would be (231-230) + 0.5, which simplifies to 1.5 V. If you have faulty earthing, contact a licensed electrician to look at your electrical system to find the problem.


Comments
0 comment