
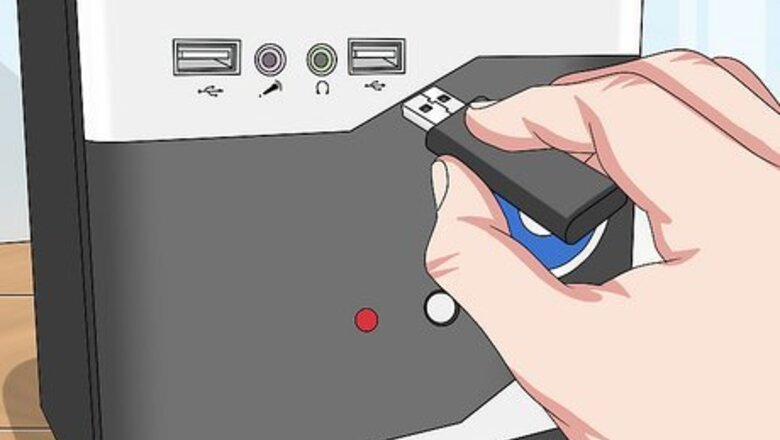
Insert a blank USB flash drive.

Find a USB port on your computer, and make sure your USB flash drive is plugged in. Your flash drive must be able to hold at least 16 GB. Your flash drive must be able to hold at least 16 GB. Creating a recovery drive will erase everything in your flash drive, so make a backup if there's anything on the drive you want to keep.
Open the Windows search bar.

Press "Windows key + S" to open the Search bar. If you see a bar that says "Type here to search" next to the Windows Start menu, just click the typing area instead.
Type Create a recovery drive into the search bar.
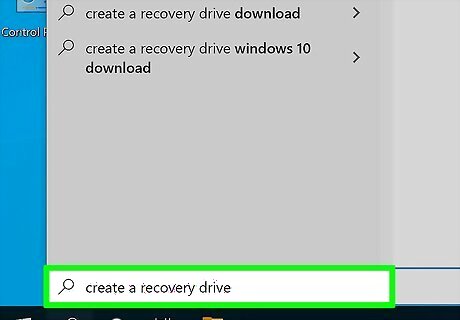
A list of results will appear. You will see "Create a recovery drive" as one of the options.
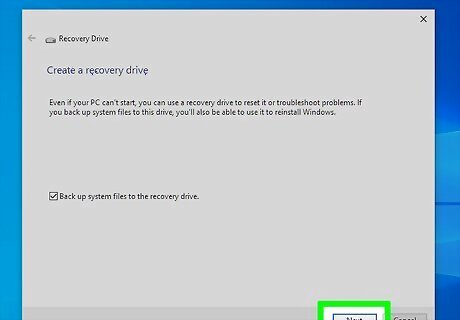
Click "Create a recovery drive."

It should be the first option. This opens the Recovery Drive setup wizard in a new pop-up window. You'll notice that "Back up system files to the recovery drive" is checked by default—leave the checkmark intact, as you'll need those system files on the recovery drive.
Click "Next" to continue.
Click Next. Windows will then scan your PC for connected USB flash drives.
Choose your USB flash drive and click "Next."
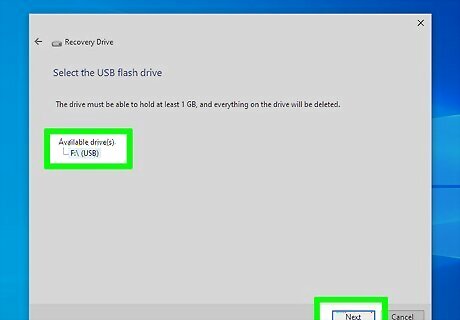
Select your flash drive and click Next. This starts the wizard.
Click "Create."

Click the Create button. This will erase everything on your USB flash drive, reformat it, and add the files necessary to restore your PC. Creating a recovery drive may take anywhere from a few seconds to a several minutes depending on your computer.


Comments
0 comment