
Vowels in BSL/AUSLAN and NZSL
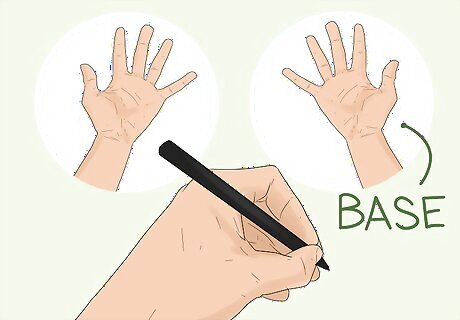
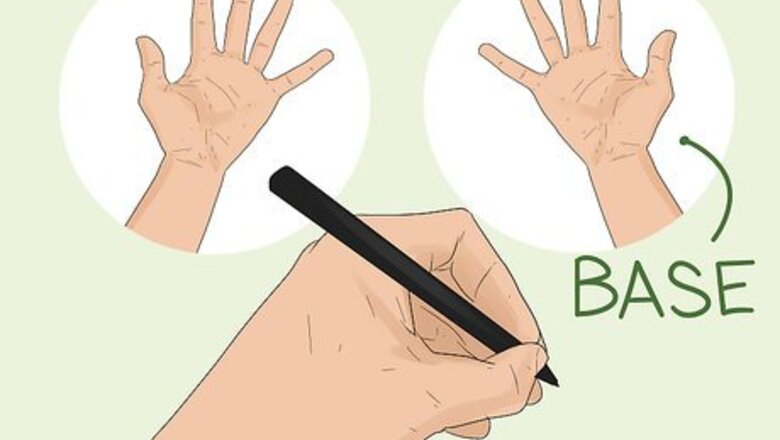
Know which hand to use. In the British, Australian and New Zealand Sign Languages, your dominant hand is used to sign onto the fingers of your non-dominant hand, which is forms the “base” for your vowels. If you are left handed, use your right hand as your base hand. If you are right handed, use your left hand as your base hand to sign the vowels. To sign vowels, you are required to point with your index finger onto the fingers on your other hand, so ensure that you have enough dexterity to carry out these signs.
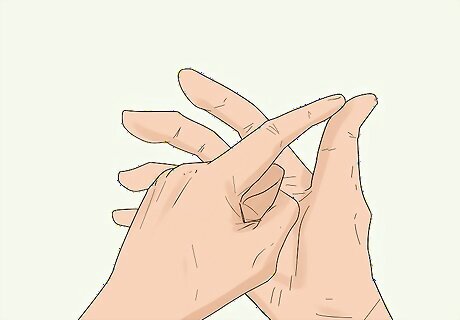
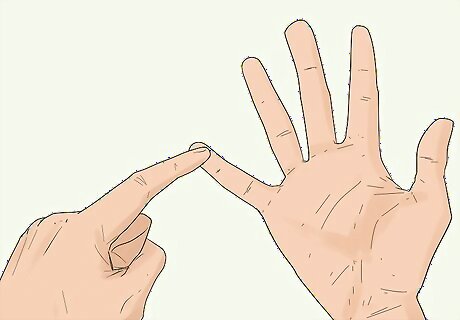
Sign the letter A. Hold out the palm of your non-dominant hand, so that it is mainly turned side-on, but is angled slightly outward to the person in front of you. Using the index finger on your dominant hand, place the fingerprint section onto the thumb of your non-dominant hand. Lean your thumb slightly forward, so that the other person is clear that you are signing the letter A. Make sure that the other remaining fingers on your non dominant hand stay facing upward and are evenly spread out so that the sign can be easily understood.
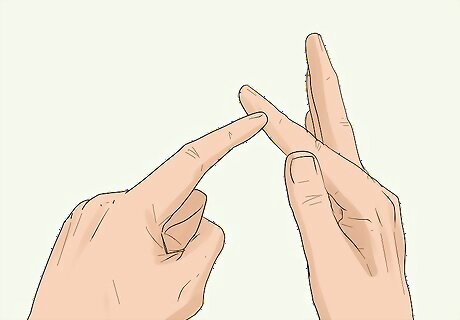
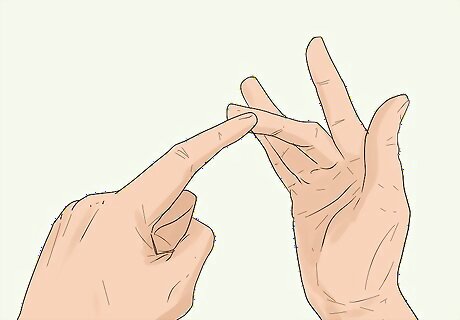
Sign the letter E. Hold out the palm of your non-dominant hand, so that it is mainly turned side-on, but is angled slightly outward to the person in front of you. Using the index finger on your dominant hand, place the fingerprint section onto the index finger of your non-dominant hand. Lean your index finger on your non dominant hand slightly forward, so that the other person is clear that you are signing the letter E. Make sure that the other remaining fingers on your non dominant hand stay facing upward and are evenly spread out so that the sign can be easily understood.
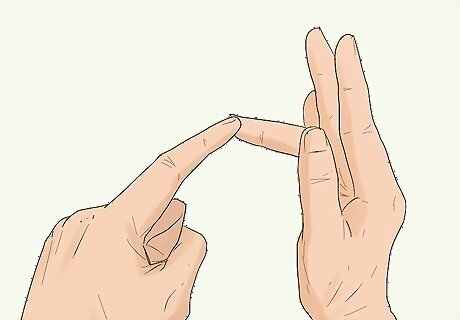
Sign the letter I. Hold out the palm of your non-dominant hand, so that it is mainly turned side-on, but is angled slightly outward to the person in front of you. Using the index finger on your dominant hand, place the fingerprint section onto the middle finger of your non-dominant hand. Lean the middle finger of your non dominant hand slightly forward, so that the other person is clear that you are signing the letter I. Make sure that the other remaining fingers on your non dominant hand stay facing upward and are evenly spread out so that the sign can be easily understood.
Sign the letter O. Hold out the palm of your non-dominant hand, so that it is mainly turned side-on, but is angled slightly outward to the person in front of you. Using the index finger on your dominant hand, place the fingerprint section onto the ring finger of your non-dominant hand. Lean the ring finger on your non dominant hand slightly forward, so that the other person is clear that you are signing the letter O. Make sure that the other remaining fingers on your non dominant hand stay facing upward and are evenly spread out so that the sign can be easily understood.
Sign the letter U. Hold out the palm of your non-dominant hand, so that it is mainly turned side-on, but is angled slightly outward to the person in front of you. Using the index finger on your dominant hand, place the fingerprint section onto the pinky of your non-dominant hand. Lean your pinky on your non dominant hand slightly forward, so that the other person is clear that you are signing the letter U. Make sure that the other remaining fingers on your non dominant hand stay facing upward and are evenly spread out so that the sign can be easily understood.
Vowels in ASL/ISL

Understand that ASL and ISL vowels are not the same as vowels in AUSLAN and BSL. In the British, New Zealand and Australian Sign Languages, the vowels require both hands, however, in American Sign Language and Irish Sign Language, vowels are signed only using your dominant hand. Other letters of all English-based Sign Languages are not universal and each country may have their own unique or varied signs for the other letters of the alphabet, so make sure to research the correct signs for where you live.

Sign the letter A. With your palm facing upward and directly towards the other person, clench all of your fingers as if you were making a fist. Leave your thumb facing upwards.

Sign the letter E. With your palm facing upwards and directly in front of the person you are signing to, cross your thumb accords your palm. Then, bend all of the remaining fingers just enough so that your fingertips touch your thumb. Do not cross your thumb over the top of your other fingers, as this would be signing the letter S instead. Make sure that it is clear that you are signing the letter E.
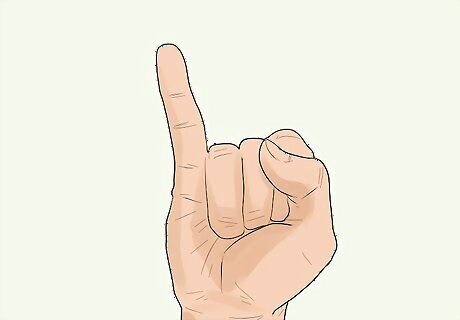
Sign the letter I. With your palm facing upwards and directly in front of the person you are signing to, bend all your fingers except your pinky finger into a fist. Leave your pinky facing upwards to form the letter I.

Sign the letter O. With your palm facing upwards and side on to person you are signing to, make an ‘O’ shape with all of your fingers, including your thumb. This should be round and should form a visible circular shape.
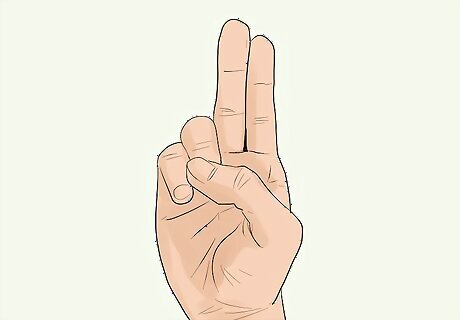
Sign the letter U. With your palm facing upwards and directly in front of the person you are signing to, bend your ring and pinky fingers into a fist, and cross your thumb over them. With your index and middle fingers, keep them pointing upwards, and bring them together so that there is no gap between the two fingers.


Comments
0 comment