
views
Making a Cartoon Boy

Draw a large circle to make the boy's head. Use your pencil to lightly draw a circle that's as big you want the cartoon head to be. Most cartoon characters have heads that are larger than their bodies, so don't be afraid to exaggerate the size of the head. If you prefer, make an oval instead of a circle. This gives the boy more of a pointed chin. If you need help drawing a perfect circle, place a small glass on your paper and trace around it.
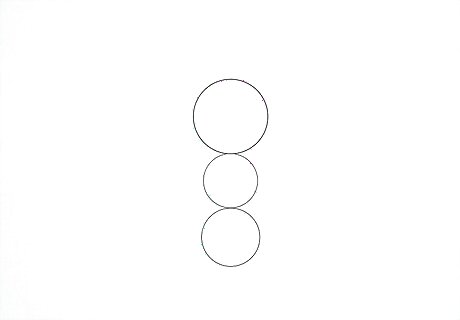
Make 2 small circles below the head to outline the torso. Sketch a circle that's smaller than the head directly below the head. Then, make another circle below the one you just drew. You can make these circles any size, depending on what shape you're making the boy's torso. For example, to make a pear-shaped body, draw the bottom circle a little larger than the center circle. Customize your cartoon by creating a different shape for the torso. For example, make a vertical rectangle or a small square to give your cartoon a different body shape.
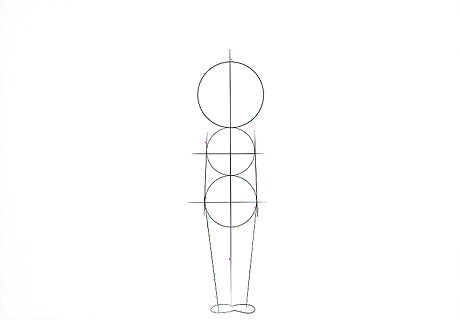
Draw a vertical and horizontal guideline to help you draw symmetrical features. Place a ruler vertically through the outline you've drawn. Lightly draw a straight line from the top of the head through the bottom shapes. Extend the line below the bottom shapes so you can use the guideline to make the legs. Then, draw a straight horizontal line through the center of the head. If you're not concerned about making the drawing perfectly symmetrical, skip this step and begin drawing the boy's features.
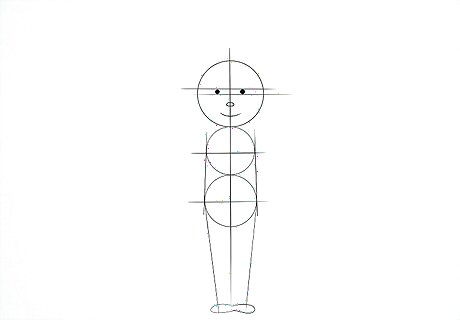
Sketch the facial features for the boy. Since you're drawing a cartoon, you can make the facial features as simplistic or detailed as you like. To make simple features, draw basic shapes, such as a small horizontal oval for the nose, 2 small circles for the eyes, and a curved line for the mouth.Tip: Use the guidelines to place the features symmetrically on the face. For example, draw the eyes on the horizontal guideline you drew so the vertical guideline is in between them. To make more detailed features, shade in the irises and pupils before you draw eyelashes. Keep in mind that boys' eyelashes are usually shorter than girls' eyelashes.
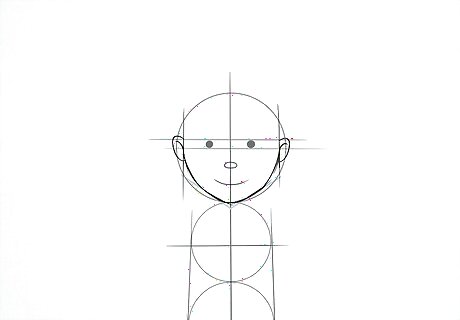
Adjust the shape of the jaw and sketch an ear on each side of the head. Decide if you want to leave the cartoon boy's jaw round, which can make him look young. To make your boy look older, draw a V-shape along the jawline to make the chin look pointed. This also defines the jawline so the face looks more muscular. To draw a simple ear, make a half-circle on each side of the head where it meets the horizontal guideline. You can leave the ear a simple shape or draw a small horizontal line that curves down from the center of the ear shape. This makes the ear look a little wrinkled.
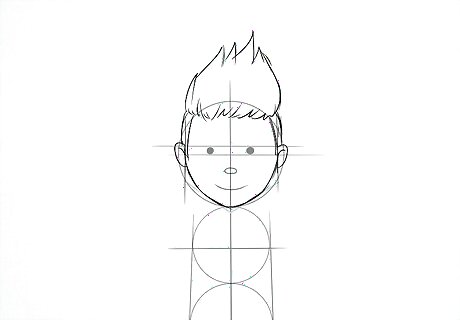
Give your cartoon boy a distinct hairstyle. Cartoon boys usually feature shaggy or spiky hair. To draw noticeable hair, lightly sketch the hairline where it meets the top of the head. Then, make pointed segments of hair that move in the same direction. Draw the hair as long or large as you like. Remember that you can customize your cartoon. If you want the boy to have short hair, sketch thin short strokes over the top and sides of the hair instead. Consider drawing a hat if it matches the personality of your cartoon. For example, draw a beanie, backward baseball hat, or fedora.
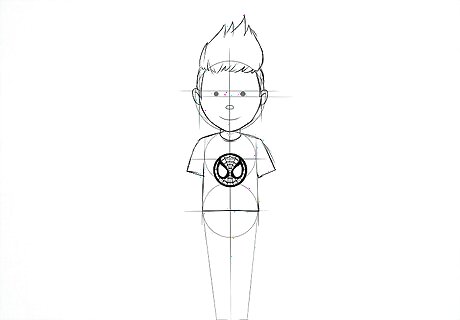
Draw in the torso with a shirt. Press your pencil firmly on the paper to go over the outline for the torso. Draw a smooth line to connect the sides of the circles and make a horizontal line along the bottom that connects these vertical lines. Then, draw a vertical line near the top to create the neckline. This outline defines the torso and makes a simple shirt shape.Tip: Draw the logo for a band or sports team on the center of the shirt to give your cartoon a little personality. Sketch a V-shape to make a deeper neckline. Add short sleeves, long-sleeves, or capped sleeves to the shirt if you like.
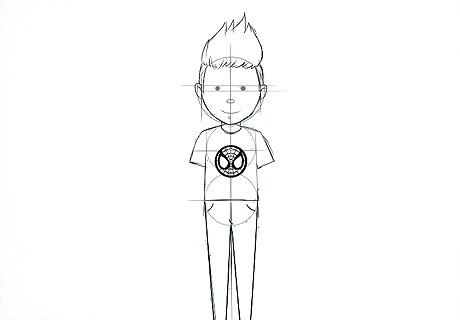
Make pants and shoes for the cartoon boy. Sketch 1 pantleg that extends from the bottom of the shirt and tapers down on 1 side of the vertical guideline. Try to make the leg as long as you made the torso and repeat this for the other side so you have a narrow upside-down V-shape between the legs. To draw the shoes, make a small oval at the bottom of each foot. To give the boy's pants more detail, add several pockets on each side of the pants. You could also draw a belt around the waist.
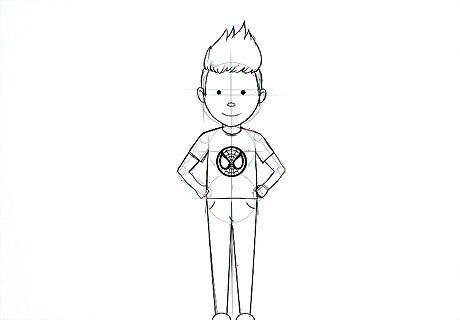
Draw arms off to the side of the torso. You can make the cartoon boy in any pose, so decide how you want to position his arms. You could sketch 2 parallel lines coming from the shoulder to the bottom of the shirt if you want his arms to hang by his sides. If you prefer, draw an arm bent at the elbow in a 90-degree angle so you can draw the hand resting on his hip.
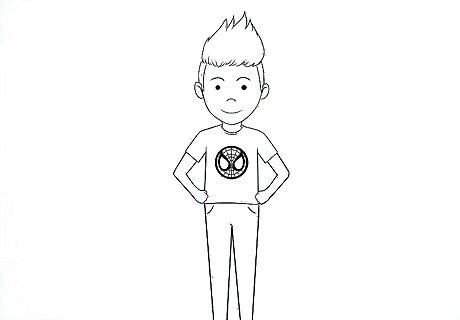
Make the fingers of his hands. Many cartoons only have 4 fingers so they're faster to draw. Sketch 4 or 5 fingers on each hand keeping them rounded near the fingertips. If you don't want to draw individual fingers, sketch a small circle at the end of the arm so it looks like a closed fist. You could also draw the boy's arms so it looks like his hands are tucked into his pockets.
Drawing a Realistic Boy
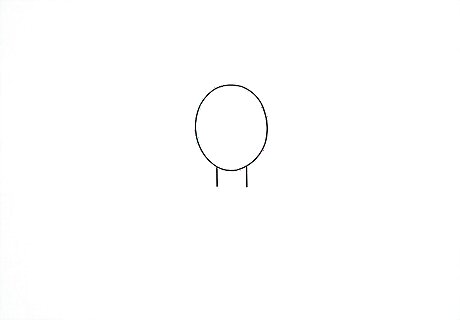
Draw an oval for the head with 2 short vertical lines coming down for the neck. Lightly sketch a vertical oval for the head and make it as large as you want the boy's face to be. Then, make a short vertical line that extends down from each side of the bottom of the oval. This makes the neck where it meets the jaw. Make each vertical line about 1/3 the size of the facial width. Position each vertical line so the space between them is around 1/2 the width of the face.
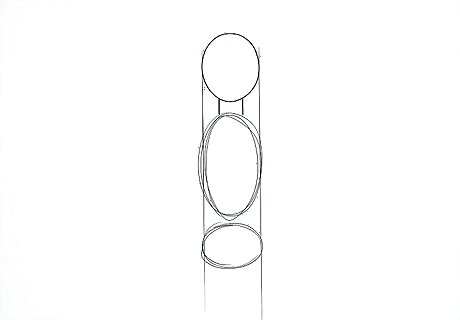
Sketch 2 horizontal ovals for the chest and bottom of the torso. Draw a horizontal oval so the top line connects to the necklines you just drew. Make the oval's width the same as the width of the head and make the length 2 times as long as the head's length. Then, draw an oval that's 1/2 the size of the chest oval to make the bottom of the torso. Leave a gap the size of the chest oval in between the chest oval and the bottom torso oval.
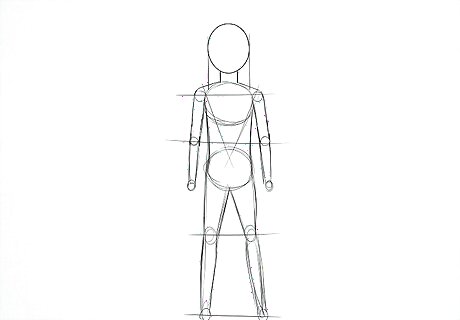
Draw straight lines for the arms, legs, and torso. Use a ruler or freehand draw a straight vertical line from the center of the chest down to the bottom of the torso. Then, draw a straight vertical line from the shoulder point down to the bottom of the torso. Place your pencil on the bottom of the torso near the side and draw another straight line down to make the leg.Tip: Draw each line so it bends slightly in the middle to make it look like joints are bulging out. Repeat the straight line for the arm and leg on the opposite side of the boy's body. Make the length of the leg lines about the same length as the top of the chest to the bottom of the torso.
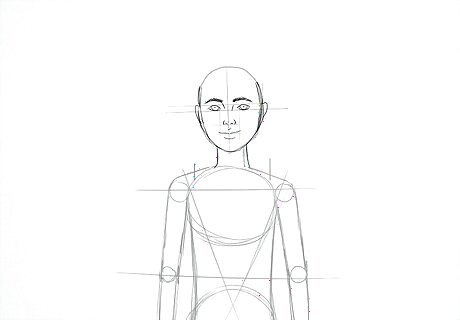
Sketch the eyes, nose, and mouth of the boy. Place the eyes near the middle of the face and leave a gap that's the size of 1 eye in between them. Make the eyes as expressive as you like and draw the lashes so they're a little shorter than girls' lashes. Draw a nose that's about as wide as an eye and position it so it's centered below the eyes. Then, make a mouth that's slightly larger than the width of the nose. You can center the mouth below the nose or draw the mouth so 1 side is raised in a smile or smirk. Keep in mind that boys' and girls' features are very similar, especially in younger kids. To make the boys' features stand out, make thicker, darker eyebrows and make sharper lines for the jaw.
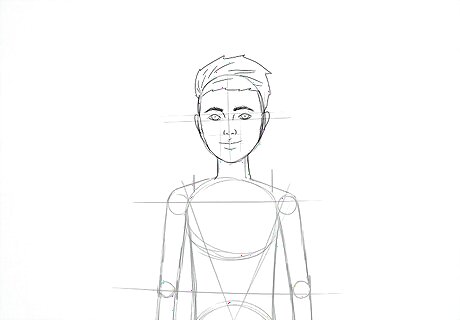
Give the drawing a distinctive hairstyle. Decide the overall look you want your drawing to have. You might give him a short, sleek hairstyle or a loose, messy look with longer hair. Keep your wrist loose to draw light, wispy strokes that look like individual hairs. It's fine to have a few sticking out of place to make the drawing look realistic. Remember that some hairs might fall into the face or hang down near the eyes. Also, the hairline height is a stylistic choice, so feel free to draw it as you want. You could draw the boy's hair any length! Play around with drawing a variety of hairstyles to see what works for your character. For example, draw fine hair that's swept over the forehead or wavy shoulder-length hair.
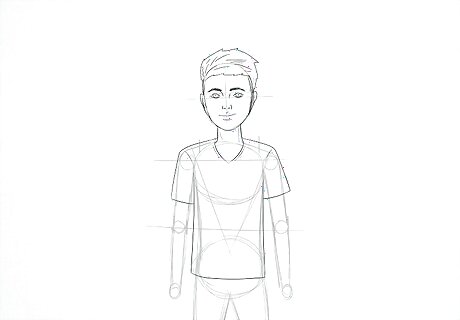
Draw the shirt over the oval shapes in the middle of the body. Press firmly over the 2 ovals you drew in the center of your drawing. Follow the curved line of the top oval and make the sleeves. Then, go back and adjust the neckline to make it V-shaped or curved. Draw straight vertical lines down each side of the shirt and sketch a horizontal line at the bottom of the torso to connect them. To personalize the drawing, make a T-shirt, long-sleeved shirt, or jacket.
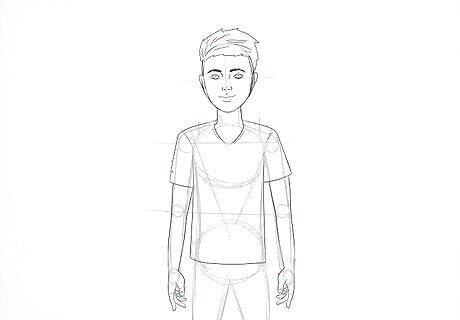
Draw arms that are straight at his sides or slightly bent. Lightly make a small circle where you want the elbow to be. Draw 2 parallel lines that run from the sleeve to the sides of this circle leaving a gap between them for the arm. Make the arm as thin or thick as you like. Then, continue the parallel lines until you reach the bottom of the straight guideline you drew earlier. Sketch individual fingers for the hand or draw a closed fist. Repeat this for the other arm or draw the opposite arm in a different position. Make the forearm taper a little as you get closer to the hand.
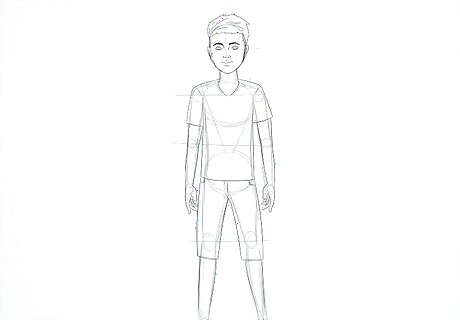
Sketch pants or shorts with legs. Decide if pants will cover the boy's legs or if you'll draw shorts that cover 1/2 of them. Lightly draw a small circle where each knee is located and draw a darker vertical line from the side of the shirt down to the knee. Extend the line down to the bottom of the guideline if you're making pants. Then, draw a short horizontal line at the bottom of the shorts or pants. Draw the inner sides of the clothes so the points meet at the crotch. Draw the gap between the legs so it forms a narrow upside-down V-shape.
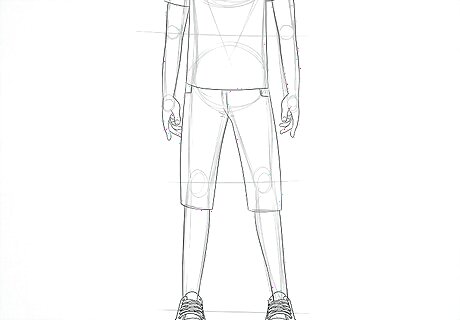
Make shoes to cover the feet. Sketch a small oval at the base of each foot. Draw over the top line so it curves down towards the toes. Then, go back and add laces to the top of the shoe. Make the bottom of each shoe flat unless you want to add a heel for a boot. You can draw the shoes so they're pointed straight ahead or turned slightly to the side.
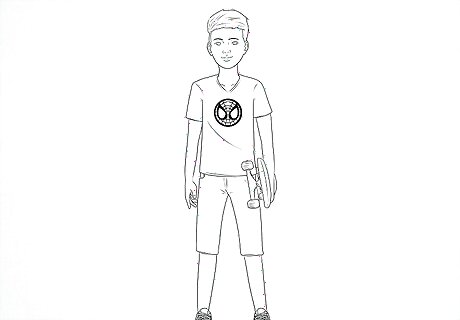
Add accessories or details to the clothing. To make your drawing more interesting, sketch a logo or fun image on the center of the shirt. If you're drawing an older boy, consider drawing headphones or a bag slung loosely over his shoulder. Add a backward baseball hat or show him holding a skateboard by his side. To make the cartoon boy look young, choose a cartoon character or simple figure, such as a dinosaur or rocket for the detail of the shirt.






Comments
0 comment