

Drawing While Presenting (PowerPoint 2019 and Later)

Open your presentation in PowerPoint. You can do so by double-clicking the presentation file on your PC or Mac.

Click the Slide Show tab. It's at the top of PowerPoint. If you're using Windows, make sure the box next to "Use Presenter View" in the toolbar is checked.
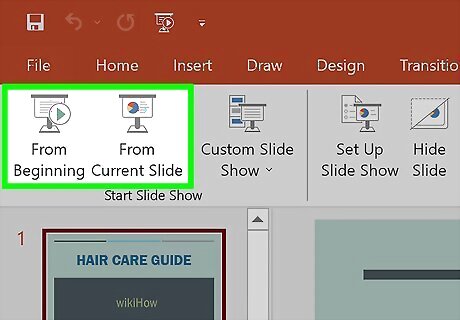
Start the presentation. You can click Play from Start or From Beginning to begin the slide show.
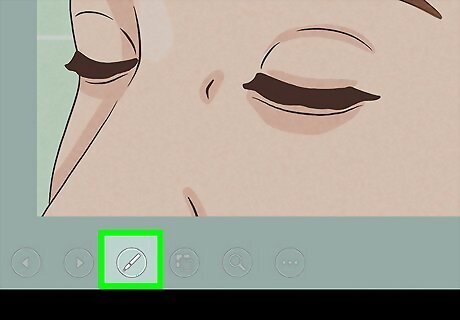
Click the Pen icon. You'll see this icon at the bottom-left corner of the slide. A list of drawing tools will expand.

Click Pen on the menu. This selects the Pen tool, which is the main drawing tool. If you'd rather use a translucent drawing tool, go for Highlighter instead.

Select an ink color. The default color is red, but you can change it if you'd like. To do so, click the pen icon at the bottom-left again, select the Ink color or Pen color option on the menu, and then click the color you want to use.

Draw with your mouse, finger, or digital tablet. Now you can draw on the current slide with the selected option. The options selected will stay the same as you proceed through the slide show. You'll be asked if you want to save your markings after the slide show is finished.
Drawing While Creating (PowerPoint 2019 and Later)

Open your presentation in PowerPoint.
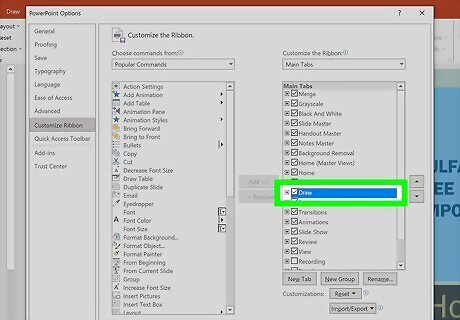
Enable the Draw tab if it's not present (Windows only). If you don't see a tab called Draw at the top of PowerPoint, you'll need to enable it. Here's how: Click the File menu at the top-left and choose Options. Click Customize Ribbon. Click Draw.
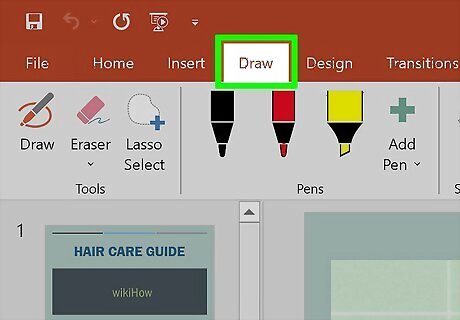
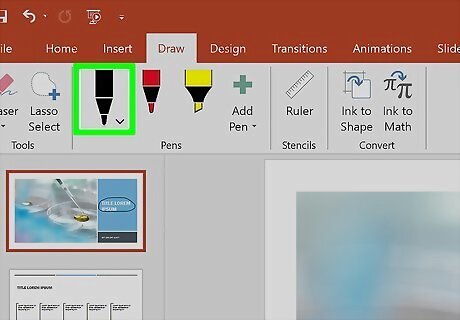
Click the Draw tab. It's at the top of Word. This displays the Draw toolbar.

Select one of the drawing tools. The options are in the Draw toolbar at the top. You can choose the pencil, one of the pens, or the highlighter, to get started.
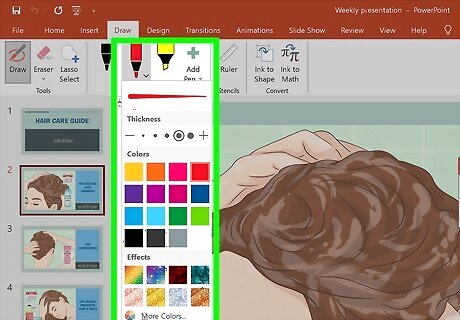
Click the drawing tool again to set your preferences. Clicking it a second time allows you to change its color and size, as well as choose from a gallery of special effects.
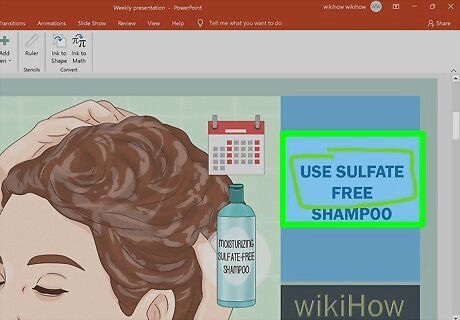
Draw with your finger, mouse, or tablet. To start drawing, just click and drag the mouse, finger, or drawing tool. If you're using a trackpad on a Mac, you may find it helpful to turn on the "Draw with Trackpad" feature, which allows you to draw without having to hold down the mouse button at the same time. Click its switch on the Draw tab to toggle the feature on or off. You can switch between tools, colors, and sizes as you continue working on your illustration. If something didn't come out as you intended, click the down-arrow next to the eraser on the toolbar to find a variety of eraser tools. You can also use the Undo keyboard shortcut to undo your last stroke—just press Cmd + Z (Mac) or Ctrl + Z (Windows) to do so.
Drawing While Creating (PowerPoint 2016 and 2013)
Open your presentation in PowerPoint. As long you have a touch-enabled PC or a compatible drawing tablet attached, you can use PowerPoint's inking tools to freehand draw on your slides. You can use your mouse to draw if you'd like, but your PC much be touchscreen-compatible to use this method. If your PC doesn't have a touchscreen or a compatible drawing tablet connected to the system, these tools will not work.
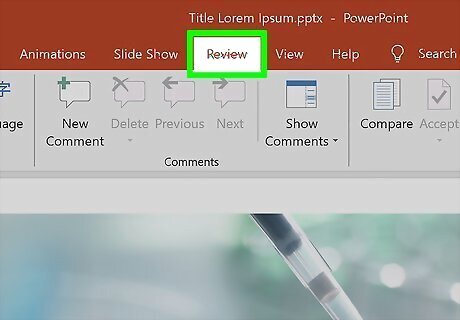
Click the Review tab. This is on the menu bar at the top of PowerPoint.
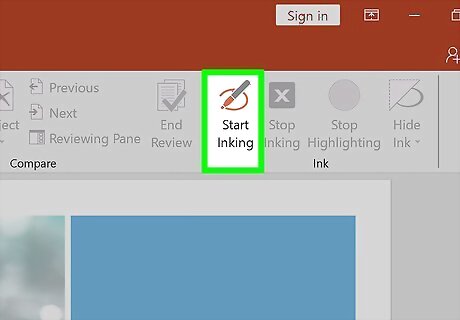
Click Start Inking. This option is in the toolbar at the top of the screen. If the optioned is grayed-out, this won't work on your computer.
Use the “Pen” to draw free-hand. Click the pen icon on the left side of the toolbar to choose this tool, which lets you make basic line drawings. You can use your touchscreen, touchpad, digital tablet, or mouse to draw with any of these tools.

Use the “Highlighter” to draw transparent lines. This tool, which is to the right of the pen tool on the toolbar, acts as a thicker version of the pen with transparency. It allows you to ink over text or other drawings without covering them.
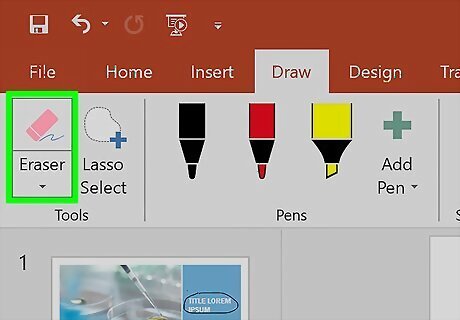
Use the “Eraser” to remove drawn elements. After selecting, click and drag the cursor over other lines to erase the drawn content. Click the down arrow on the “Eraser” icon in the toolbar to select an eraser thickness.
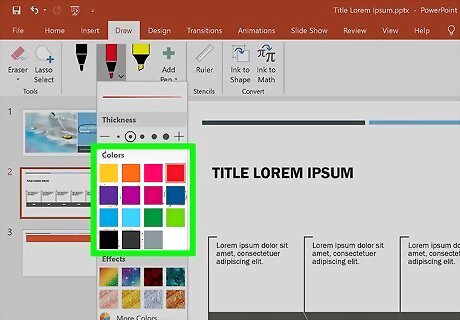
Change the tool color. Select the “Color” dropdown in the “Pens” section of the toolbar to select from a color palette for different pen/highlighter colors.
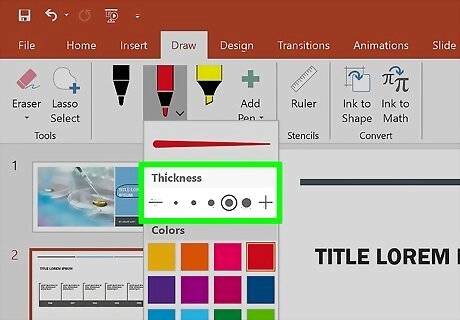
Adjust your tool thickness. Select the Thickness dropdown in the “Pens” section of the toolbar to select different widths of your pen/highlighter marking. You can also select color/thickness presets from the menu to the left of the “Color” and “Thickness” dropdowns.
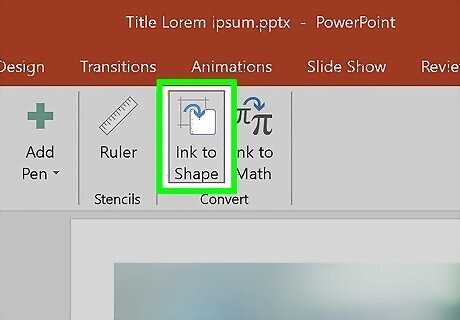
Click Convert to Shapes (optional). This will auto-adjust any shape approximations into the detected shape. For example, drawing a circle, will adjust the lines to be a perfect circle. After choosing this option, draw the shape you want to make, and PowerPoint will automatically adjust it for you. The feature will also approximate a shape based on the number of lines drawn (square, hexagon, etc.).

Click the Lasso Select tool to select and move drawn items. This option in the toolbar allows you to click and drag drawn items to move them around on the screen.
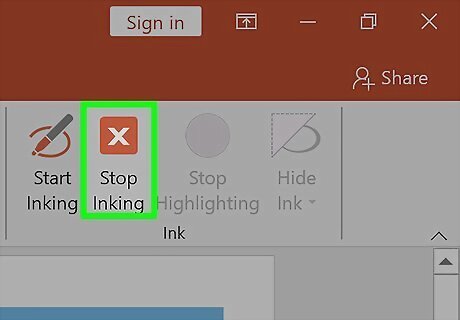
Click Stop Inking when you're finished drawing. This button will automatically returns to the regular PowerPoint Select tool after making edits with the pen or highlighter. If no edits were made this button will return you to the “Review” tab.


Comments
0 comment