
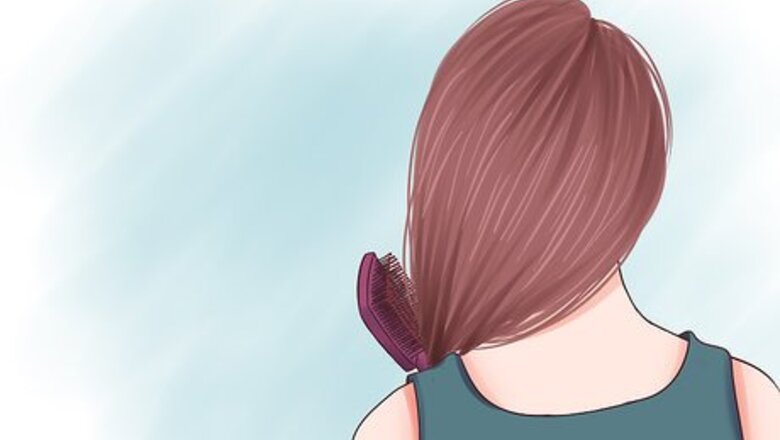
Making a Side Braid
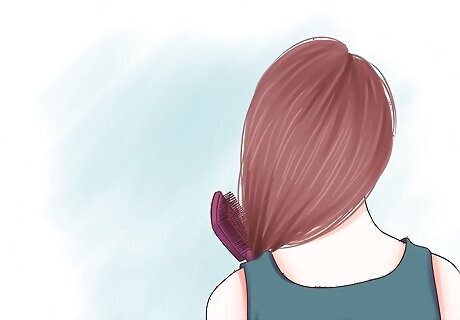
Brush your hair to the left or right hand side. Either side works just as well.
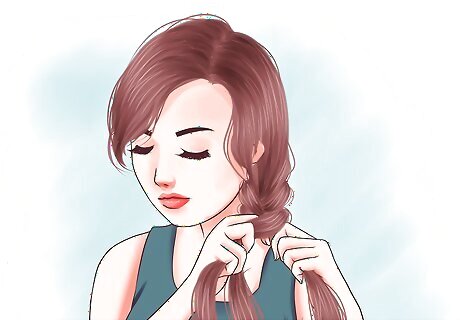
Braid your hair over your shoulder. Keep it loose or tight, either way is great.
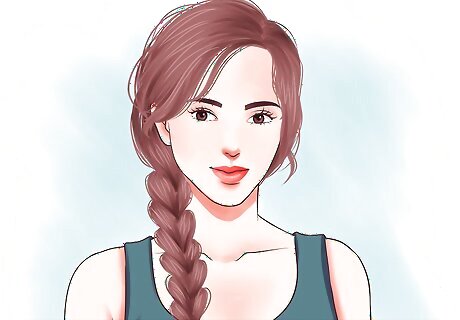
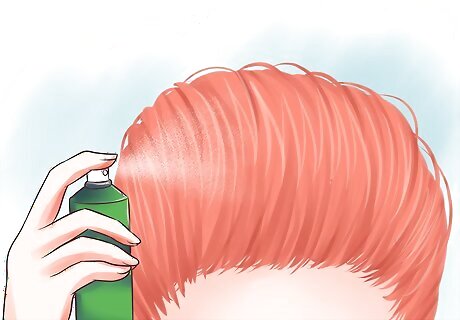
Use hairspray and bobby pins to keep it secured. You can also try hair spraying the bobby pin(s) if any hairs are still out of place or won't stay pinned, they tend to grip better. This will help ensure your braid won't fall out over the course of the day.
Using a Crossover Clip
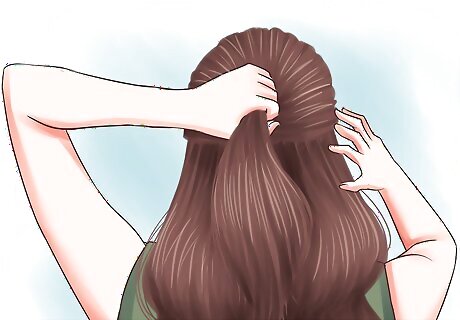
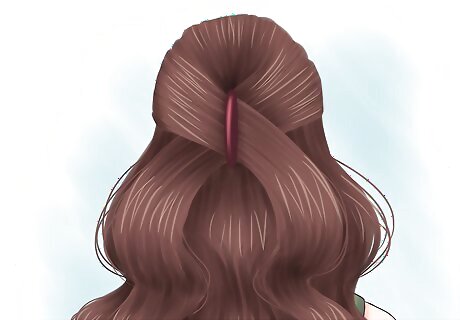
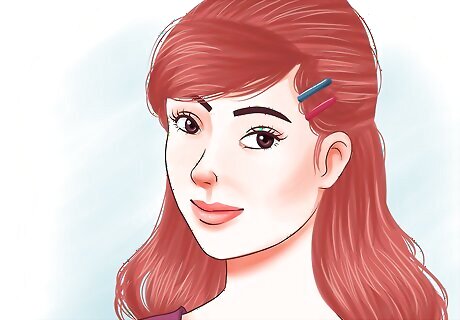
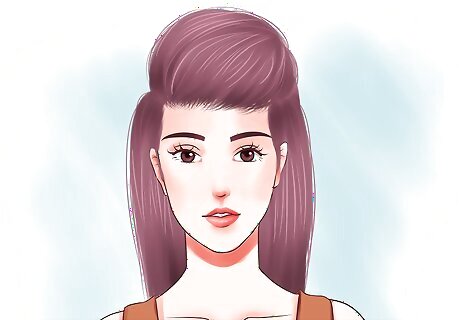
Gather two sections the top of your hair to pull back. Choose strands from around your face for a pretty look.
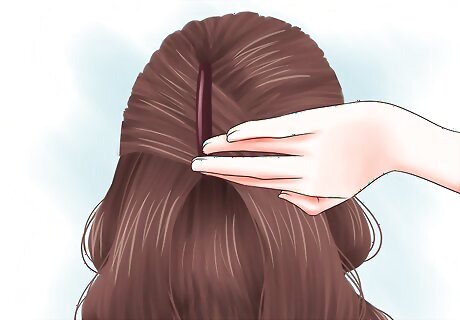
Cross the sections at the back of your head. Pin them back with a crossover clip. Position the clip horizontally to clip back the strands of hair.
Leave the rest of your hair down. You can curl it, straighten it or just let it stay natural. If you decide to curl or straighten you hair, make sure you use products for heat protection so you won't damage your hair.
Fashioning a Fishtail Braid
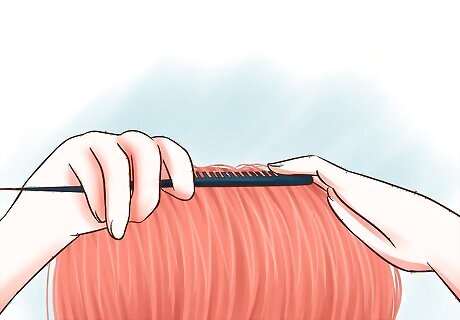
Divide your hair into two sections. Comb them out so that they're tangle-free.
Cross a strand from the right section to the left. Take a strand from the outside edge of the right section and cross it over. For a more intricate fishtail braid, use a very small strand of hair.
Cross a strand from the left section to the right. Take a strand from the outside edge of the left section and cross it over, making sure it crosses over the strand from the other side.

Continue crossing strands back and forth. As you move down the length of your hair, you'll see the fishtail pattern emerging.
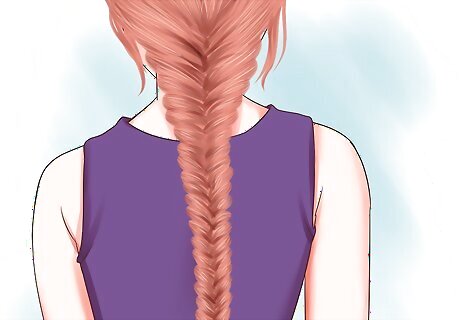
Secure the end with a ponytail holder.
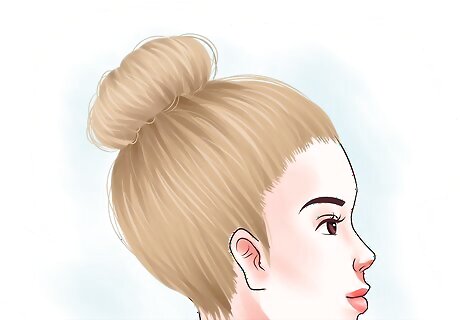
Creating Sock Bun Curls

Cut off the toe end of an old sock. A a long, thin sock will work best. Roll it down so that it resembles a donut shape. You can also find premade hair donuts at a lot of stores.
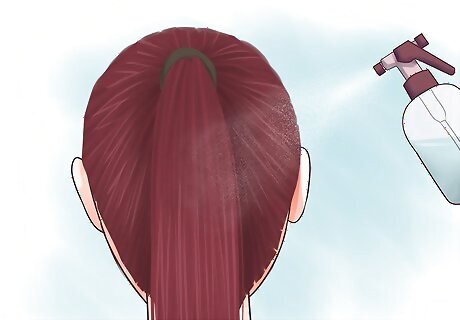
Spray your hair with water. This step will help your hair curl up while it dries in the sock bun.
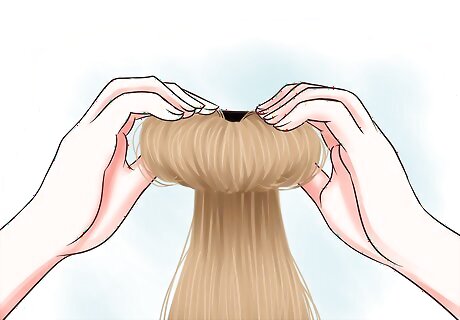
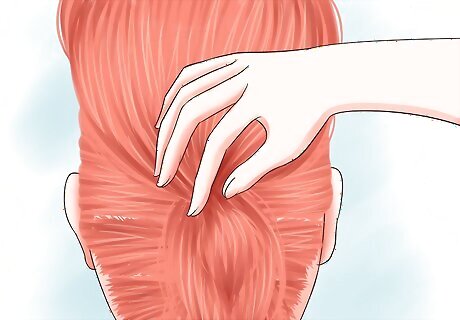
Pull your hair up into a high ponytail and secure it with an elastic. Pull your ponytail through the rolled sock.
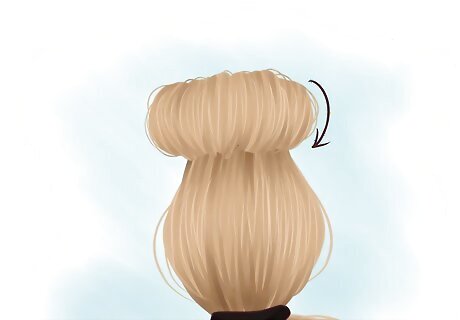
Smooth your hair over the sock. Start at the tip of your ponytail, and tuck the ends underneath as you go. Repeat this step as you slowly roll your hair over the sock.

Secure the bun at the base of your ponytail. You can use another hair elastic or bobby pins to secure.
Let your hair dry in the bun. You can sleep with it or wear it out in public.
Take your hair down. When you take it out of the sock, your hair will be slightly curly. Spray with hairspray to hold the curls.
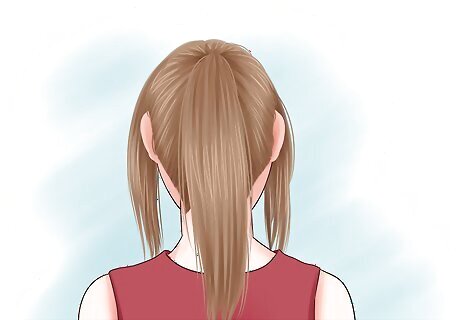
Tying-Up a Classic Ponytail
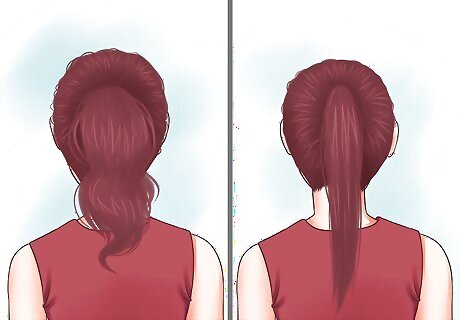
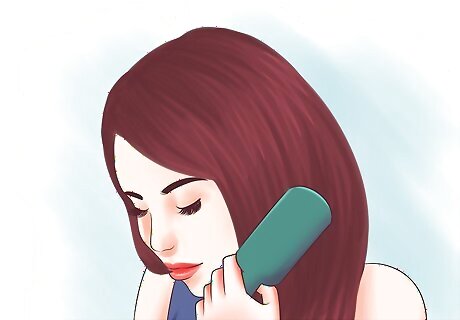
Choose between a messy ponytail or a sleek ponytail. If you desire a neat and sleek ponytail, brush your hair and consider straightening it before proceeding. If you want a messy ponytail, which is just as cute, leave your hair in its natural state.

Gather all your hair at the back of your head. Choose either a low, medium, or high height.

Comb your hair to prevent bumps. You can use a comb or simply run your fingers through your hair while you're gathering it into a ponytail. If you prefer to have a messy ponytail, you don't need to check for any lumps.
Secure with a hair elastic. Make sure the elastic is tightly wound so your ponytail doesn't fall out. Either keep it simple or add cute hair clips. Adding headband can also enhance the look.
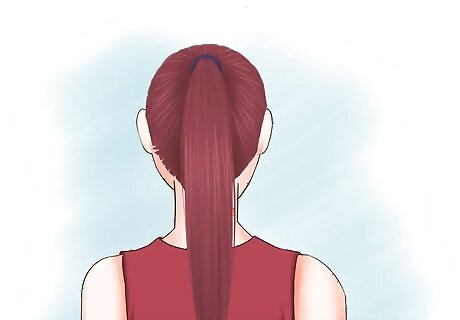
Try a cool twist. Take a thin strand of your hair from your ponytail. Wrap it around the hair tie and secure with bobby pins. This will cover up the hair tie for an elegant look. Bobby pins that match your hair color are recommended so that they are less noticeable. To spice up your ponytail, you can use a ribbon or bow instead of a proper hair tie. Another option is to cover your elastic with the ribbon.
Forming a Basic Bun
Try a messy bun. Secure your hair in a neat ponytail. Twist the actual hair around the base, where the hair tie is. Secure with another elastic and pull random pieces out.
Do a sporty bun. Pull your hair up like you are making a ponytail. However, when you put the elastic in, only wrap it fully twice. The third time, only pull the pony halfway through. Pull out random pieces, if needed.
Do a sleek, dressy bun. Take a small bit of hair at the top of your head. Do a bun as described in the second method. Split the rest of your hair in half. Take the right half and wrap it around your head, including the beginning bun. Do the same with the left. To make it look cuter, add flowers, bows, etc.
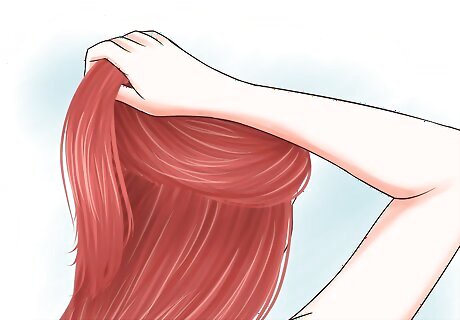
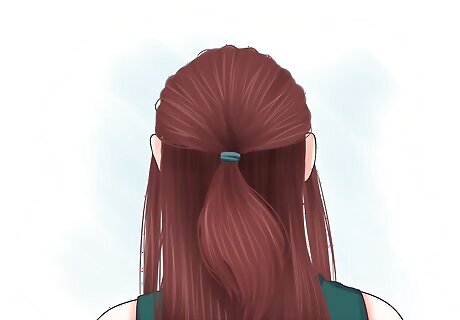
Creating a Half Ponytail

Divide your hair into two layers. There should be a top layer and a bottom layer.

Gather the top layer. Pull the top layer back and away from your face as if you were making a ponytail. Secure it with a hair tie.
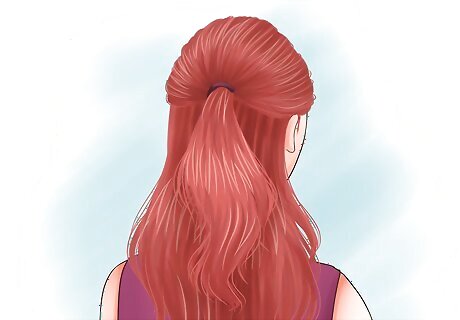
Leave the rest of your hair down. You can curl or straighten the rest of your hair, or just let it stay in its natural state.
Finish with some colorful clips or a headband.
Braiding Your Hair
Part your hair. Do with either a center part or a side part (for an older look). Brush your hair so it's tangle-free.
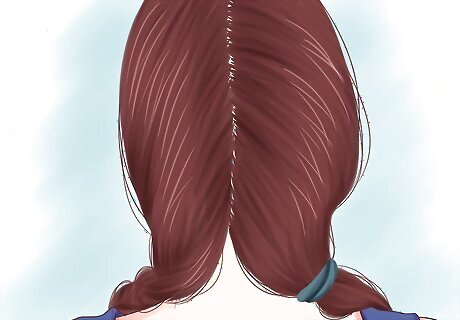
Divide your hair into two sections. Tie one section off for later using a clip or a ponytail holder.

Braid the first section and secure with an elastic. Do the same to the section tied off earlier.
Doing a Twirled Half Ponytail
Divide your hair into two layers. There should be a top layer and a bottom layer.
Gather the top layer and leave out two strands. Pull the top layer back and away from your face as if you were making a ponytail, but leave out a strand on either side. Secure it with a hair tie.
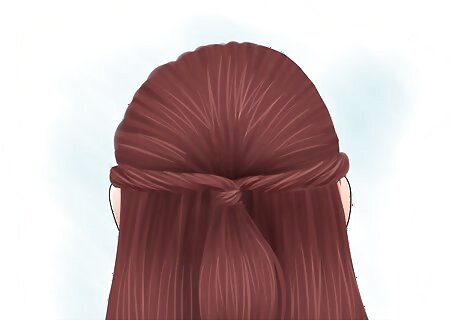
Twist the two strands. Twist them tightly so they stay twirled, then secure them to the top of your hair tie with hair pins.
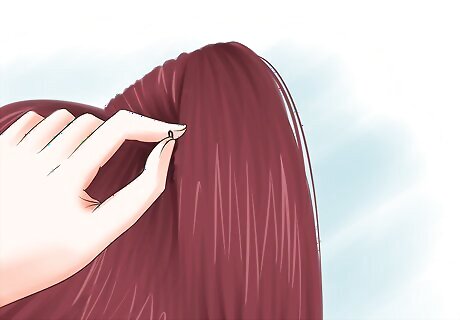
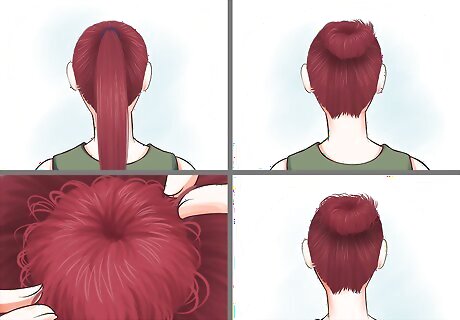
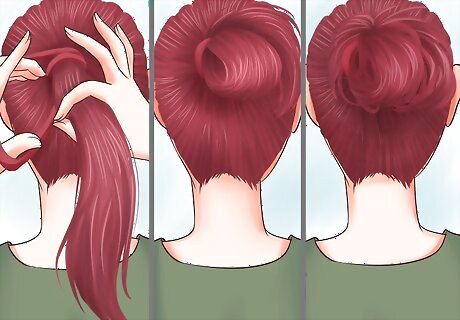
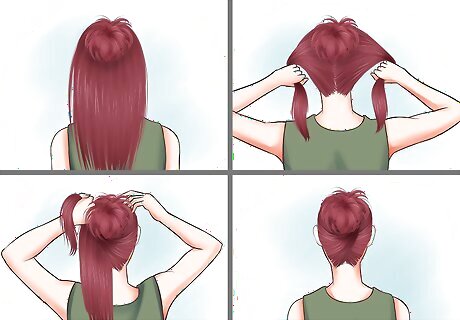
Making a Sock Bun
Cut off the toe end of an old sock. A a long, thin sock will work best. Roll it down so that it resembles a donut shape.

Pull your hair up into a high ponytail and secure it with an elastic. Pull your ponytail through the rolled sock.

Smooth your hair over the sock. Start at the tip of your ponytail, and tuck the ends underneath as you go. Repeat this step as you slowly roll your hair over the sock.
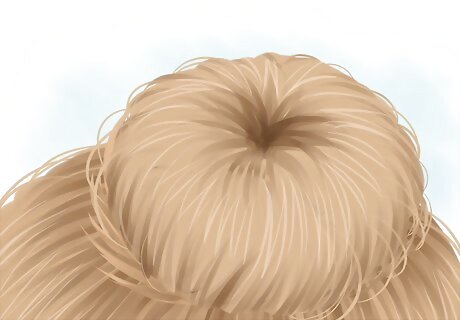
Secure the bun at the base of your ponytail. You can use another hair elastic or bobby pins.
Use hairspray to keep it from coming out.
Combing a Side Ponytail

Choose between a neat side ponytail or a messy side ponytail. For a neat one, you might want to take time to straighten your hair first. For a messy one, which is just as cute, just let your hair keep its natural texture.
Brush all of your hair to one side. It doesn't matter if your side ponytail is located on the left or the right.
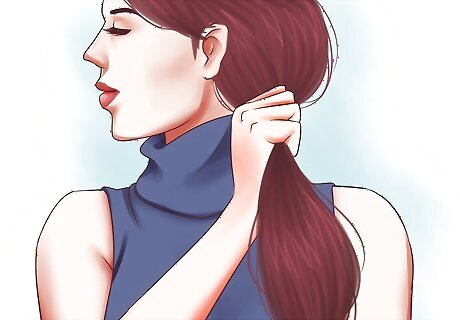
Gather your hair into a ponytail just below and behind your ear. The end of the ponytail should drape over your shoulder.
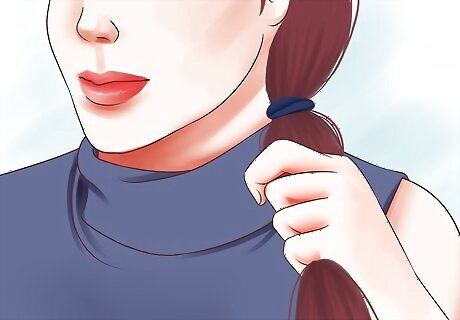
Secure with a hair elastic or rubber band.
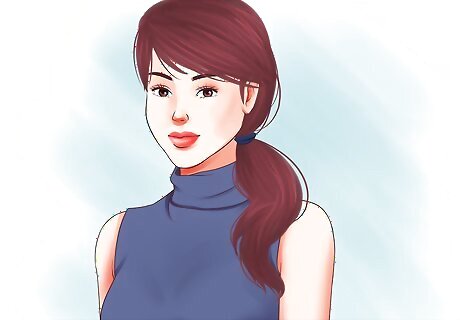
Use hairspray or hair pins if needed to secure loose strands.
Fashioning a Basic Quiff
Put your hair in a ponytail. You can keep it in a ponytail or twist it into a bun, as both styles work well in a quiff.
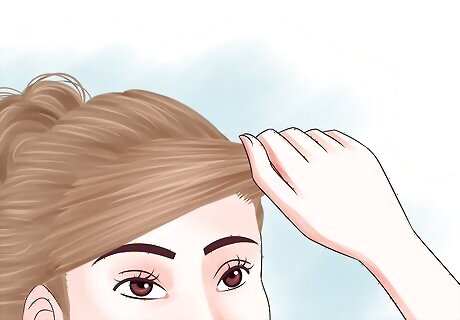
Gather your bangs. If you don't have bangs, pull up a bit of the hair near your forehead, taking it out of the ponytail.
Backcomb the hair and twist it. Hold hair up straight and comb from the ends down to the roots. This adds the volume you need to do a quiff.
Clip the hair back. Keep it twisted so it has volume. Apply either hairspray or a bit of water.
Push the hair forward for a quiff. It should look like a stylish bump on the top of your head. Be careful not to overdo it. A quiff should not be too thick or too thin, so ensure it is back combed properly.
Forming an Elvis Presley Quiff

Brush your hair. Make sure it's tangle-free and easy to handle.
Split your hair into three ponytails. Leave some hair out at the top of your head, and divide the hair below into three even ponytails. Secure each one with a ponytail holder. Make sure they're stacked one on top of the other going down the head, not across.

Undo the first ponytail and backcomb it. Hold it out straight and run a comb from the tips back to the roots. This will create volume and texture. Keep backcombing until it stands up.
Clip it near the top of your head. Use some hairspray to help it retain its volume and stay in place.

Comb the loose hair on top over the backcombed section. Smooth it over the backcombed section very lightly with a comb. You want it to cover the backcombed section so that it has a smooth appearance.
Undo the ponytails and comb your hair straight in the back.
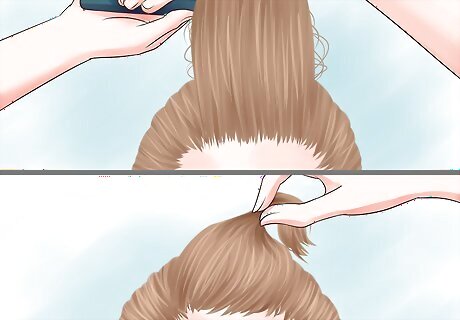
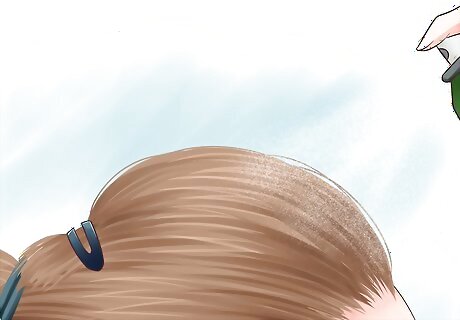
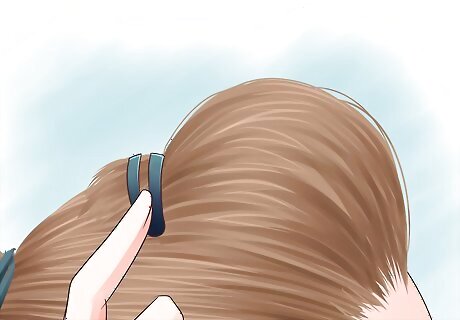
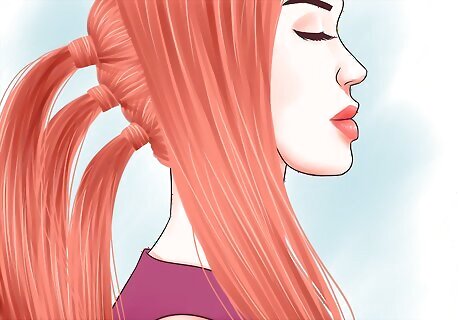
Creating a Layered Ponytail
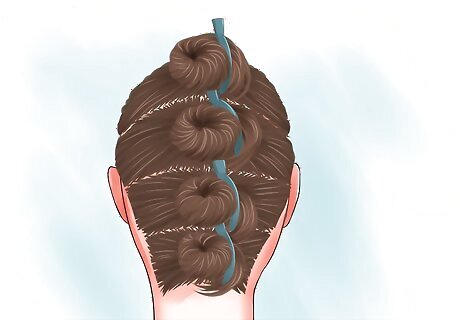
Divide your hair in four sections. They should be stacked on top of one another in a line stretching from the top of your head to the nape of your neck.
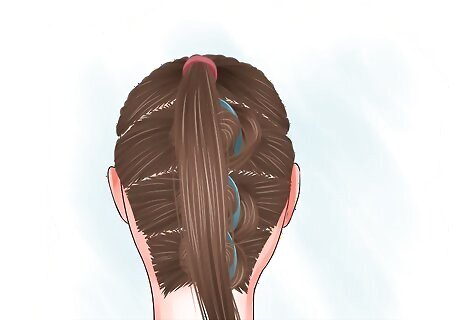
Tie the first section into a ponytail.
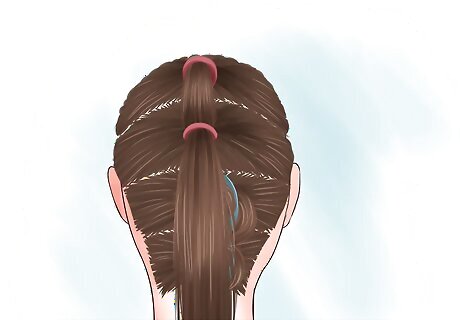
Tie the second section into a ponytail, adding the first ponytail.
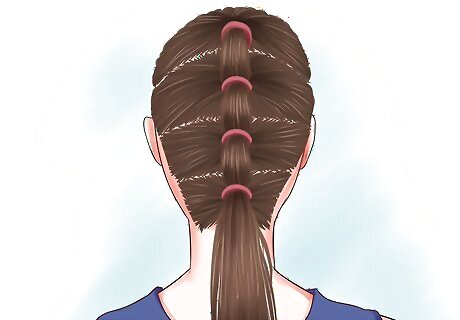
Repeat with the other sections. This is a pretty layered look that's more interesting than a regular ponytail.
Forming Quiff Ultraflex
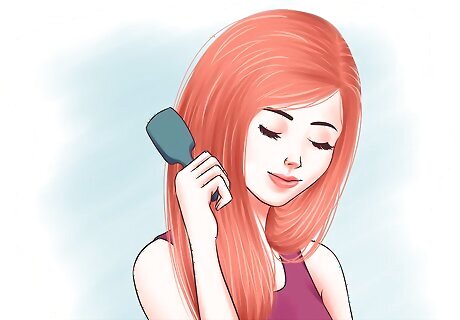
Brush your hair. Make sure it's tangle-free and easy to handle.

Split your hair into three ponytails. Leave some hair out at the top of your head, and divide the hair below into three even ponytails. Secure each one with a ponytail holder. Make sure they're stacked one on top of the other going down the head, not across.
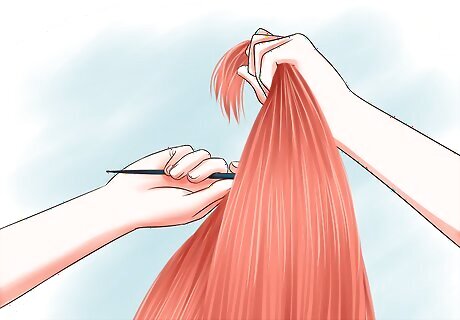
Undo the first ponytail and backcomb it. Hold it out straight and run a comb from the tips back to the roots. This will create volume and texture. Keep backcombing until it stands up.

Hairspray it. This will help it retain its volume and stay in place.
Comb the loose hair on top over the backcombed section. Smooth it over the backcombed section very lightly with a comb. You want it to cover the backcombed section so that it has a smooth appearance.
Undo the ponytails and gather your hair back. You can gather it into a ponytail or a bun. Secure it in place with a ponytail, and you're good to go.


Comments
0 comment