
Planting Rhizomes in Containers

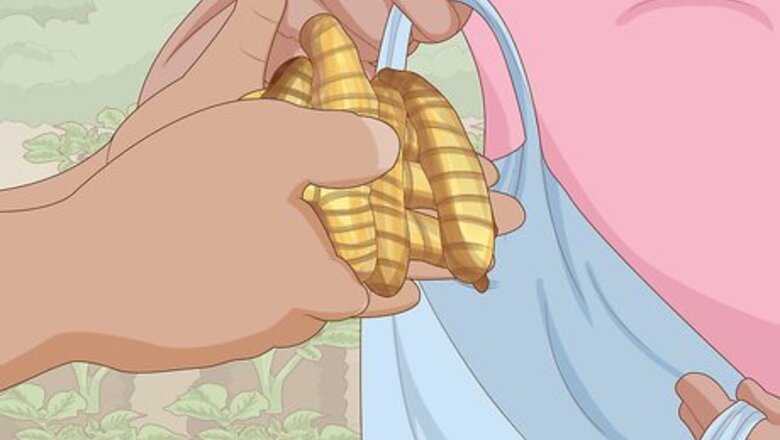
Purchase some turmeric rhizomes from a market or health food store. You may be surprised to learn turmeric doesn’t have seeds; they have rhizomes that look like ginger roots. Fortunately, turmeric rhizomes can be found in most grocery or health food stores. Look for ones with little bumps on the round portion sticking out of the root. These are called buds, and the number of buds on a rhizome will determine how big the plant gets.Tip: If you can’t find turmeric rhizomes at your local store, look for them at an Asian or Indian grocery shop. Turmeric is a popular ingredient in a lot of Asian and Indian dishes. There are approximately 133 species of Curcuma Longa (where turmeric derives from). However, the most common types of turmeric consumed worldwide include Madras and Allepy. Allep is mostly popular in the United States, while Madra is most popular in Britain and the Middle East.
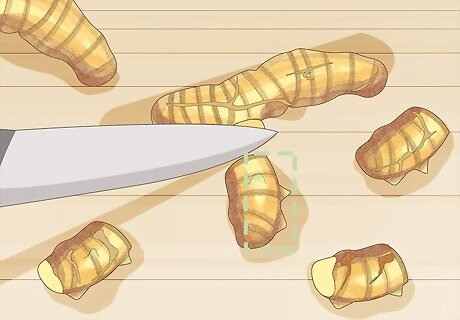
Slice your rhizomes into 2–6 in (5.1–15.2 cm) pieces so each piece has 2-3 buds. Inspect the length of the rhizome and count how many buds there are. The buds are the small bumps extending out of the rhizome's body. Cut sections of the rhizome into smaller pieces with a sharp knife so that each chunk has 2-3 buds on it. Some rhizomes may still be attached to their stem, which looks like a bulky chunk of dried garlic. Use a knife to cut them off of your rhizome, or pull it off with your fingers if it's dried out.
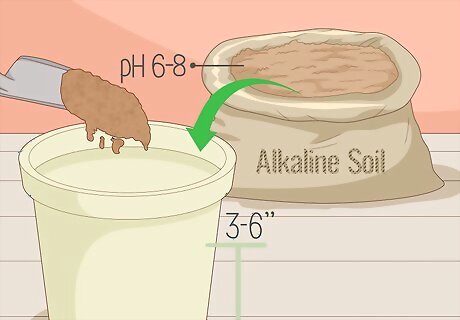
Fill a planter with 3–6 inches (7.6–15.2 cm) of potting soil. Look at the label on a bag of soil to find a slightly alkaline soil with a pH between 6-8. Pour your soil into the planter to fill the bottom third of your container. You do not need to pat the soil down, but you can shift it around with your hands so that it’s flat if you’d like to. Landscaping Expert Jovace Nelson recommends getting posts that are at least 12 inches (30 cm) deep and 12–18 inches (30–46 cm) wide. Once you plant your rhizomes, they’ll need plenty of space in the pot to grow. Turmeric can grow up to 3.5 feet (1.1 m) tall, so choose a pot that will be big enough to support it as it grows. If you’re planting your turmeric outside, consider using a planter’s box to ensure the rhizome has enough space to grow. A simple box with a depth of 1–2 feet (0.30–0.61 m) should be more than enough. pH refers to the acidity level in the soil. Turmeric grows best in slightly acidic soil.
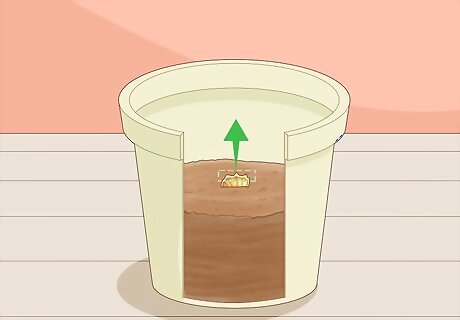
Lay a section of rhizome flat on top of the soil with the buds facing up. Nelson says to place a rhizome in the center of the soil. Rotate the rhizome so most of the buds face up toward the pot's opening. If the buds are on random sides of the rhizome, rotate it so that the majority of the buds are pointing towards the opening of the pot, even if they’re at an angle. The stalks of your turmeric plant will grow out of the buds, so as long as most of them are facing the opening of the pot, they’re likely to grow in the direction of the opening. Don’t worry about a stalk growing out the bottom of your pot or planter. It will die off when it can’t get any sunlight after growing.
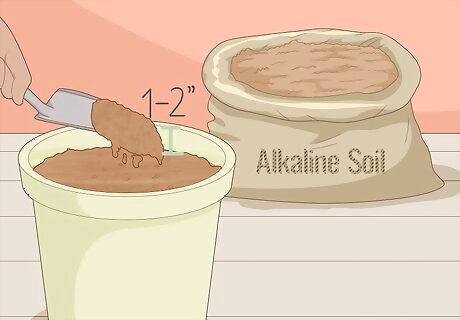
Cover the rhizome with potting soil, leaving 1–2 in (2.5–5.1 cm) at the top. Fill the rest of your pot or planter with your potting soil. Tilt the open bag of your soil over the top of your pot or planter and tip it downward to pour the soil. Cover each section of the pot or planter equally until you have some room at the top. Some ancient Asian or Indian methods of turmeric harvesting involve covering the rhizome in manure, fertilizer, or compost. This is not recommended for health reasons.
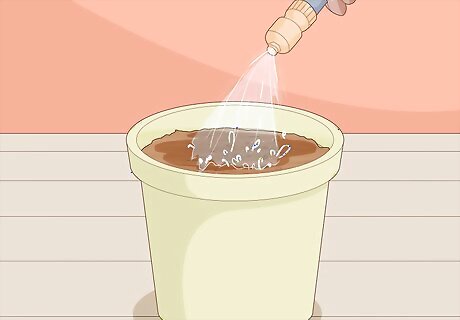
Water your pots or planters thoroughly until the soil is visibly wet. Fill a water sprout or large cup with tap water and pour it liberally across the surface of your pot or planter until you’ve gotten each section of the soil wet. Water until the soil is visibly moist. Nelson recommends doing this slowly to avoid drowning your rhizome. Make sure there is a base for your pot or planter if it has drainage holes at the bottom to avoid making a mess.
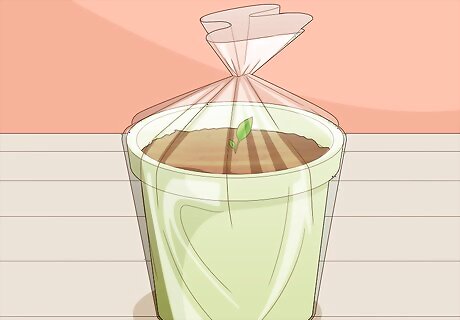
Slip your pots or planters into clear plastic bags. Get planter bags or large plastic trash bags and slip your pots inside. Set each pot at the base of an individual bag and fold it over at the top to restrict the opening. Place your turmeric in the area that you plan on storing it. If you’re planting your turmeric in a garden, plant them in a greenhouse if you can. If you can’t, consider making a miniature greenhouse for your plants. Your turmeric may still grow without a plastic bag or greenhouse, but keeping the plant humid is essential to making it sprout. If you can’t store it in a greenhouse or bag, mist your turmeric daily with a spray bottle filled with water. You don’t need to seal the bag. You want a little airflow to promote growth.

Store your pots or planters in a warm place between 70–95 °F (21–35 °C). Turmeric rhizomes grow best in higher temperatures. Nelson advises against planting in temperatures below 50 °F (10 °C), since your plant may die before it has had a chance to sprout. If you don’t have a warm place to store your turmeric, use a heating pad or desk lamp to keep it warm. If you don’t want to keep your turmeric artificially warm and have no appropriate place to store it, put it in a large plastic cooler in a temperate section of your home. It doesn’t matter if your plants are exposed to light at this stage in the growing process.
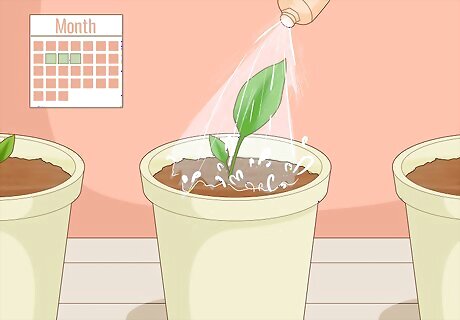
Water your turmeric every 2-3 days to keep the soil damp. Nelson recommends watering rhizomes regularly, especially if you live in a warmer climate where the water is likely to evaporate very quickly. Check your turmeric once every few days to see if the soil is damp. If it’s still moist, you can wait another day before checking. Water your rhizomes with tap water until the soil at the top is visibly dampTip: If it’s cold outside or your soil is still wet when you go to water it, you do not need to water your turmeric immediately. If you’d like to keep the humidity level up, though, feel free to mist it with a spray bottle.
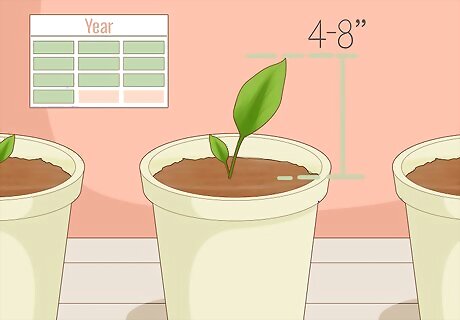
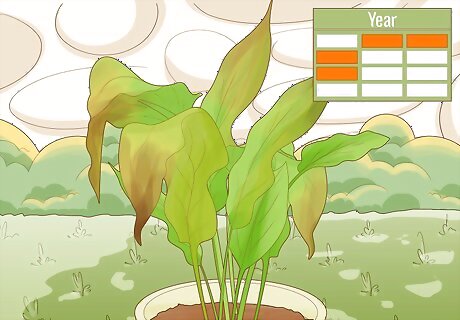
Wait 6-10 months for your turmeric to grow. Your turmeric will begin to sprout after 6-10 months of watering in a warm climate. Once you see a stalk start to stick out of the planter or pot, it has begun to grow into a mature plant. Leave your turmeric plants where they are until the stalks grow to 4–8 inches (10–20 cm) in length.
Caring for Turmeric Plants
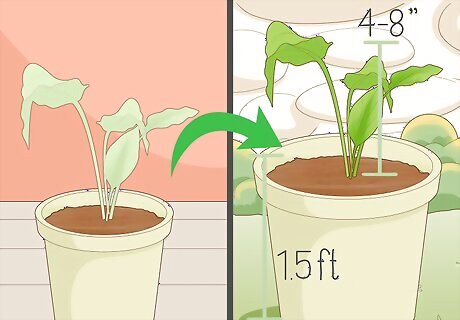
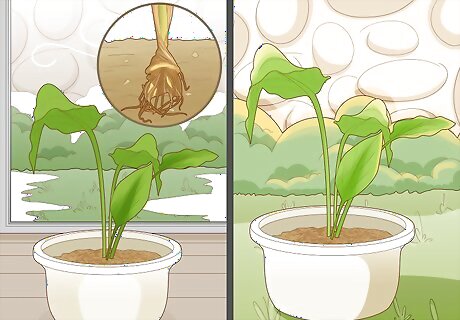
Transfer the stalks to their final pot once they’re 4–8 in (10–20 cm) long. Once your stalks have emerged, transfer them to a bigger pot or a section of your garden with sunlight exposure. To transfer a plant, pour soil halfway into a new pot. Dig your hands into your turmeric pot’s soil to find the rhizome. Carefully lift it out of the soil, moving topsoil out of the way by hand as needed. Space plants in the same planter or planter’s box at least 1.5 feet (0.46 m) apart from one another.Tip: Any pot that’s at least twice the size of your original container should provide more than enough space for your plant. Use the same soil you originally used to plant your rhizome. You don't need to transfer your plant if you’re growing turmeric in your garden. If you’re moving the plants into a planter’s box, dig your hole so that the plant has at least 1.5 feet (0.46 m) of space around it in every direction.
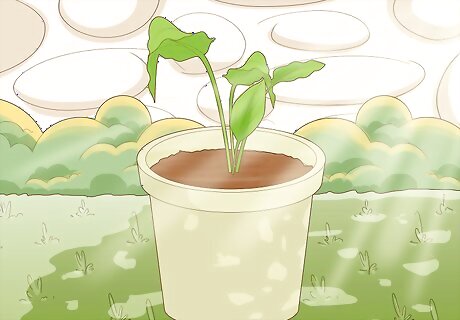
Move your plants to partial shade once they’re in a bigger pot or planter. Find a place with partial shade to keep your leaves from getting burnt as they adjust to the sunlight. Once you’ve transferred your plants into a bigger container, Nelson recommends moving them outdoors to be exposed to sunlight and continue growing. Turmeric doesn’t need a ton of light to stay healthy, and keeping it in partial shade for at least part of the day will ensure that the leaves don’t dry out quickly. You’ll have to store your turmeric indoors near a window if it’s still colder than 50 °F (10 °C) outside.
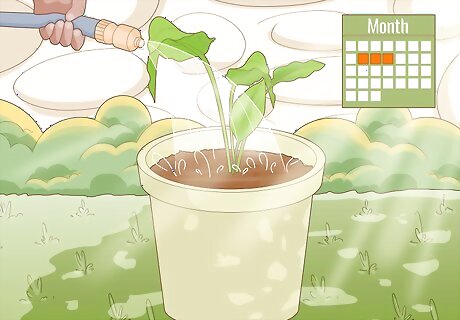
Water your outdoor plants every 2-3 days. Moving the plants outdoors is essential once the leaves have grown, as the plant will need sunlight. Nelson advises watering the plant as you usually did indoors to keep it from drying out. If the plant doesn’t get enough water, it will start to die. Use the mist setting on your garden hose to water your plant to avoid damaging the leaves.
Add organic fertilizing to the soil every few weeks. Once turmeric actively grows, it becomes a heavy feeder. Opt for a soil mix rich with organic matter and feed it with quality compost. Then, every few weeks, add worm casings, organic liquid fertilizer, granular organic fertilizers, or compost tea to keep it growing strong and healthy.
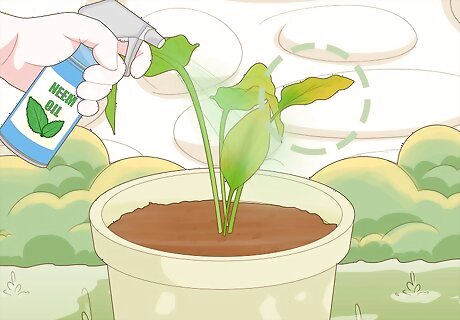
Look out for damage or discoloration in your plant. If you find physical damage to your leaves, it could be a sign of a thrips infestation or a caterpillar feeding on your plant. Use an organic pesticide like neem oil or nontoxic soil treatment to ward off unwanted bugs. When you remove or inspect a rhizome, if it looks gray or pale, it could be a sign of scale damage. Throw your rhizome out to prevent the infestation from spreading, and then treat your soil with dimethoate. Turmeric plants are often unappealing to many insects in temperate regions of the world. Turmeric powder can even be used as a pesticide with some crops!
Move your turmeric indoors in the late winter. Turmeric takes a long time to sprout, but luckily, it can be done indoors during the winter. It also won’t require light until it begins to sprout, so you don’t need to worry about taking up a big space near a window for the 5-6 months required to sprout the stalks. If you live in a warmer climate and want to plant your turmeric outside, you can plant the rhizomes in your garden. Do it in the winter after the last frost passes so that they sprout in the summer months. You can’t do this if it gets colder than 50 °F (10 °C) outside in winter, though. If you’re planting turmeric outside, do it in a greenhouse with a planter’s box. Turmeric requires a lot of space for the roots and needs a lot of humidity to grow early on.
Harvesting and Storing Turmeric
Turmeric is ready when the leaves and stems turn brown and dry. Within 2-3 months, the turmeric plant will begin to brown and dry out. This is the best time to harvest your turmeric. If you continue to let the plant grow, it will slowly rot over time and ruin any potential turmeric that you could extract. You can tell if your turmeric is almost ready for harvesting if it’s struggling to retain water and dries out quickly.
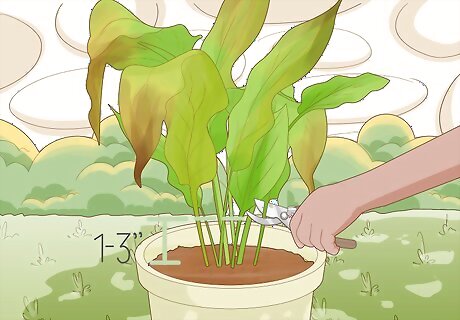
Cut the stems of your plant 1–3 inches (2.5–7.6 cm) from the soil. To harvest the turmeric, access the adult rhizomes underneath the soil. Use garden shears or a cutting knife to remove the stalks near the soil. Discard the leaves by composting them. If the plant is dry enough, you should be able to snap the stalk near the bottom.
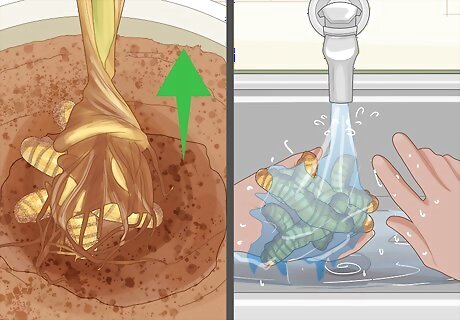
Remove the rhizome and wash it in the sink. Once you’ve cut the stem, pull the remainder of the plant out of the soil by hand. Cut or snap off the remaining stalk sections and take the mature rhizome to a sink to wash it. Run it under warm water and rub it softly by hand to remove the dirt and soil off of the rhizome. Don’t forcibly scrub the rhizome. Remove the outer layers of dirt and soil before grinding, using, or storing it.

Store any matured rhizomes in the refrigerator. Place rhizomes in an airtight plastic bag or storage container if you don't plan on using them immediately. Store them in the fridge for up to 6 months without inflicting any damage on the flavor of the turmeric.Tip:You can replant rhizomes after they’ve been stored in your fridge if you’d like. As long as the rhizome hasn’t been boiled or cooked, you’ll be able to replant it using the same process that you used before.
Grinding and Storing Turmeric
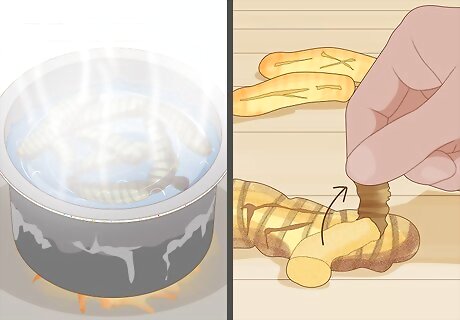
Boil and peel a rhizome to prepare it for grinding. To prepare a rhizome for grinding, boil a clean rhizome in a pot with water. Once the water reaches a rolling boil, turn it down to a simmer. After 45-60 minutes, drain the pot in a colander or strainer. You can rub the skin off of the rhizome after boiling it, although it’s perfectly fine to leave it on. If a fork easily pierces it after boiling, the rhizome is ready for grinding.
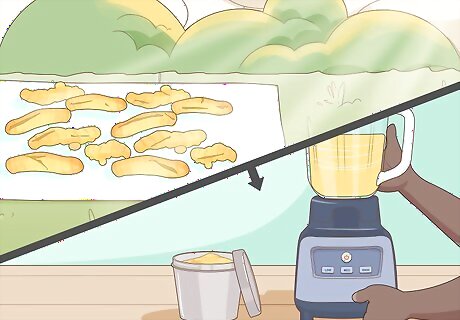
Grind your rhizome to make turmeric powder. Let your rhizome dry out in the sun overnight. Put on rubber gloves before making turmeric powder since the orange powder won’t easily wash off the skin. Cut your rhizome into smaller pieces and then grind it with a spice mill, grinder, or with a mortar and pestle until you’ve got a fine powder. You can use a food dehydrator set to 140 °F (60 °C) to dry your rhizome more quickly if you’d like. It’s ready to cut and grind once it’s brittle and dry. This process usually takes 30-45 minutes. Store turmeric powder in an airtight container to use turmeric later.
Add powdered turmeric to meals or beverages. Turmeric has been a popular culinary seasoning option in India for centuries. It's used in curries, mustard, and even vegan cheese recipes! Use a teaspoon of ground turmeric for bean, rice, grain, or soup dishes. Alternatively, you can combine ⁄2 teaspoon (0.17 US tbsp) of turmeric with ⁄2 teaspoon (0.17 US tbsp) of maple syrup and 1 cup (8.0 fl oz) of water to make a delicious tea.


Comments
0 comment