
Setting up Your Workspace

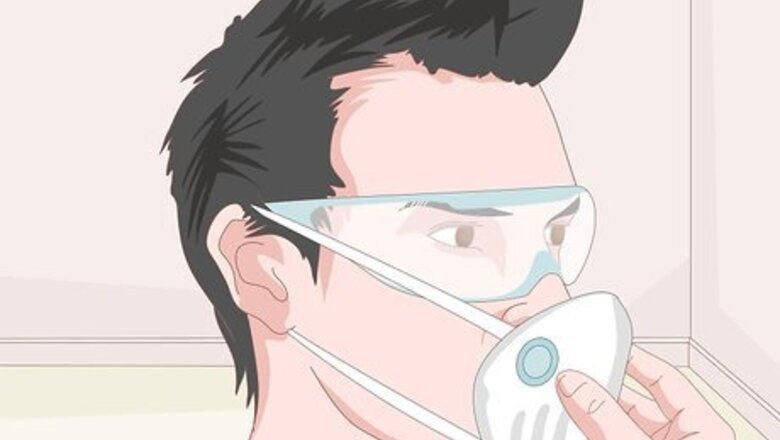
Wear the proper safety equipment. Put on a pair of safety glasses along with a face mask to take some extra precautions. You don’t want to inhale any foreign substances while polishing your granite edges. You can purchase most safety equipment at a hardware or home improvement store.
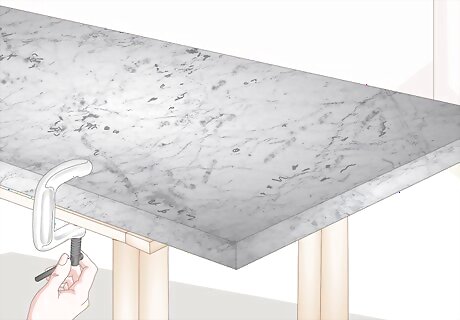
Place the granite lengthwise on a flat work surface and clamp it into place. Set the granite down horizontally on a sturdy, level surface, like a work table, before securing it into place with a clamp or vise. Make sure that the granite edges are hanging off the end of your work table, so that you can reach and polish them easily. Be certain that you can easily reach the granite with your hands, since the polishing process will be done with a hand-operated angle grinder.
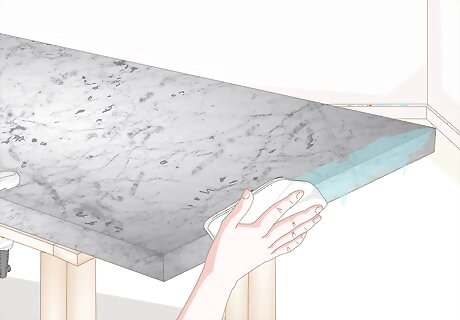
Wet the edge with water. Have a damp rag nearby so you can moisten the edge of the granite before polishing it. While it may seem like a good idea to keep your granite dry, this creates more dust particles, which are dangerous to breathe in.

Get your angle grinder into position and plug it into a GFCI. A GFCI (Ground Fault Circuit Interrupter) is essential for appliances that will be getting wet, as it keeps you from receiving any electric shocks when water touches the equipment.
Smoothing the Edge with an Angle Grinder

Assemble your polishing pads so you have easy access to them. The buffing process requires a number of different round polishing pads, which will be at different grit levels. Since you’ll be switching these pads often as you transition from coarse to finer grit pads, make sure that they’re all accessible near your work station. The grit level can be anywhere from 50 to the mid-thousands. The number of pads you have may vary, but expect to be using at least 7.

Put a 50 grit pad into your angle grinder. A 50 grit pad is the coarsest buffing pad you can use. Most pieces of equipment allow you to pull off and switch your polishing pads easily, so can alternate throughout your work process. If you’re working with freshly cut granite, you’ll probably see saw marks along the edge. The 50 grit dial, along with other coarse buffing pads, smooths out the edge so that those saw marks are no longer visible.
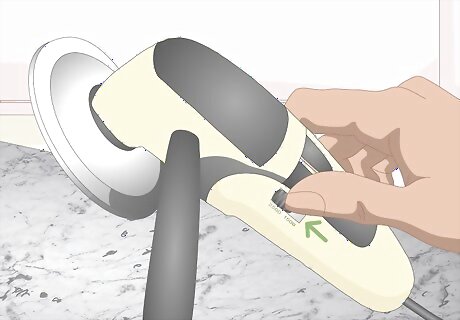
Set the angle grinder to 2500 RPM and turn it on. Double check to ensure that your grinder is set to 2500 RPM before you start polishing. If the RPM is set too high, then your buffing pads won’t stay in the angle grinder. Make sure that you’re wearing safety glasses whenever you handle this equipment.

Move the grinder from left to right in long, quick strokes. Turn on the angle grinder and shift it in a constant, horizontal motion. Keep it steady around a 45-degree angle as you move it along the edge’s topmost corner, as this will make the process more efficient. Try to work on just one part at a time. Keep polishing the top corner for at least 5 seconds. Gradually apply the grinder to an edge or corner. You don’t want the equipment to hit the edge directly. As you go back and forth, you want to be applying a consistent amount of pressure so that any obvious scratches disappear. If your countertop has a fancier edge style like ogee, consult a home improvement professional before proceeding to smooth and polish.
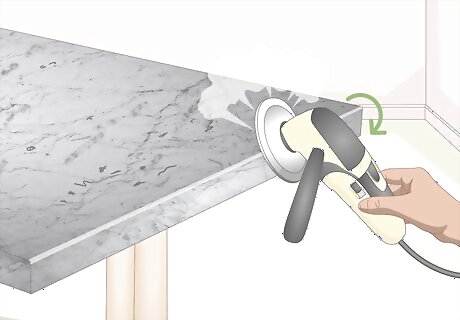
Shift the pad while polishing from left to right. Begin buffing the rest of the granite edge by moving the angle grinder downward. The polishing pad should be snug against the flat portion of the edge before you proceed. Continue polishing for at least 5 seconds, using the same left to right motion that you used initially. Depending on the type of equipment you have, you may want to hold the grinder above the handle. This helps you to maintain a firmer grip, and ensures that the angle of your buffing pad doesn’t change in the middle of a polishing stroke.

Adjust the buffing pad so it polishes the bottommost corner of the edge. Apply a consistent amount of pressure as you continue moving the angle grinder in long, horizontal strokes, but focus instead on the bottom corner of the granite’s edge. Go back and forth for over 5 seconds, until you’re confident that you’ve thoroughly polished this area with the buffing pad.
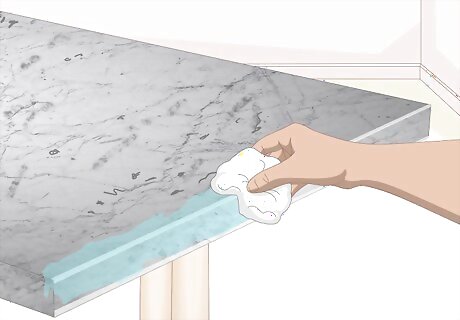
Wipe down the granite edge with water as you go. Use a damp rag to moisten the edge of the granite as you continue smoothing it with the angle grinder. This helps to indicate which portions of granite haven’t been smoothed yet. The grinder removes any moisture from the stone, so if a portion of the edge is wet, you know that you haven’t smoothed it over with the grinder.
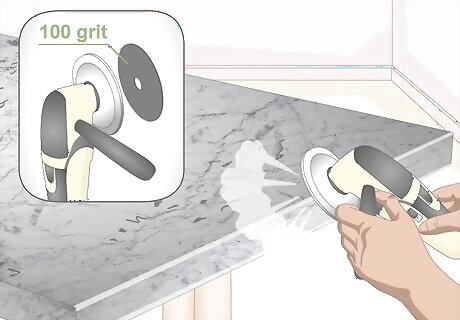
Switch to a 100 grit pad to remove the scratch marks from the previous pad. Remove the 50 grit pad and replace it with the 100 grit dial. This pad helps to buff out the scratches created by the 50 grit pad, and works to make your granite smoother. Continue working in long, horizontal strokes, shifting the grinder up and down as you go over the corners and flat portion of the edge.

Continue this process of switching pads. Each buffing dial will leave its own unique scratch mark on the granite, so you have to use a finer grit to get rid of those marks. A good rule of thumb is to double the grit of each pad as you continue (i.e, 50 to 100, 100 to 200, 200 to 400, etc.), but this also depends on the set of pads you have. Keep going in a sequential order, working out the subsequent scratches with each new buffing pad.
Polishing with Finer Grit Buffing Pads
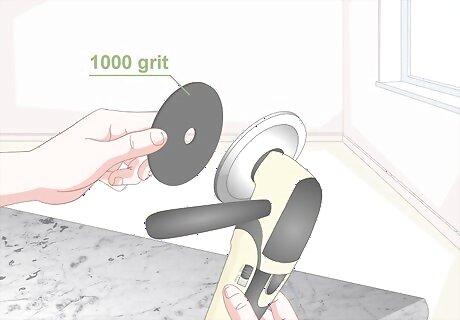
Switch to a 1000 grit pad to start polishing. Use a finer polishing dial after you’ve finished working through the coarser grit levels. The scratches on the granite will be getting less and less pronounced as you continue moving on to finer buffing levels.
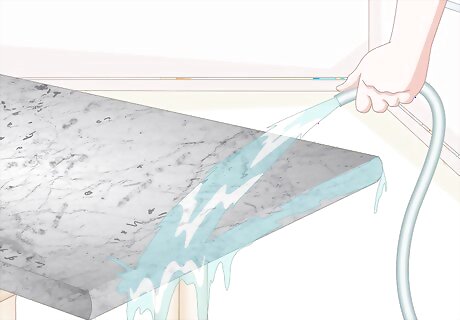
Wet the granite fully when working with a finer grit. Use a more powerful water source like a hose to spray a steady stream of water onto the edge of the granite, since you’re now working towards a smooth, polished finish. Double check to make sure that your GFCI attachment is plugged into your angle grinder before you continue.

Use a constant, up and down movement when polishing the edge. Move your angle grinder in short, vertical motions as you continue to go from left to right. The granite has been smoothed out, so your main priority is to get the edge looking as shiny and smooth as possible. Continue applying a consistent amount of pressure and working from around a 45 degree angle as you go. Don’t worry if your angle changes slightly as you go up and down. The main goal is to continue going in short vertical motions as you go from left to right. Focus on making the granite edge look as polished as possible.

Continue switching your pads to finer grit levels. Alternate the grit of your buffing pads throughout the polishing process. After you’ve finished polishing with the 1000 grit pad, continue doubling/increasing your grit and working up to 2000, and then 4000 or 5000. The specific grit levels will depend on the manufacturer—don’t worry about the exact grit numbers, as long as they continue to increase. Keep applying a steady amount of pressure while alternating the position of your angle grinder along the edge. You can spend a little extra time polishing with the very fine buffing pads, like the ones that are 3000-5000 grit. They will help make the granite edge look more shiny.


Comments
0 comment