views
Removing Your Existing Tub
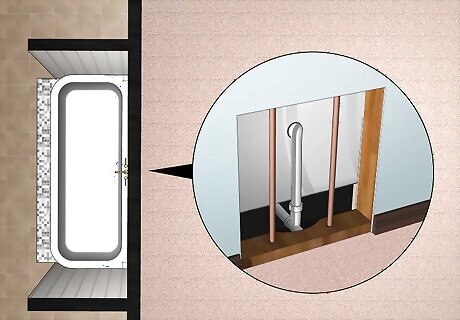
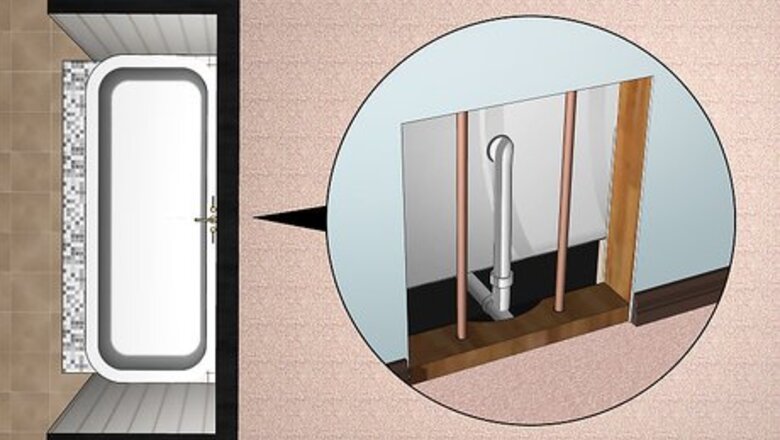
Cut a panel behind your tub to access the drain pipes. Most times, the water supply valve for your tub is located in the walls behind the faucet. Go into the room adjacent to your bathroom to cut a hole in the wall where the drain and faucets are for your tub. Use a stud finder so you don’t accidentally cut into one of the studs. Cut an 8 in × 8 in (20 cm × 20 cm) square in the drywall with a reciprocating saw to expose the pipes. If you can’t access the room adjacent to the drain, cut a hole in the floor beneath the bathroom using a reciprocating saw. Make sure you’re underneath where the tub drains. Wear safety glasses while working with your saw.
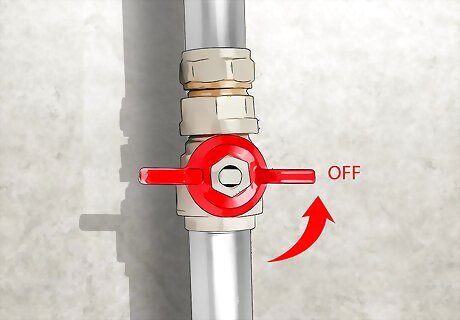
Turn off the water supply to your bathroom. The water supply for your tub is either controlled by a valve in the wall behind your faucet or by the main water pump. Turn the valve so it’s perpendicular to the pipes to turn it off. If your valve shut-off is circular, look for the directions printed on the valve head to figure out which way to turn it. If you cannot turn off the water for your tub or bathroom, you may need to turn it off for the entire home or building.
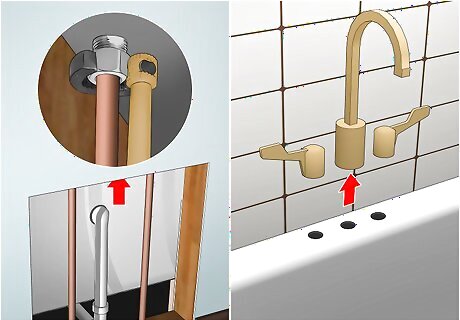
Remove the tub spout. Locate the screw on the underside of the faucet or where it connects to the wall. Use a flathead or Phillips screwdriver to remove the screw. If it doesn’t have a screw, tighten the jaws of a pipe wrench around the back of the faucet and twist it counterclockwise until it’s loose. Then, pull it out. If you want to save the faucet, put a rag in between it and the wrench so you don’t leave any scratches.
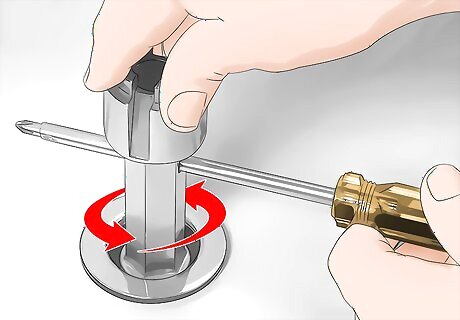
Take out the main and overflow drains. A drain removal tool is a cylinder that fits into the drain to loosen its connection to the pipes. Put the end of a drain remover tool in the drain hole and turn it counterclockwise. Keep turning the tool until the drain is loose and you can pull it out by hand. Unscrew the overflow drain, located on the front wall of your tub, and pull it off of the surface. Drain removers can be bought from your local hardware store. Some tub drains have screens that you need to remove with a screwdriver before you can use the remover tool. Make sure that the waste-and-overflow unit is disconnected, too.
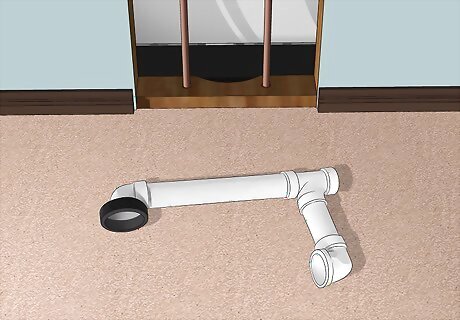
Take out the drain shoe from the access panel you cut. The drain shoe is made up of the pipes that connect the overflow and the main drain to your tub. Look for the T-shaped connector holding the pipes together, and use a pipe wrench to twist the drain shoe off of the main pipes. If the joint is stuck or won’t come out with a pipe wrench, cut through the pipes with a reciprocating saw or hacksaw.
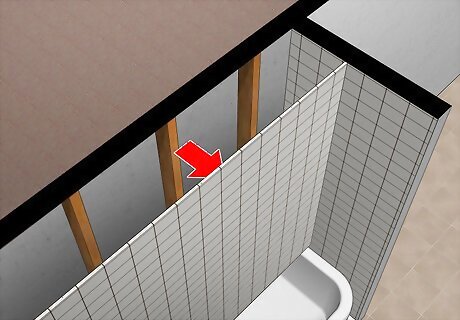
Remove the tub surround and drywall around your tub. The surround is the tile or fiberglass on the walls around your tub. Use a pry bar or the back of a claw hammer to rip the surround away from your tub. When you reach the drywall, use a razor knife to cut out the area around that extends 6 inches (15 cm) from the top of your tub until the studs are exposed. Wear safety glasses, work gloves, and a respirator to keep yourself protected. If your tub has a surround panel made from fiberglass, you need to take out the entire piece in order to install a new bathtub. Since tile damage is a given, think about buying replacement tiles beforehand.
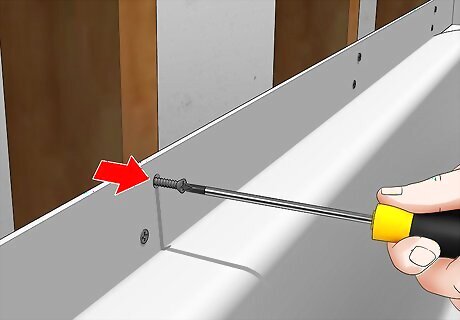
Pull out the nails or screws connecting the tub flange to the studs. The flange around your tub is the raised edge that keeps water from draining into your walls. Use an electric screwdriver or the back of your claw hammer to remove the screws or nails from the flange. Make sure to check each stud around your bath for any nails. Some older tubs may not be nailed or screwed into the wall.
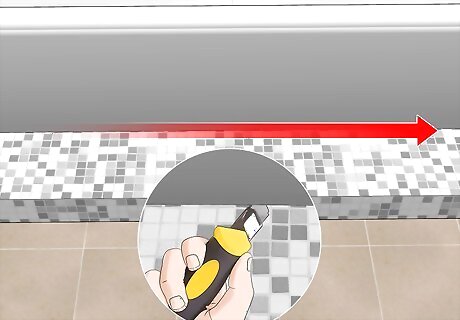
Cut any caulk holding the tub the to floor. Run a razor knife through the caulk or sealant surrounding your tub. Cut through the line of sealant that connects the apron, or front of your tub, to the floor.
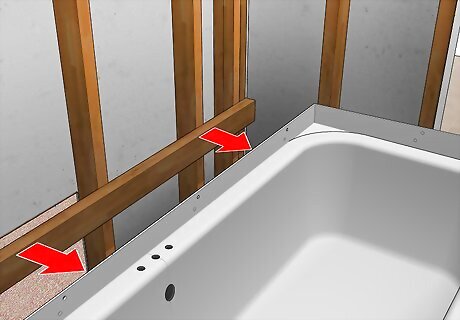
Lift the tub out of place with a partner’s help. Grab the tub from the side opposite of the drain and lift it out from its place. Have a partner help slide the tub backward away from the drain pipes. Stand the tub upright and work together to carry it out from your bathroom. Check with your city’s waste department to find out how to properly dispose of the old bathtub. Don’t attempt to lift a cast-iron or steel tub out by yourself since they can be extremely heavy.
Leveling and Prepping Your Work Area
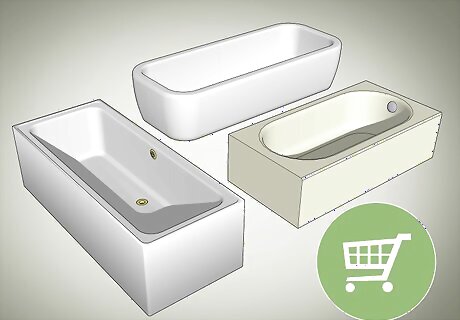
Purchase a tub that matches the size and layout of your old one. Measure the size of the alcove and note the drain direction. Use a tape measure to find the maximum length and width of the alcove. Note whether your drain is on the left, right, or center of the tub Find a tub from your local home store that fits in the alcove and has a drain in the same place. Most standard tubs are about 5 feet (1.5 m) long and 2 ⁄2 feet (0.76 m) wide. Make sure you can fit the tub through different doorways in your home. Also, remove any toilets or sinks that may be in the way as you replace your tub. Common Types of Bathtubs Acrylic and fiberglass tubs are the cheapest and the easiest to maneuver due to their light weight. Cast-iron tubs are durable and hold heat longer, but they are heavier and difficult to maneuver.
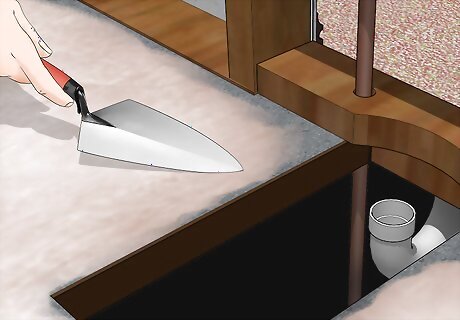
Level the floor with an underlayment if it’s not already flat. Underlayment is a thin layer of concrete that smooths the surface of your floor. Check your floor with a level to see if it sits flat. If not, mix the underlayment following the package instructions and spread it across your floor with a flat trowel. Smooth the surface and allow it to dry for 1 day so it has time to set. Applying a layer of underlayment allows you to remove the tub easier if you need to fix any plumbing issues. Underlayment can be purchased from your local hardware store.
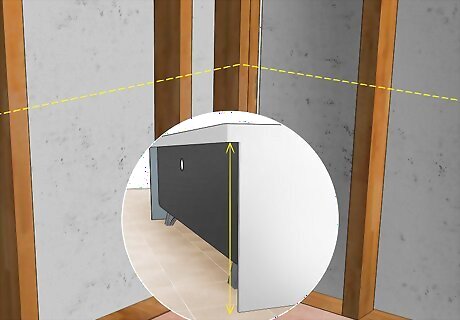
Fit the new tub into the alcove and mark the height of the flanges. Set your new tub into the opening where the old one used to be. Make sure your tub sits level on the floor. Use a pencil or marker to trace a line on your studs at the same height as the flanges on your tub. Once you have each stud marked, take the tub out from the alcove again. If the tub isn’t level, place hardwood shims underneath it until it sits flat.
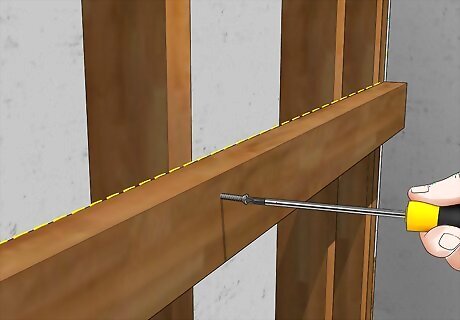
Attach ledger boards to the studs below your flange marks. Nail or screw 2 in × 4 in (5.1 cm × 10.2 cm) boards so the top edge is even with the marks you drew on the studs. Use flat, straight boards that are the same length as the sides of your tub. Ledger boards help support your tub, but they cannot hold its full weight. Make sure your tub has full contact with the floor after you install the boards.
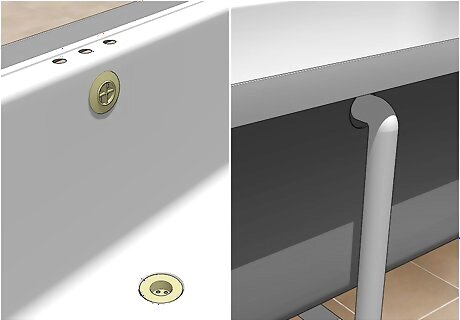
Dry-fit the drains and drain shoe on the new tub. Set your new tub on its side so you can easily access where the drains are placed. Feed the bottom drain through the hole on the tub and screw it into the L-shaped pipe fitting. Repeat the process with the overflow drain on the side of your tub. Cut the pipes to the length you need using a hacksaw. Tighten the nuts with a pipe wrench. Drain kits come with all of the plumbing and hardware you need in order to put it together.Tip: Dry-fit the L-shaped pipes to your drains first and measure the length between them to determine how much pipe you need in order to connect the drains together. Make your measurements twice to make sure they're precise before cutting the pipe.
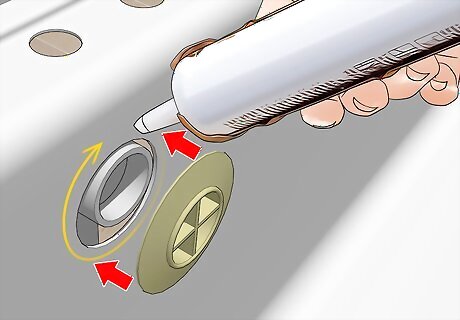
Use a sealant on the drains and pipes to secure the joints in place. ABS glue is a liquid plastic that seals your pipes together. Paint a layer of this glue on the inside and outside of the pipes where they attach on your drain show. Hold the pipes together for 90 seconds until they have time to set. Continue gluing all of the joints together until they are completely set. Use a clear sealant around the outer edge of the drain inside your tub and hold it in place to seal it. Sealant and ABS glue can be purchased at your local hardware store.
Installing the New Tub
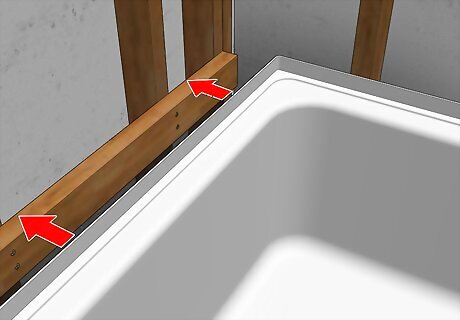
Slide the new tub in place so the flanges rest on the ledger boards. Have a partner help you slide your new tub into place. Feed the drain shoe into the hole in the floor, and set the rest of the tub down. Make sure the tub is level one more time before securing it to the wall. Make sure the tub is in full contact with the floor so the ledger boards aren’t supporting the full weight.
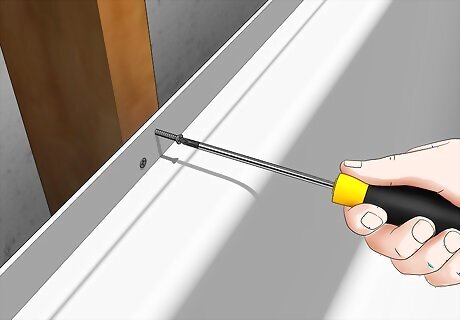
Screw or nail the tub into the studs. Use screws or nails that are 2–3 in (5.1–7.6 cm) long to secure the tub flange to the the studs. Work slowly so you don’t accidentally crack your tub. Put 1 nail or screw into each stud to keep it in place.Tip: If there are any gaps between the studs and the tub flange that are ⁄8 in (0.32 cm) or larger, put wooden shims in before you put in nails or screws. Use hardwood shims since soft wood can deform over time.
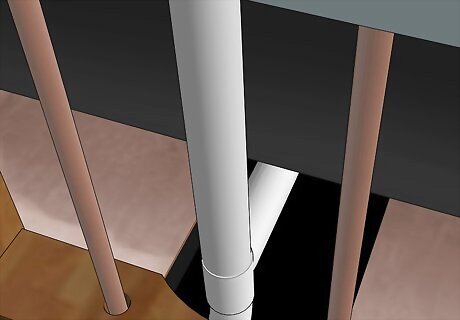
Connect the drain shoe to the pipes. Access your pipes from the hole you cut in the room adjacent to your bathtub. Use a pipe wrench to tighten the drain shoe to the P-trap until it’s completely secure. Squeeze a ring of silicone sealant around the pipe and P-trap for another layer of protection from leaks.
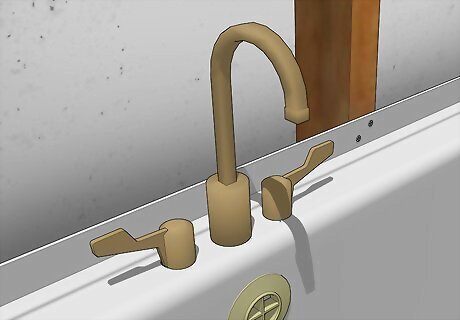
Reattach the faucet. If the faucet had a screw, put the faucet back on with a screwdriver and turn it clockwise. If the faucet screwed off by itself, twist it back on by hand and use a pipe wrench to secure the faucet in place completely.
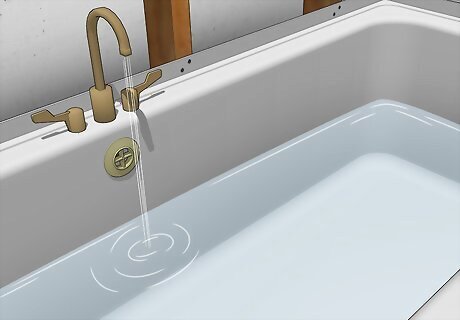
Fill the tub and test for leaks the day after it’s installed. Let the sealant on your tub dry for 1 day so it’s completely set. Turn the water valve back on and let it fill the tub. Listen for any dripping noises and watch for any noticeable leaks near your drain or on your pipes. If you find any leaks, use more sealant around the leaking area. Check the drain shoe from the access panel you cut earlier so see if any water is leaking underneath your tub.
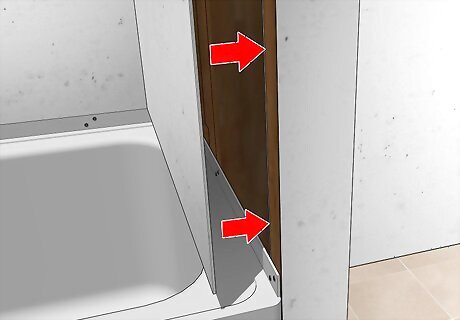
Cover the exposed studs and flange with drywall or cement backerboard. Cut the pieces of drywall to the sizes of your gaps with a reciprocating saw. Hold the piece of drywall or backerboard against the studs so it covers the flange and there’s a ⁄4 in (0.64 cm) gap between the board and the tub. Use nails to secure the boards in place. Drywall or backerboard can be purchased from your local hardware store. Don’t forget to install new drywall on the access panel you cut out from the other room.
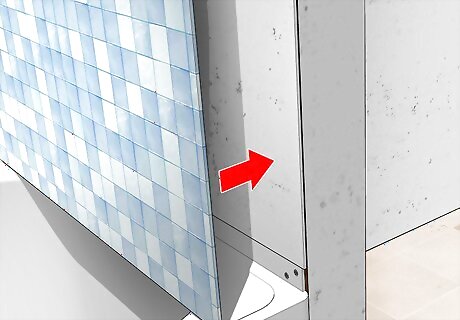
Replace the surround. If you’re using tiles, mix tile mortar in a bucket based on the instructions on the packaging. Stir the mortar with a flat trowel and spread it on the drywall. Press the tiles onto the backerboard and hold it in place for 30 seconds. Use tiles that match the existing ones in your bathroom. Otherwise, you’ll have to retile the entire wall. For a fiberglass surround, set the entire piece in place so it covers the tub flange. Drive screws with an electric screwdriver into the divots along the sides and top of the surround so it’s secured to the studs.
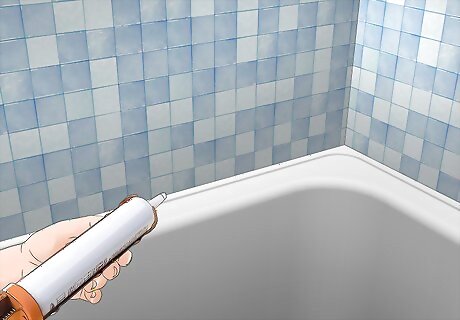
Seal the gap between the tile and tub with silicone sealant. Once you’ve secured the tiles to the backerboard, place a thin bead of silicone around the bottom of the of the tiles to fill in the gap. Put the tip of the sealant dispenser into the gap, and pull the line slowly so it applies smoothly. Wipe any excess sealant away with your finger.





Comments
0 comment