views
- Place batter boards or stakes at your fence ends. Connect the boards with string and place a stake at each post spot to mark your fence outline.
- Use a post hole digger to make holes that are ⅓ the length of the post and 12 inches (30 cm) wide.
- To set a post in gravel or soil, tamp down a 2-3 inch (5-8 cm) layer of gravel and insert the post. Then, add and tamp gravel or soil into the hole until it’s filled.
- To set a post in concrete, tamp down a 4-6 inch (10-15 cm) layer of gravel and insert the post. Brace it with stakes, then shovel concrete into the hole.
Getting Your Fence Posts Ready
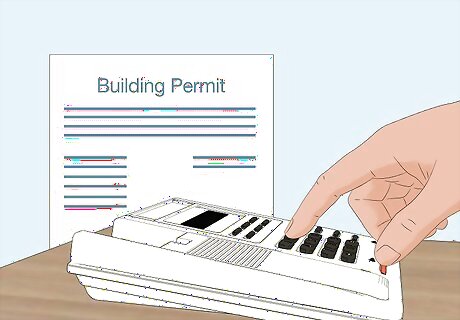
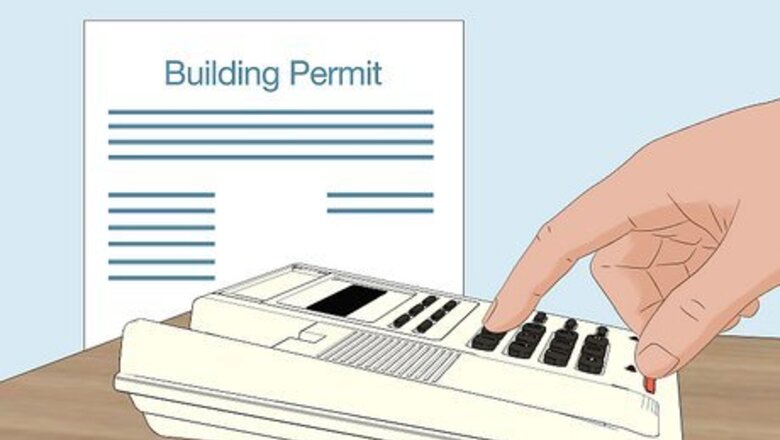
Check the building codes and permits in your city. Before you start digging, make sure your fence follows the guidelines for your city or neighborhood association. Just search for your area’s building department online to find any relevant codes, restrictions, and permits. For example, there might be rules about maximum fence heights and how deep you have to dig the post holes.

Call your utility company or 811 to locate utility lines before you dig. To protect yourself and your utilities, ask a utility worker to come to your house and mark all the buried lines. Either call your utility company directly or call the national US dig line at 811. Or, go to your state’s 811 dig website. It typically takes 2 to 3 days for a utility worker to come to your house.
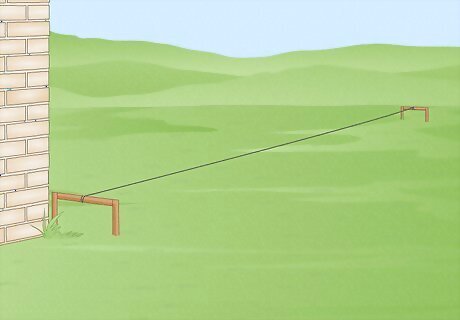
Outline the area of your fence with string attached to batter boards. A batter board is a simple marker made out of 2 wooden stakes and a piece of wood attached between them. Make and place a batter board at each end of your fence. If your fence has corners, place them there too. Then, connect the batter boards with string to outline the area of your fence. The string provides a guideline for your posts and ensures that they’re installed straight when you put them in the ground. Using a batter board allows you to move the string across the wood piece to adjust your fence guideline. If you don’t want to make batter boards, just use stakes to mark the corners.
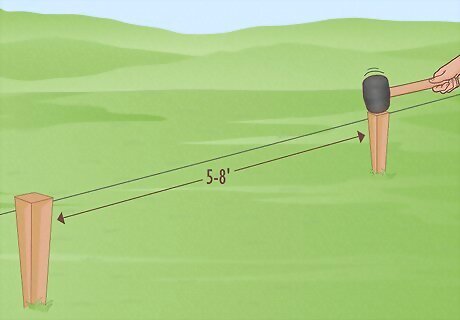
Insert a wooden stake at each post location, lining it against the string. Fence posts are typically spaced 5 to 8 feet (1.5-2.4 m) away from each other, though that depends on your city’s regulations and the type of fence you’re building. Just drive a stake into the ground where you’ll install each post. Line the stake flush against the string to ensure all the posts are straight.
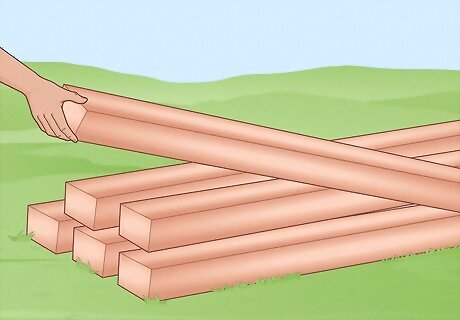
Choose fence posts made from heartwood or pressure-treated wood. Use wood that stays sturdy in the climate you live in. Both heartwood and pressure-treated wood make durable fence posts, so look up your area’s building guidelines or codes to see what specific lumber they recommend. Regardless of the type of wood you use, only buy lumber that’s labeled as suitable for ground contact. Unless you live in a desert, choose durable lumber for your posts, like: Durable heartwood: Western juniper, black locust, and Osage-orange are excellent lumber choices. Pacific yew, redwood, and most cedar and white oak species often last 20+ years in most conditions. Pressure-treated wood: choose a variety with about 1 inch (2.5 cm) of sapwood surrounding a core of heartwood. Aspen, ponderosa pine, lodgepole pine, and Douglas fir are great options. Just buy this wood from a trusted source to avoid poorly treated wood.
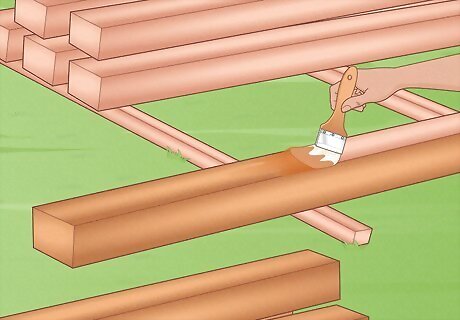
Coat the posts with wood preservative to protect them against moisture. While this step is optional, it helps your wood posts stay sturdy for longer. The sawn-off ends of fence posts are often vulnerable to moisture. If you live in a damp climate or want to take some extra precautions, follow these steps to protect your wood: Use a saw or sliding bevel to cut the top of the fence post at a 45º angle, which encourages rain runoff. Or, install post caps on the posts once they’re in the ground. Treat each end of the wood with a non-water-based, brush-on wood preservative, such as copper naphthenate. Wood preservative is toxic, so follow the safety recommendations on the label when you apply it. Apply multiple coats of the copper naphthenate, letting each coat dry for 24 hours.
Setting the Post in Soil or Gravel
Use soil or gravel to set your fence post if you have dense soil. Install your posts directly into the soil as long as it's dense and has good drainage. Installation is typically more labor-intensive and a bit less stable than concrete, but it’s often cheaper and makes your wood more resistant to decay. Loamy soil, which has an even mixture of sand, silt, and clay, is generally dense and has good drainage. Soil that is mostly sand or clay tends to have poor drainage. Dig a hole 12 inches (30 cm) deep and 4-12 inches (10-30 cm) wide to check your soil drainage. Fill the hole with water and wait for it to drain. Then, fill it with water again. Measure the water depth, wait 15 minutes, and measure again. Multiply the measurement by 4 to find how fast the water drains per hour. If it’s less than 1 inch (2.5 cm), your soil has poor drainage. Due to additional strain, gate posts work better when installed in concrete.
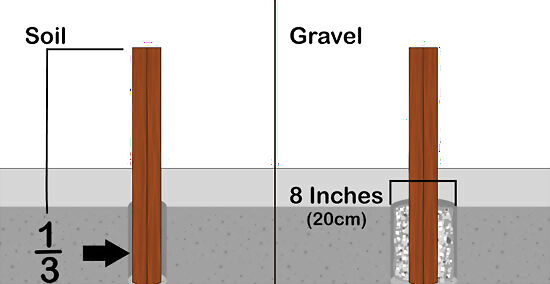
Use a post hole digger to dig a hole about ⅓ of the length of your post. For sturdy fence posts, stick to the general rule of burying ⅓ of its length in the ground. For example, if you have an 8-foot (2.4 m) post, make a hole at least 2 feet (0.6 m) deep. When anchoring the post in soil, dig the hole about as wide as the fence post. If you’re anchoring the post in gravel, dig a hole about 8 inches (20 cm) across for a standard 4x4 post. If your soil is hard, cut through the sod with a shovel and soak the ground with water. Keep some dirt, or dirt mixed with gravel, nearby to backfill the hole.
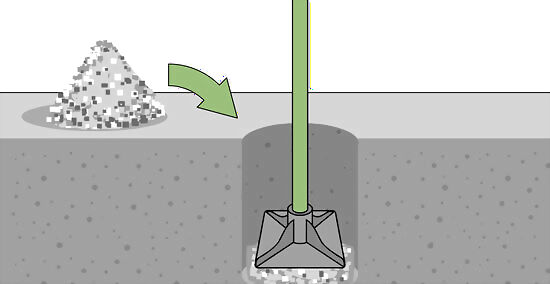
Pour 2-3 inches (5-8 cm) of gravel into the hole. Adding some pea gravel or crushed stone to the bottom of the hole improves soil drainage. Pour it in then tamp it down flat with your post. It’s especially important to add gravel if your soil has poor drainage. Alternatively, use a wooden stick, a broken wood tool handle, or a piece of scrap lumber as your tamping bar.
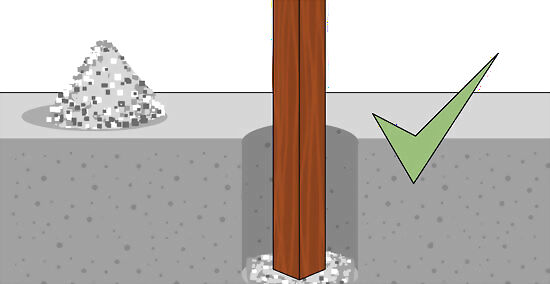
Position the post in the center of the hole. Ask a friend or family member to help you center the post in the hole and get it level and in line with the other posts. Then, get your assistant to hold the post in place. If you’re by yourself, use scrap wood and stakes to stabilize the posts. Drive the stakes into the ground about 2 to 3 feet (61-91 cm) away on two sides of the post. Then, nail one end of the piece of wood to the stake and the other end to the post. Make sure the post is flush against the string guideline you made. Measure the distance between your posts to ensure that the top and bottom rails fit.
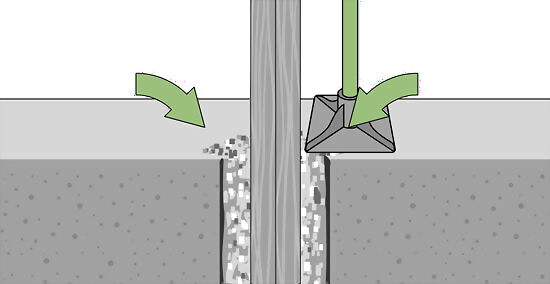
Pour gravel or soil into the hole, tamp it down, and repeat. Crushed stone typically offers better drainage than soil. It can also improve the stability of your posts if it’s well-tamped and installed in dense soil. Whether you’re using crushed stone or soil, shovel it in 3–5 inches (7.5–12.5cm) at a time, tamping well after each batch. Repeat until the hole is filled. Before each tamping, hold a level against the post and adjust it if it isn’t level. If you want to plant grass at the base of the post, use soil for the last 2-3 inches (5-8 cm).
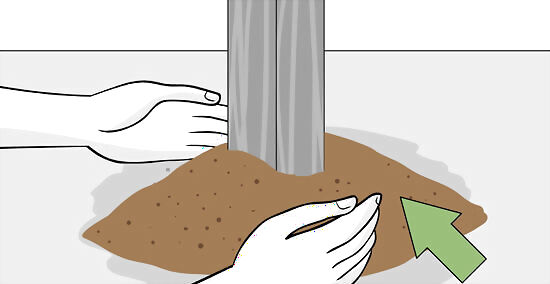
Make a small hillock with dirt at the base of the post. Build up the soil at the base of the pole to make a small "hill" sloping away from the post in all directions. The spot where the post leaves the ground is the most common location for rot. Good drainage here is extremely important.
Setting the Fence Post with Concrete
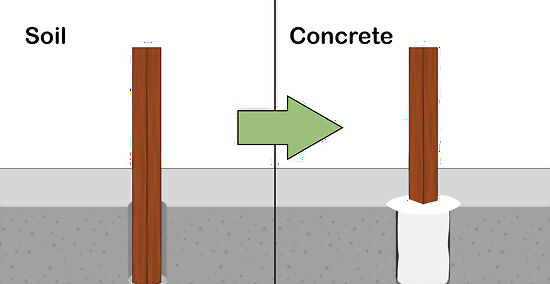
Set fence posts in concrete when stability is extra important. Whether you’re installing a fence in sandy or muddy soil, or simply want extra stability, go with a concrete setting. The main downside to using concrete is that it can trap water around the post. This sometimes reduces the lifespan of your posts by many years. However, adding a gravel base and an open-bottomed concrete sleeve helps mitigate this issue. If you’re adding a gate post, be sure to use concrete.
Dig a hole ⅓ as deep and 3 times as wide as the fence post. Use a post hole digger or post driver to make a hole at least ⅓ the length of your post. Then, dig an extra 4 to 6 inches (10-15 cm) for the gravel base. For a typical 4x4 fence post, dig the hole 12 inches (30 cm) wide across, or 3 times the width of the post. If you’re digging a lot of post holes, use an auger to make the process faster and easier. If the soil is rocky, using a power tool might be dangerous. Instead, use a clamshell digger to make your holes and a long digging bar to lever out rocks. Make sure the hole is straight and the same width all the whole way down.
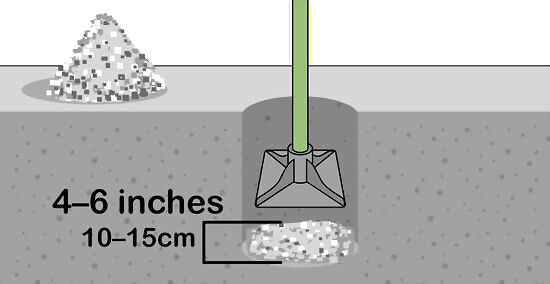
Add 4 to 6 inches (10-15 cm) of gravel to the bottom of the hole. Adding a base of gravel or crushed stone below the post greatly improves drainage. Pour 4 to 6 inches (10-15 cm) of gravel into the hole and tamp it down with your post or a piece of scrap lumber.
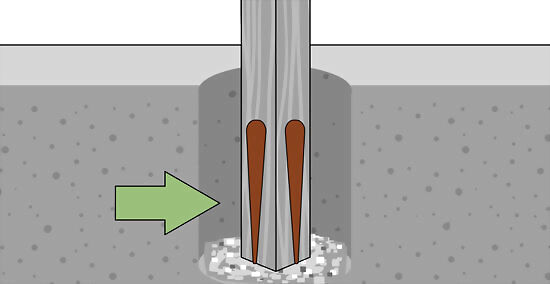
Brace the post to keep it straight by using 2 stakes and scrap lumber. Position the post in the center of the hole, using a level to ensure it's straight. To hold the post in place, pound 2 stakes into the soil about 2 to 3 feet (61-91 cm) away from the post and on adjacent sides. Nail or screw scrap lumber to the stake and the post to keep the post upright and straight. Don't pound the nails or screw the screws all the way into the post so they’re easy to remove later.
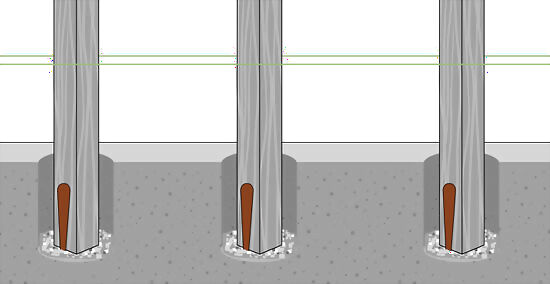
Dig holes and add braces to each wooden post. To pour the concrete all at once, make every post hole, insert each post in the center, and brace each one using the stakes. Then, ensure the string you tied at each post corner is flush against the other posts. Adjust any posts to make them in line with each other.
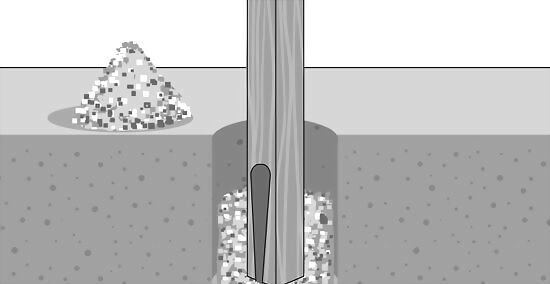
Add 1 to 2 more inches (2-5 cm) of gravel inside the post holes. Adding another layer of gravel further improves drainage and the post’s stability. Just tamp the gravel down after you pour it inside.
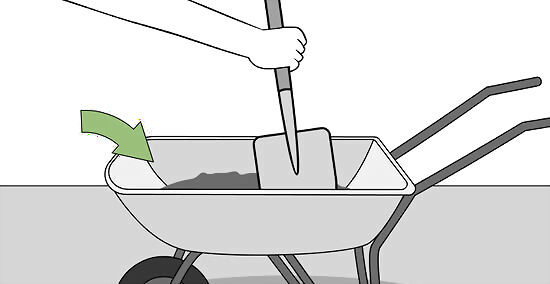
Mix your concrete in a wheelbarrow. Put on safety glasses and waterproof gloves. Then, pour a full bag of concrete mix (or as much as you can transport) into your wheelbarrow. Mix in about 90% of the recommended water according to the label. Combine the mix and water together for a few minutes. Check the consistency and slowly add more water until the concrete feels like paste. Add the water in small increments to ensure the concrete doesn’t come out too runny. When it’s a good consistency, the concrete falls off of the shovel easily. To save effort, rent a portable concrete mixer or a concrete truck. To save money, make your own concrete mix. Mix together 1 part Portland cement, 2 parts sand, and 3 parts coarse gravel, by volume. For a quicker solution, use fast-setting concrete. With this type of concrete, you pour the dry mixture into the hole, then add in water. These mixes tend to be weaker and more expensive, so use them with your own caution.
Use a shovel to fill the hole all the way with concrete. Shovel concrete into the hole up to soil level. Work quickly enough to use each batch of concrete before it hardens. Take care not to splash cement onto the post. Set a level on top of the post before the concrete dries to ensure it's straight.
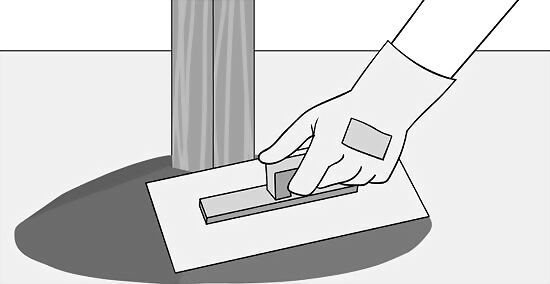
Use a trowel to slope the concrete at the base of the post. Shovel concrete around the post. Then, smoothly cap off the top of the cement with a trowel, sloping it downwards from the post. Make a slope that’s about ½ inch (1.25 cm) above ground level that drops about 1 inch (2.5 cm) below ground level. This pitch helps the water flow off the post, preventing pools of water at its base that promote rotting and decay.
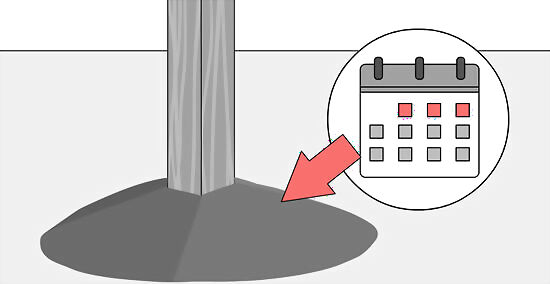
Let the concrete cure for at least 3 days. It typically takes several days for the concrete to dry and harden before you’re able to build the fence or put any weight on the post. Read the directions on your concrete mix to see how long you need to wait for it to dry.
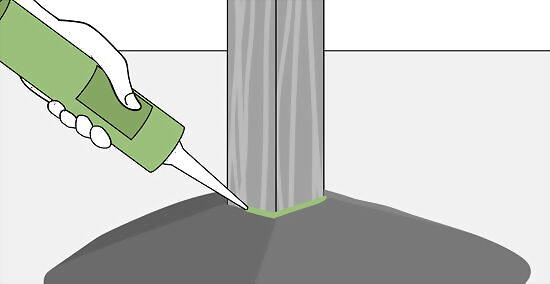
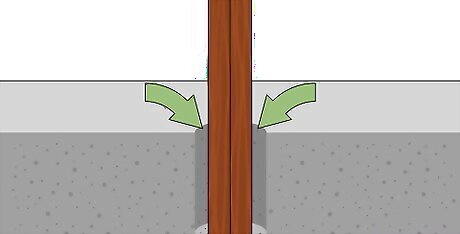
Seal the gap between the post and the concrete with caulk. A little gap often forms around the base of the post and the concrete. This gap can widen from natural expansion and frost, which lets water pool around the post and cause rot. Once the concrete is dry, apply a sealant that bonds to concrete and wood, such as some silicone sealants or exterior acrylic latex caulk, over the gap.


Comments
0 comment