
- You can access the RAM overclock profiles in your computer's BIO/UEFI settings.
- The XMP profiles are easier to use for beginners. Advanced profiles or manual settings will provide the best optimization for advanced users.
- Be sure to run benchmark tests after changing your RAM settings to make sure everything is running smoothly and stable.
How Overclocking RAM Works
Overclocking RAM increases the speed in performance of your RAM. Random Access Memory (RAM) is where your computer stores short-term data in use by software and your operating system. Overclocking improves the speed and performance of your RAM by increasing the frequency while decreasing the timing or latency. Higher frequencies allow the RAM to transfer data faster, while lower timing decreases the time in between operations. Ideally, you want your RAM to have a high frequency and lower timing/latency numbers. However, increasing these numbers too much can cause your RAM to become unstable. You may be able to improve the stability by increasing the voltage usage of your RAM. However, there is a limit to how much voltage your RAM can use. Overclocking your RAM can be a bit of a delicate balancing act.
Is overclocking RAM risky?

There are some minor risks associated with overclocking your RAM. While it is generally considered safe to overclock your RAM—especially if you are using XMP profiles—it could void the warranty. It can also cause stability issues with your computer system, which can generally be fixed by reverting your overclock settings back to the previous stable setting. Overclocking RAM may involve increasing the voltage, which can cause your run hotter than normal. This can reduce the life of your RAM, and, in rare cases, cause permanent damage. Make sure your computer has a decent cooling system and that your RAM has heat spreaders applied. Check the maximum voltage of your RAM chips and do not exceed it. The following are the general limits for most RAM chips: DDR3: 800 to 2133 MHz frequency, 1.5 V to 1.975 V voltage DDR4: 1600 to 5333 MHz frequency, 1.2 V to 1.5 V voltage DDR5: 3200 to 6400 MHz frequency. 1.2 V to 1.4 V voltage
Performing Benchmark Tests
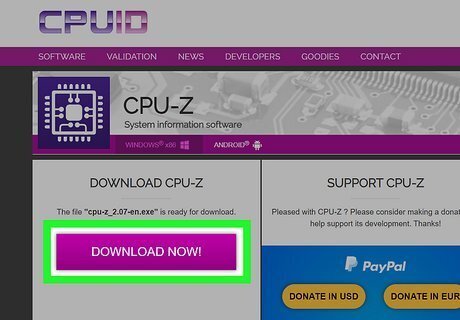
Download CPU-Z. CPU-Z is a free tool used to gather data about your computer system, including your RAM. Use the following steps to download CPU-Z: Go to https://www.cpuid.com/softwares/cpu-z.html in a web browser. Scroll down and click Setup • English. Click Download Now. Open the "cpu-z_[version number]-en.exe" file in your web browser or Downloads folder. Agree to the license agreement and click Next. Select an installation location and click Next. Click Next. Click Install. Click Finish.
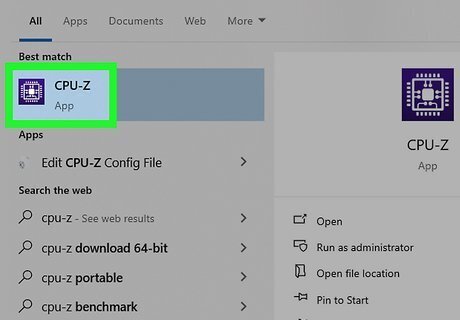
Open CPU-Z. It has a blue icon with an image that resembles a CPU processor. Click the CPU-Z icon in the Windows Start menu to open CPU-Z.
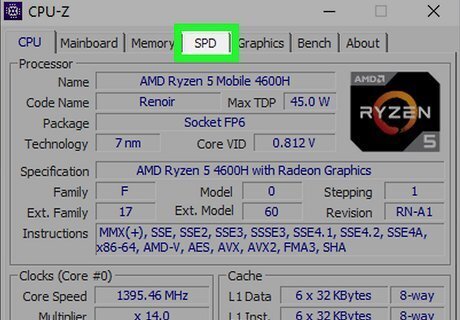
Click the SPD tab. It's the fourth tab in the middle at the top. This page displays information about your RAM, such as the frequency, voltage,
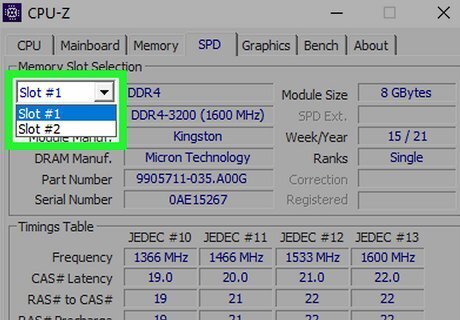
Select a RAM slot. If you have more than one RAM chip installed, use the drop-down menu in the upper-left corner to select which RAM slot you want to check. Check all the RAM slots you have.
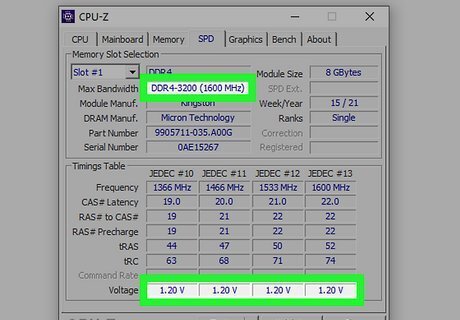
Note your RAM information. This will give you some baseline information about our RAM. You need to know your RAM type (i.e., DDR4, DDR5, DDR3), frequency (i.e., 3200 MHz), timing/latency (usually four numbers), and voltage. This gives you a baseline performance of your RAM before you begin overclocking. This will give you something to compare to when you perform benchmark tests and allow you to see the results of your work. It also tells you your RAM's default settings in case you need to revert them back to their original settings.
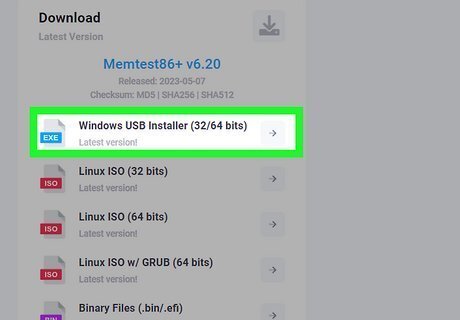
Download Memtest86+. Memtest86+ is a free and open-source tool you can use to test your RAM. You can use it to test your RAM in between settings changes. There are many other tools you can use, including Aida64 Extreme, Novabench, MaxMEM2, and Memtest86 (not the same as Memtest86+). Use the following steps to download and install Memtest86+: Go to https://www.memtest.org/ in a web browser. Click Windows USB Installer (32/64 Bits) below "Downloads" on the left side. Extract the contents of the ZIP file.
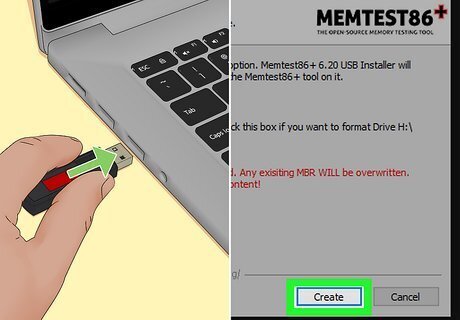
Create a USB boot drive. Memtest86+ needs to be installed on a USB drive that you can use to boot your computer from. This will erase all data on your USB drive. Make sure you back up any files you want to keep on your USB drive before continuing. Use the following steps to create a bootable USB drive: Insert a USB drive. Open the "mt86plus_[version number]_USB_installer.exe" file. Click I Agree. Select your USB drive using the drop-down menu and click Create. Click Next. Click Finish.
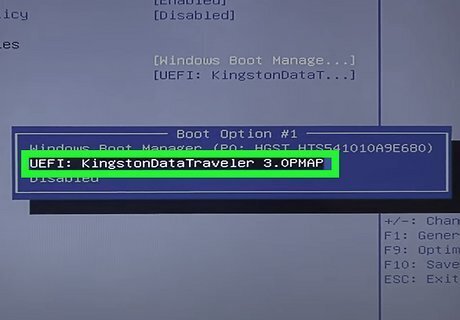
Boot your computer from the USB drive. To do this, you will need to boot into your BIOS and ensure your boot order is set to boot from a USB drive first. Once this is done, insert the bootable USB drive and restart your computer. Your computer will boot from the USB drive and load Memtest86+. You may need to clear the CMOS on your motherboard to get a good test result. You can do so by opening your computer, removing the battery from the motherboard, and re-inserting it. Be sure to disconnect the power cord and touch something metal to discharge any static discharge before touching your motherboard.

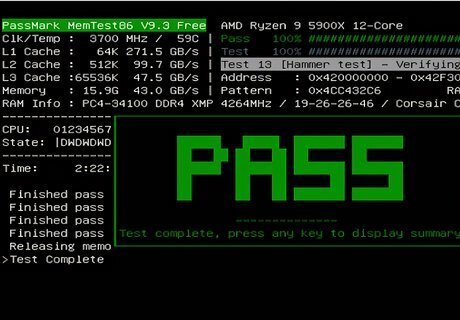
Allow the test to be completed. It may take a couple of hours for the test to complete. At the end of the test, it will display any errors with your RAM. When overclocking your RAM, it is important to perform a benchmark test using Memtest86+ after any overclock settings changes to check the performance of your RAM and to check for any errors and stability issues.
Using XMP & Advanced Profiles
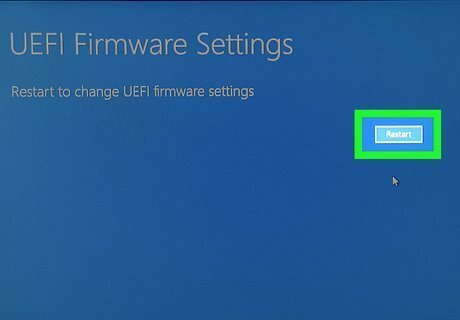
Boot into your BIOS. When you restart your computer, press the dedicated key to boot into your BIOS/UEFI settings as your computer boots up. The dedicated key is different depending on your computer model. It's usually F1, F2, F10, F12, Esc, or Delete. The dedicated key is usually displayed in the lower-left corner. If your PC boots too fast to see what the dedicated key is, you can use the following steps to boot into your computer's BIOS from within Windows: Click the Windows Start menu. Click the Settings menu. Click Update & Security (Windows 10) or System (Windows 11). Click Recovery Click Restart now below "Advanced Startup." Click Troubleshoot. Click UEFI Firmware Settings. Click Restart.
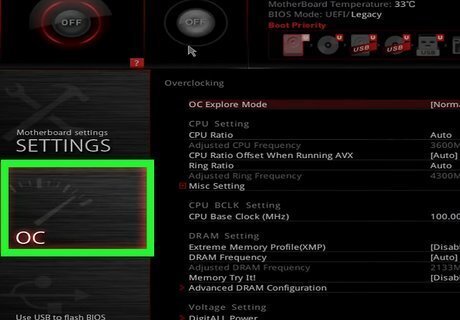
Locate the memory overclock settings. The BIOS menu for each motherboard is different. It may be the Extreme Tweaker menu, the Advanced DRAM menu, or the Overclock (OC) settings menu. Look for the memory tuning settings in your BIOS menu. Not every motherboard supports overclocking RAM. If you cannot find memory tuning settings, your motherboard may not support overclocking. In this case, you will need to use the default settings for your RAM.

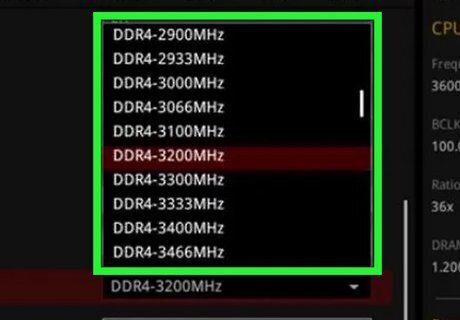
Select a memory profile setting. Most motherboards have XMP profiles for easy use. However, some high-end motherboards built for overclocking may have Advanced Profiles that allow more advanced users to fine-tune their overclock settings. XMP Profiles: XMP stands for Extreme Memory Profile. These profiles are predetermined by the RAM manufacturer. This is the easiest way to overclock your RAM if you are a beginner. There will usually be a couple of profiles you can choose one. One will offer a more stable overclock, and the other may be a little harder on your RAM. Select the one that works best for you. Advanced Profiles: Not all motherboards offer advanced memory profiles. This is usually only found on high-end motherboards designed for overclocking. Advanced memory profiles will list the specific frequencies, timing/latency, and voltage uses. Finding the right profile takes a bit of trial and error. It's recommended that you select profiles that make small changes to your memory settings. Run a benchmark test, and if everything works, then you can try making more small, incremental changes.

Save and exit the BIOS. Once you pick a profile you like, save and exit the BIOS.

Run another benchmark test. After changing your memory profile settings, boot up Memtest86+ and run another test. Compare the performance of your RAM to the baseline settings you got out of CPU-Z. If you receive any errors or your system crashes, boot back into the BIOS and revert the settings to the most recent stable settings.
Manually Overclocking Your RAM
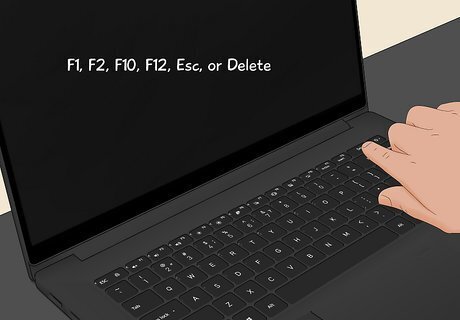
Boot into your BIOS. When you restart your computer, press the dedicated key to boot into your BIOS/UEFI settings as your computer boots up. The dedicated key is different depending on your computer model. It's usually F1, F2, F10, F12, Esc, or Delete. The dedicated key is usually displayed in the lower-left corner. If your PC boots too fast to see what the dedicated key is, you can use the following steps to boot into your computer's BIOS from within Windows: Click the Windows Start menu. Click the Settings menu. Click Update & Security (Windows 10) or System (Windows 11). Click Recovery Click Restart now below "Advanced Startup." Click Troubleshoot. Click UEFI Firmware Settings. Click Restart.
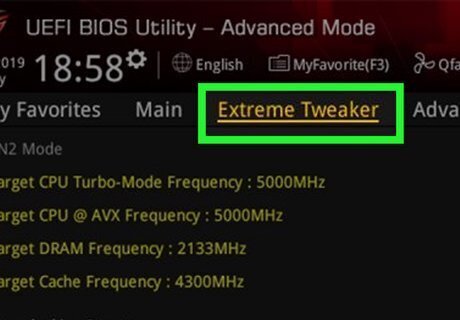
Locate the memory overclock settings. The BIOS menu for each motherboard is different. It may be the Extreme Tweaker menu, the Advanced DRAM menu, or the Overclock settings menu. Look for the memory tuning settings in your BIOS menu. Not every motherboard supports overclocking RAM. If you cannot find memory tuning settings, your motherboard may not support overclocking. In this case, you will need to use the default settings for your RAM.

Set your memory profile to manual. A manual memory profile will allow you to set the timing, frequency, and voltage yourself. This is only recommended for advanced users who know what they are doing. This will allow you to get the most optimal overclock settings, but it can also be time-consuming and risky.
Make small incremental changes to your memory settings. The goal is to decrease the timing/latency while increasing the frequency. Start by decreasing the timing in increments of 1. If that works, increase the frequency by a small amount. If this causes an unstable overclock, try increasing the voltage by a small amount (such as 0.05 V). Make sure you don't increase the voltage past what your RAM chips can handle.
Run another benchmark test. After changing your memory profile settings, boot up Memtest86+ and run another test. If you receive any errors or your system crashes, boot back into the BIOS and revert to the previous settings.


Comments
0 comment