views
- In many cases you can update the BIOS over the internet using the EZ Update utility in the AI Suite 3 app.
- You may need to use one of the USB methods if your system is very unstable or doesn’t support EZ Update.
- You can download the latest BIOS update file for your ASUS model from the ASUS Download Center.
Finding Model and BIOS Version
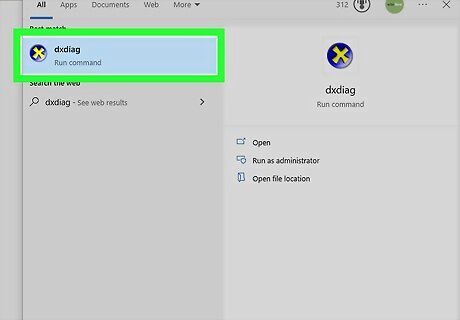
Find the model name of your computer with DXDIAG. To make sure you’re getting the right BIOS update, you’ll need to gather information about your ASUS computer, motherboard, and current BIOS version. Typically, you can find your computer’s model number on a sticker on the back of the computer or on the original box that your computer came in. If you don’t see it there, look it up this way: Type DXDIAG into the search bar in the Windows taskbar or Start menu. Click the DIXDIAG app in the search results. Find your computer’s model name next to the System Model header. You can also see your current BIOS version in this utility.
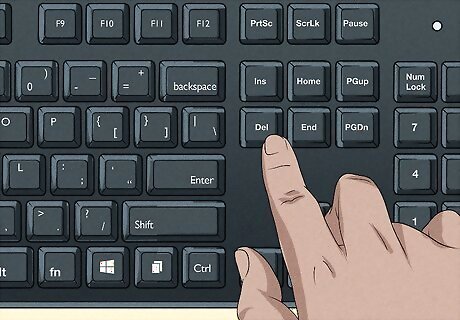
Look up your motherboard model and BIOS version in the BIOS utility. If you want to go directly to the download page for your ASUS’s motherboard, look up your motherboard model number instead. To do this, reboot your computer and hold down the Del key. Your computer will start up in the BIOS utility. Look for the motherboard model name and BIOS version in the top left corner of the screen. You can also see the model number for your motherboard by opening the computer case and looking for the sticker on the motherboard itself. However, this method will not tell you which version of the BIOS is currently installed.
Downloading the Update

Visit the ASUS Download Center. Open a browser on your computer and visit https://www.asus.com/support/Download-Center/.
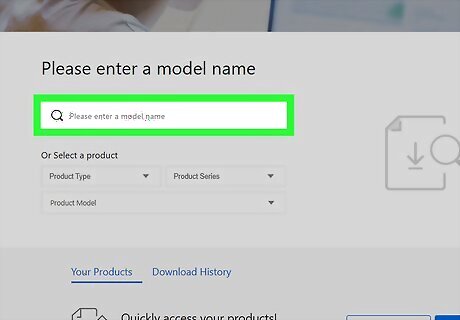
Enter your model name or select it from the dropdown menus. Type the model name of your computer or motherboard into the search bar under the header Please enter a model name. Or, use the Select a product dropdowns to find your computer or motherboard model.
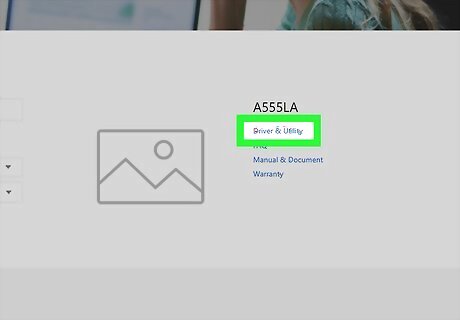
Click Driver & Utility. It's a link on the right side of the page.
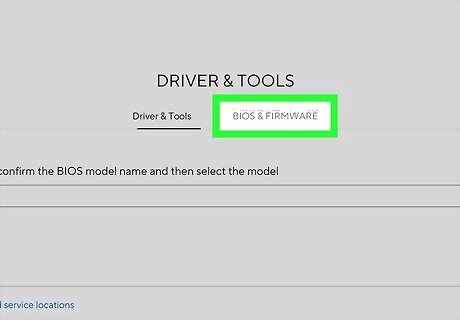
Click the BIOS & FIRMWARE tab. You'll find this near the middle of the page. You may be prompted to select your current operating system from a dropdown menu.
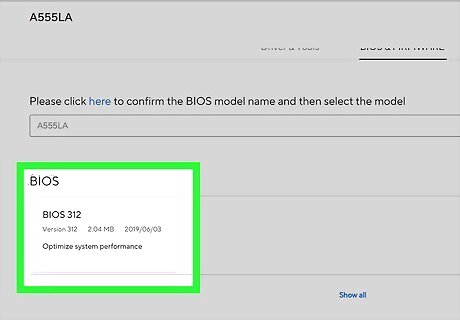
Look for an available update. You'll see the latest BIOS update file here. If the date on the BIOS update file is more recent than the date on which your computer was manufactured, your BIOS most likely needs to be updated. If the file is several years old, chances are that your BIOS isn't in need of an update. If you see several BIOS versions listed, select the most recent one.
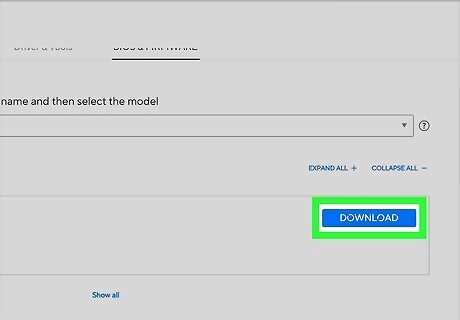
Click DOWNLOAD. It's to the right of the BIOS file. Doing so prompts the BIOS file's ZIP folder to download onto your computer.
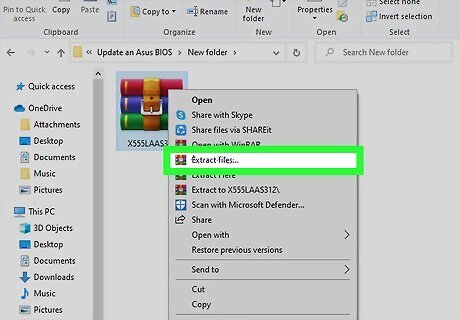
Unzip the BIOS file. Once you download the BIOS update file, locate the ZIP file in your Downloads folder and extract it. Look for a file in the unzipped folder with a .CAP file extension. This is the BIOS update file, which you can use to update the BIOS manually if necessary.
ASUS EZ Update Method
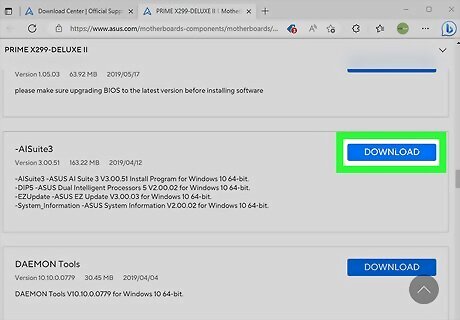
Download the AI Suite 3 app from the ASUS Download Center. Navigate to https://www.asus.com/support/Download-Center/ and enter the model name for your motherboard. From there: Click the Driver & Utility link on the right side of the page. Make sure the Driver & Tools tab is selected. Select your operating system from the dropdown menu. Find the latest version of ASUS AI Suite 3 under the Software and Utility header and click Download. Before downloading the file, look at the description and see if EZ Update is mentioned. If not, the latest AI Suite 3 for your computer model may not support this update method. Extract the ZIP file in your Downloads folder and double-click the AsusSetup.exe file. Click Install and follow the prompts to reboot your computer.
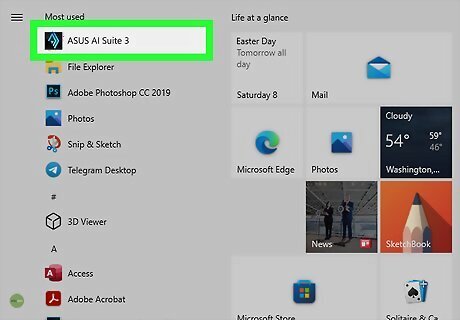
Open AI Suite 3 in your Start menu. Once the computer reboots, launch the AI Suite 3 app.
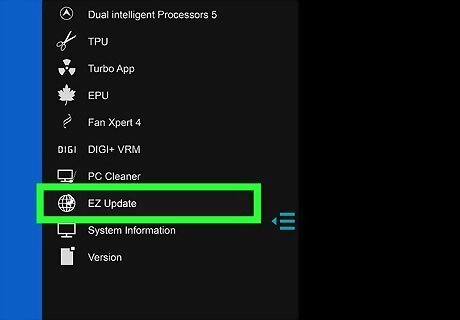
Select EZ Update in the main menu. Click the ☰ button to open the main menu in the AI Suite 3 app, then click EZ Update in the menu on the left side of the screen.
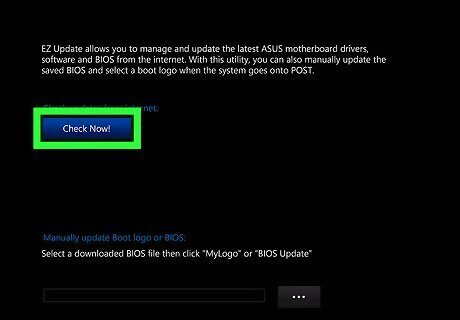
Click Check Now!, then Connect to check for updates online. Ideally, you should be able to update the BIOS directly from the EZ Update utility without having to manually download the update file. To do this, click the Check Now! button under the header Check updates from internet in the main EZ Update window. Then, click Connect at the bottom of the window.
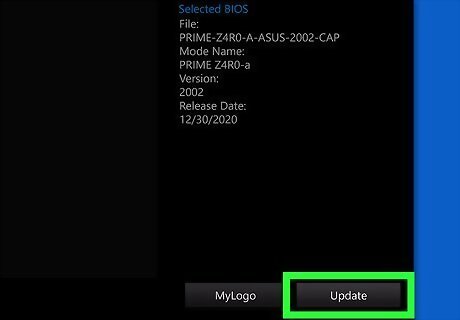
Select the update from the list and click Update. If any BIOS updates are available, they should show up in the list of available updates under your motherboard’s model name. Click the Update button at the bottom of the window.
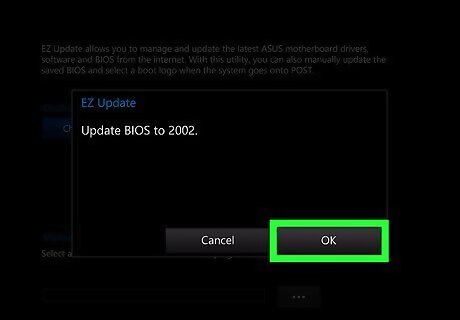
Click OK to restart your computer. Once the updates finish installing, a window will pop up asking if you want to restart your computer now to finish the process. Select OK. The computer will restart and automatically open the EZ Flash utility. Wait for the updates to finish processing. Your computer will restart again. Don’t attempt to shut down or reboot your computer during the update process, since interrupting the update could do serious damage to your system.
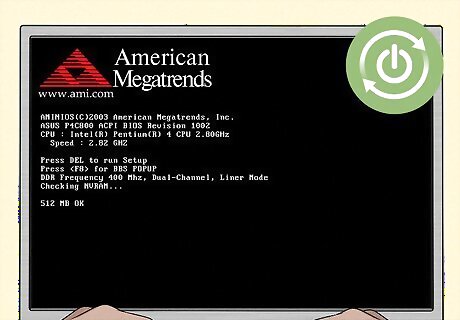
Restart again after the American Megatrends screen appears. Once the update is finished, you’ll see a screen with an American Megatrends logo. Restart your computer again.
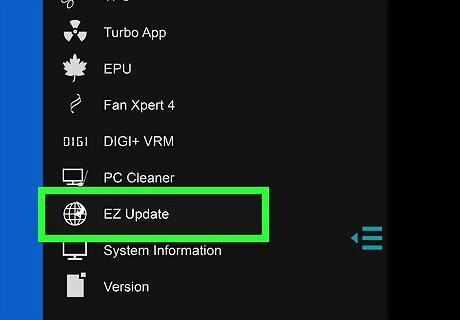
Go back into EZ Update to confirm the installation. Once your computer restarts, open AI Suite 3 again and navigate back to EZ Update in the menu. Look at the information on the right side of the screen under the Current BIOS header. Confirm that the newest version of the BIOS is listed there.
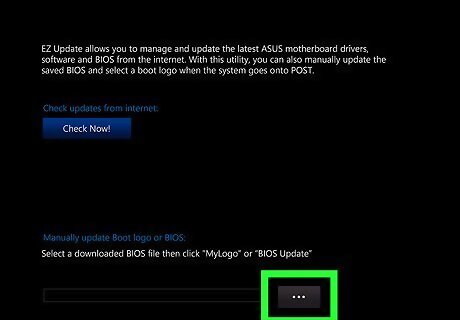
Use the manual update option if you can’t update online. If for whatever reason you aren’t able to update over the internet, you can use AI Suite 3 to update the BIOS manually using the downloaded BIOS update file. Confirm that you’ve downloaded the correct version of the BIOS, then open AI Suite 3 and navigate to EZ Update. From there: Click the ••• button next to Manually update Boot logo or BIOS Select the BIOS update file you downloaded to your computer. Double-check that the correct information is listed under the Selected BIOS header on the right side of the window. Click Update in the lower right corner of the screen. Click Flash, then select OK to confirm. Click OK again to restart your computer. Wait for the update to complete, after which your computer will restart again. Restart again after the American Megatrends screen appears. Check the current BIOS information in EZ Update again after your computer is finished restarting.
ASUS EZ Flash 3 Method
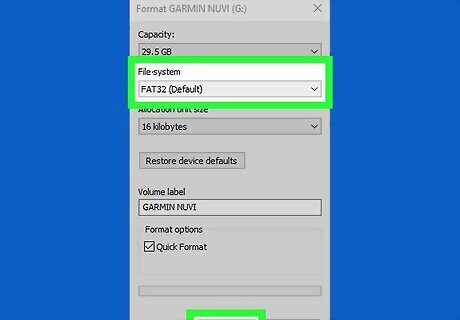
Format a USB flash drive in FAT16/32 format. To use this method, you’ll need to install the BIOS from a USB flash drive. This may be a good option if your computer is too unstable to use the EZ Update method, or if your device doesn’t support EZ Update. To format the flash drive: Select a USB drive with at least 1GB of free space. Back up any data on the drive, since formatting it will erase it. Connect the flash drive to your computer and open File Explorer. If your ASUS is too unstable for this process, you may need to use a different computer. Select your USB drive, right-click it, and select Format…. Choose FAT32 or FAT16 from the dropdown menu and click Start. Confirm by clicking OK. When the format is complete, click OK again. Keep in mind that not all ASUS computers have the EZ Flash 3 feature built in. Check the technical specifications for your computer’s motherboard on the ASUS website before you try this method.
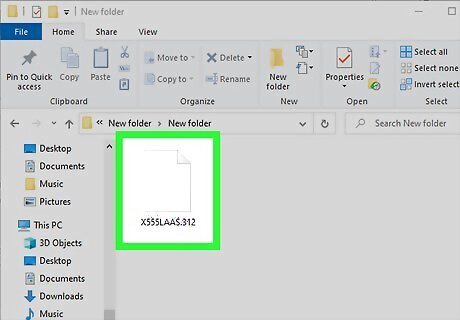
Copy your BIOS update file onto the USB drive. After you download and unzip the correct BIOS file from the ASUS download center, drag and drop the .CAP file into the USB drive. You can also copy and paste it if you prefer.
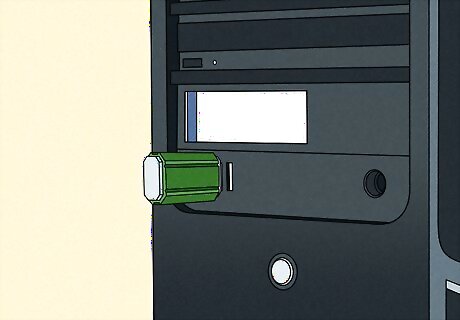
Connect the flash drive with the BIOS file to your ASUS PC. Insert the USB drive with the BIOS update file into the USB port on your ASUS.
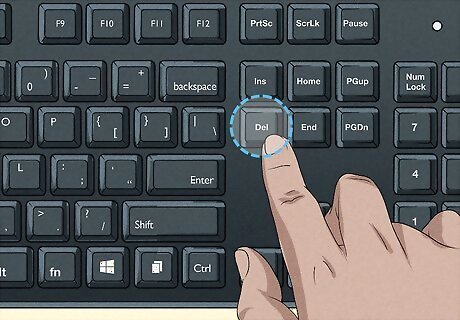
Reboot your ASUS and hold down the Del key. Boot up your computer and wait for the ASUS logo to appear. As soon as you see it, press and hold Del. This will boot up the computer in the BIOS utility.

Press F7 to enter Advanced Mode. You can also click Advanced Mode at the bottom of the screen with your mouse.
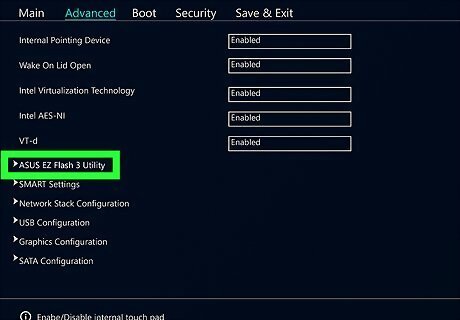
Click the Tool tab and select ASUS EZ Flash 3 Utility.
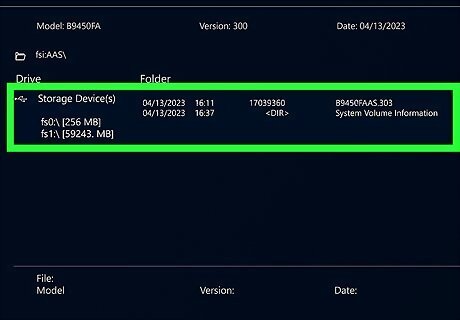
Select your USB drive from the list of storage devices. Look for a header that says Storage Devices on the left side of the screen. You should see the USB drive with your BIOS update file listed there. Click on it to select it.
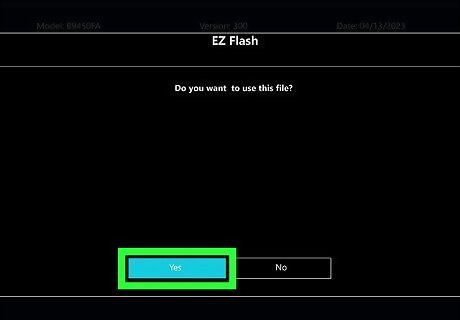
Click the update file and select Yes. Once you select the correct file, a window will pop open asking if you want to read the file. Click Yes to confirm.
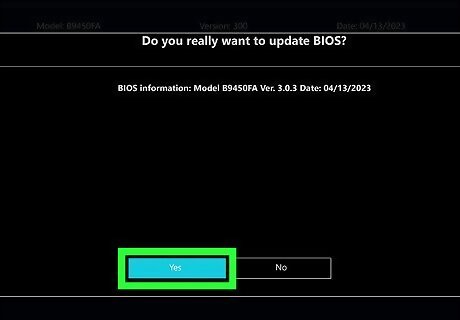
Double check the BIOS information, then click Yes. A second window will pop up asking you if you really want to update the BIOS. Check the BIOS information to make sure you’re installing the right version, then click Yes again to start the update. Once the update is complete, click OK to confirm and restart your computer. Don’t do anything to interrupt the update process, since this could cause serious damage to your system and make it impossible to boot up your computer again.
USB BIOS FlashBack Method
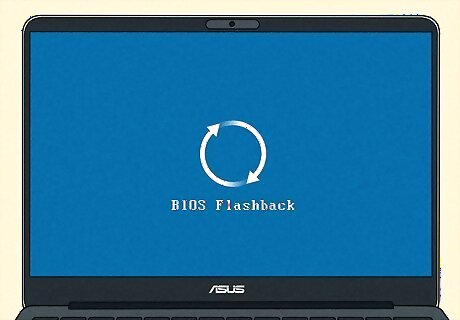
Use this method if you’re unable to boot up at all. The USB BIOS FlashBack method is ideal in situations where your computer is severely compromised and you can’t get the motherboard to start up at all. It’s not available for ASUS computers, but you can find a list of motherboards that are compatible with BIOS FlashBack here: https://www.asus.com/support/FAQ/1038568/

Format a USB flash drive in FAT16/32 format. This method involves installing the BIOS update from a USB drive. You’ll need one with at least 1GB of free space. To format the flash drive: Connect the flash drive to a working computer and open File Explorer. Select your USB drive, right-click it, and select Format…. Choose FAT32 or FAT16 from the dropdown menu and click Start. Confirm by clicking OK. When the formatting process is complete, click OK again.
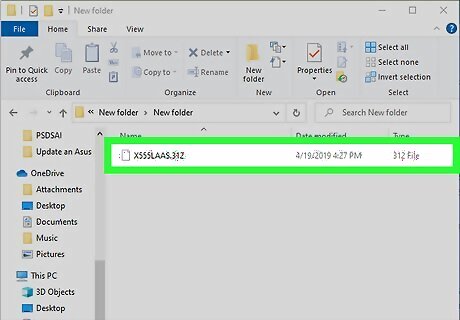
Copy the BIOS update file onto the USB drive. On a working computer, download the correct BIOS version from the ASUS Download Center. Extract the zip file, then drag and drop the .CAP file onto the USB drive. In some cases, you may see a file called BIOSRenamer in the folder with the BIOS update file. If you see this, double-click it to automatically rename the BIOS file, then move the renamed file onto the USB drive.
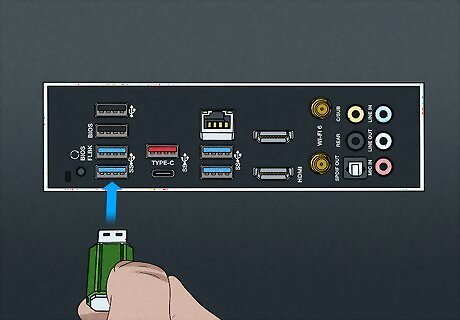
Insert the USB drive into the FlashBack port on your ASUS. The location of this port varies from one model to another. Consult your user manual if you’re not sure where to find it. If you don’t have the paper copy of your manual anymore, you can download it from the ASUS Download Center: https://www.asus.com/us/support/Download-Center/
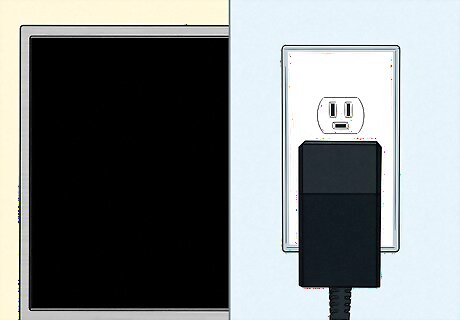
Make sure your computer is shut down but still plugged in. If you’re unable to shut down the computer properly, you may need to press and hold the power button for several seconds until the power light turns off. Make sure your computer is still connected to a working power source, since a loss of power during the update could do serious damage.
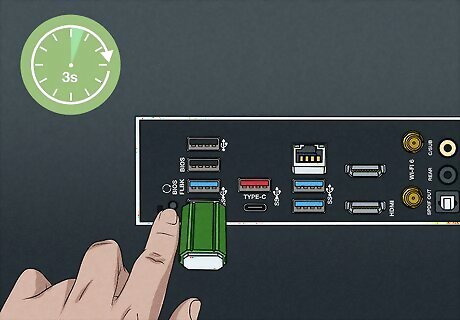
Press and hold the BIOS FlashBack button for 3 seconds. Look for a button on the back of your computer that says BIOS and shows two arrows curving toward each other. Hold the button for 3 seconds, or until you see the light on the button blink 3 times.
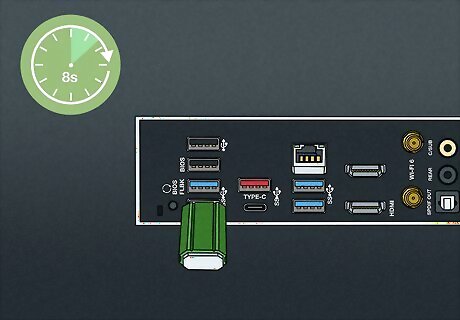
Wait for the BIOS FlashBack light to go out before restarting. It may take up to 8 minutes for the update to complete. During the update, don’t press the power button, unplug the computer, remove the USB drive, or press the CLR_CMOS button. Doing any of those things could disrupt the update and make it impossible for your computer to reboot again. Once the update is complete, the light on the BIOS FlashBack button will turn off. After that, you can try rebooting your computer. To check if the new BIOS version installed correctly, hold down F2 or Del after the ASUS logo appears during the restart process. This will cause your computer to boot up in the BIOS/UEFI menu. Look for the BIOS information under the Main tab.


Comments
0 comment