
Making an Email Account
Visit a website that offers an email service. Notable ones are https://yahoo.com, https://gmail.com, and https://outlook.com, all of which are free to use. While there are many free email providers, we will be going over the steps to sign up for these three main services. However, most email sites have very similar sign-up processes, so you should be able to follow along and still create your own email address on whatever provider you choose. Many email providers also have mobile apps. You can either sign up on the mobile app, or visit their website in your phone's browser.
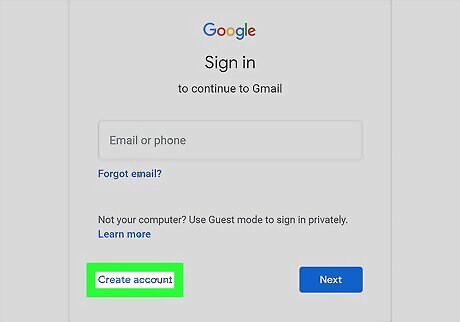
Find where to sign up. Usually, there is a small link image or text that says Register, Sign up, or Create an account, although you may have to go to the login page to find this. Yahoo: Click the envelope icon in the upper right corner, then click Create an account. Gmail: Click Create an account in the upper right corner. Outlook: Click Create free account in the middle of the homepage.
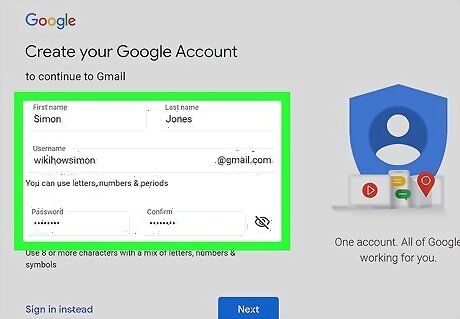
Follow all the instructions on the page, filling out all the needed details. Most email services ask for your name, birthdate, and gender. Some may ask for a phone number and address, but this isn't super common. If the email provider you're signing up with is asking for a phone number or address and you're not comfortable giving that out, consider trying a different email provider.
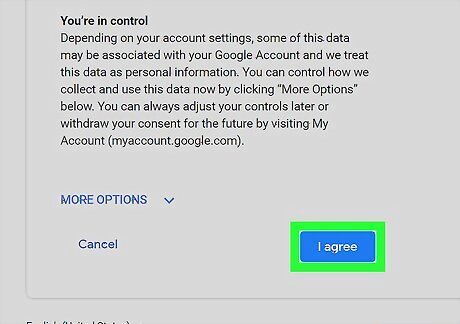
Read over the service agreement. Each email provider will have a Terms of Service and a Privacy Policy. Once you've read these documents over, click the confirmation button at the bottom of the screen to continue.
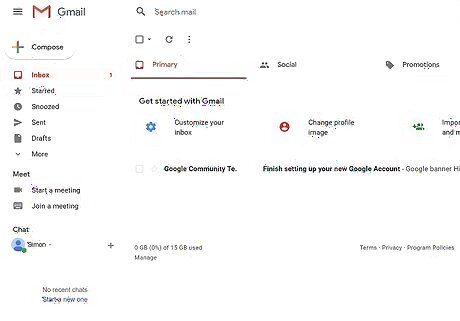
Start using your email address. After creating your email, you should be taken directly to your new email inbox. Continue on to import your contacts, message with friends, or write emails, plus much more.
Gathering Contacts
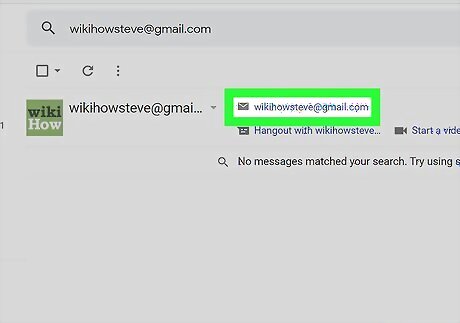
Tell your friends and family about your new email address. If you don't have their email addresses already, ask them to provide their email addresses so you can add them to your contacts list. Note that many email accounts nowadays save your contacts automatically when you send email to or receive email from a person or institution. To bring up contacts, find the contacts tab or simply type in the first or last name of the person you want to email, or the beginning of their email address. Their email address and contact information should automatically pop up. This often means you don't have to "save" someone as a contact in order to send them an email.

Import your contacts if you're changing email accounts. Navigate to your Contacts tab and find the import button; then follow any directions that follow. Usually it's as easy as dragging and dropping a .CSV file into your browser window.
Sending an Email
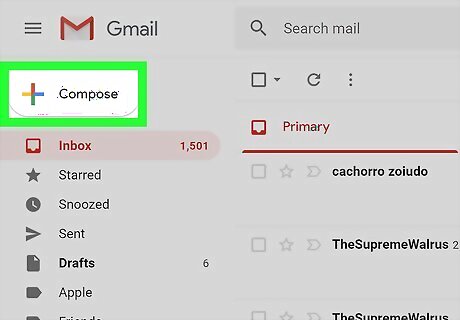
Click the Compose button. It shouldn't be too hard to find; often, it's a different-colored button in a prominent location.
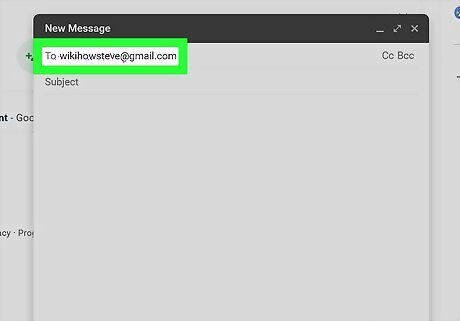
Type in the email address of the person you want to send an email to. If you don't remember the person's email address but have previously sent them an email, your account might recognize the saved email address if you begin to type in their name. If you want to copy a person on the email, hit "CC," which stands for "carbon copy." If you want to copy a person on the email without the original recipient knowing that you've copied the email, hit "BCC," which stands for "blind carbon copy."
Include a subject. This is what the email is about or concerning.
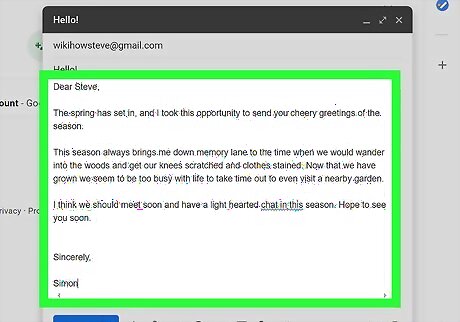
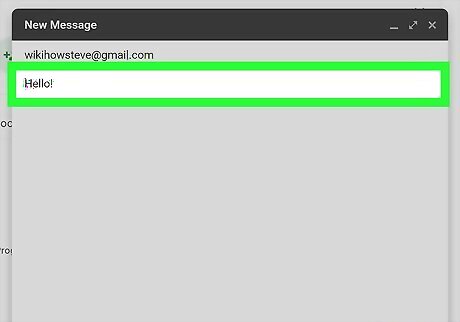
Type the message, or body, of your email. This is your communication or what you want to explain to the other person.
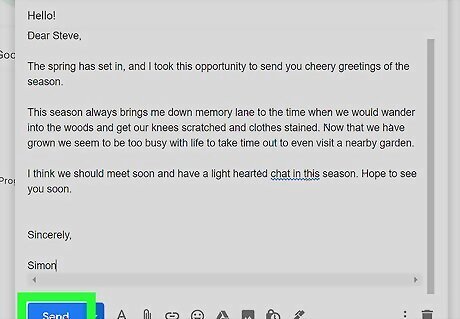
After double-checking for errors, click Send. Make sure your contact's email address is correct, and that your message contains no spelling mistakes or formatting errors. Send your email.


Comments
0 comment