
Choose yarn or string to make this project. It can be any color and any thickness you think will look good with your toy. You may find you prefer cotton yarn or string, so that it isn't too stretchy.
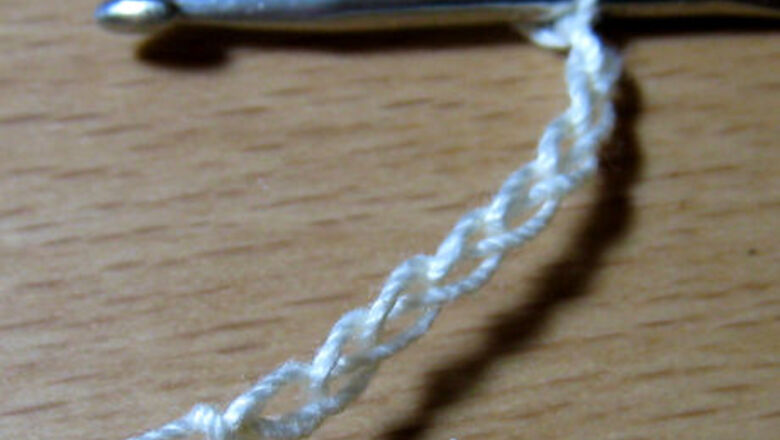
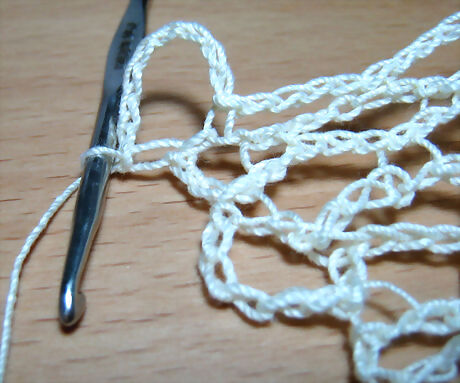
Tie a slip knot and chain 8.

Chain many more stitches, according to the length (head to toe) of the toy who will inhabit this hammock. Hammocks dangle down, so make the chain longer than the toy. This chain will form one side of the finished hammock. In this example, there are 108 chain stitches at this point.
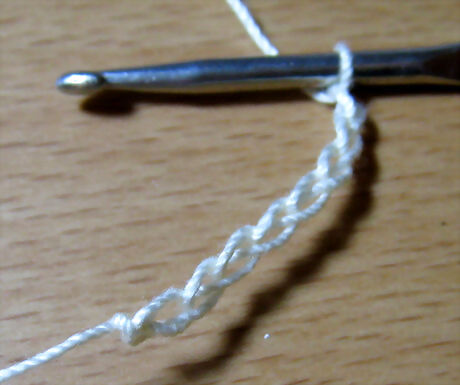
Chain ten more stitches. There are now 118 stitches in the example. The first eight and the last ten stitches will form the loops at either end, which is why they're listed separately.
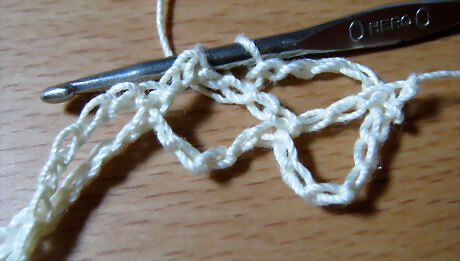
Work a slip stitch into the tenth chain from the hook.

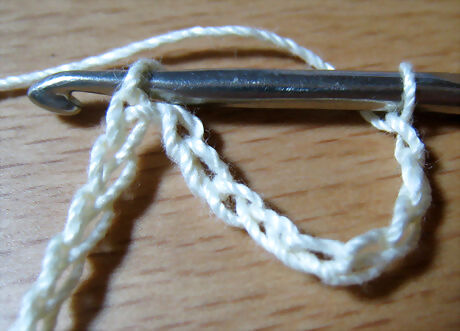
Chain five.

Count five stitches from the last slip stitch and work a slip stitch into it.

Continue this pattern back along the row. Chain 5, slip stitch into every fifth stitch, until you have the original 8 stitches remaining. Don't worry if you don't find exactly eight stitches here. Just try to leave more than five and fewer than ten.
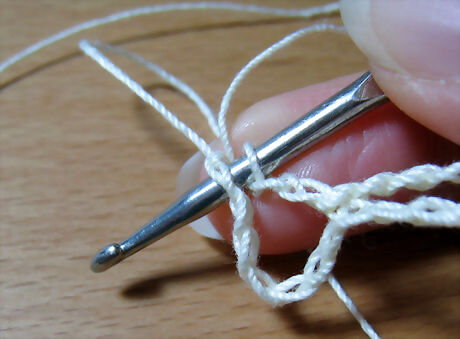
Chain three. Slip stitch to join in the first stitch of the original chain.
Turn the work. This will start the third row.
Chain five. Slip stitch into the third stitch from the chain of five that forms the loop you're over.
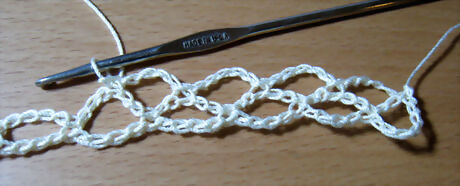
Repeat this pattern, chain five, slip stitch into the third chain all the way down the row. The last loop will be different.
Chain five and join with a slip stitch low on the last loop.

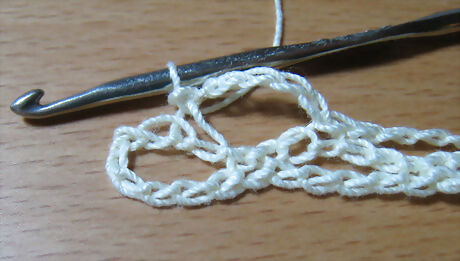
Turn. Chain eight and join in the third chain from the last slip stitch in the previous row.
Repeat row three as many times as necessary to produce the desired width. Chain eight and turn.

On the last row only, chain four between each slip stitch, joining as before. A straighter edge.This matches the very first edge and makes the edge a bit straighter and tighter.
At the end of the row, after joining the last chain of five, chain eight. Loop around and join to the corner of the fabric with a slip stitch. Tie off and sew in the ends. This produces a final loop for the corner.
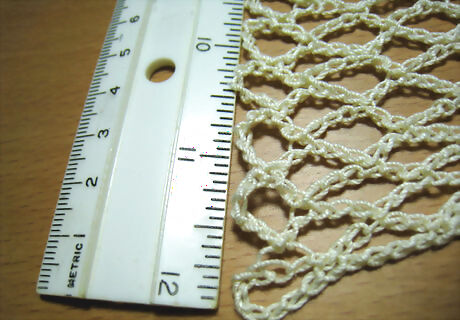
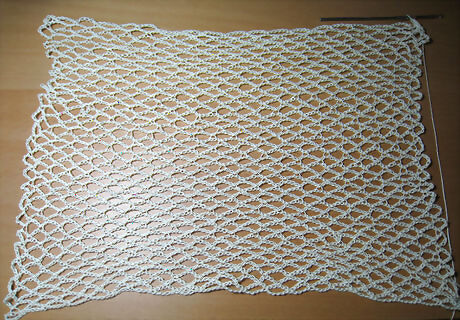
Count the number of loops at the end of the fabric and, stretching the fabric about to the dimension you intend for the hammock, also measure the fabric. This will tell you how many holes you will drill in the dowel and how far apart to drill them. This hammock will have holes every half inch. The fabric is stretchy, so the interval between the holes can be approximate, but the number of holes must be correct.
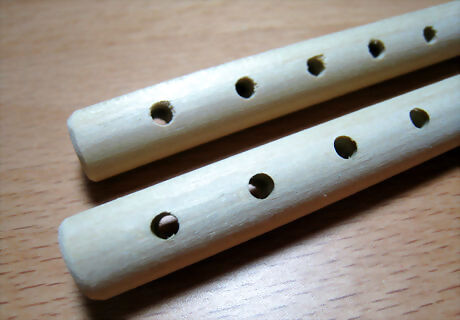
Cut dowels to the length desired and drill the appropriate number of holes in a dowel, evenly spaced. This is a 7/16" dowel with 1/8" holes every 1/2", but use whatever size and spacing seems right for your fabric. Drill the holes larger than you will need for just the yarn or string. It will make it much easier to assemble and hang the hammock.

Clean up the edges of the holes with a craft knife or small round file. Also do any sanding that the dowels or the corners require. Jagged edges on the dowels will catch on the string. If you wish to apply any sort of finish to the dowels, do that now, too, and give the finish ample time to soak in and dry before proceeding.
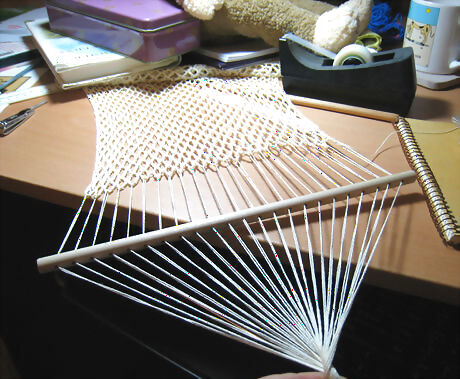
Run a string through each loop and double it. Leave the strings long so that you have leftover length. It will help to hold the opposite end firmly. Here, it's wrapped around the other dowel and weighed down with books and things.

Thread both ends of the string through the corresponding hole in the dowel. Repeat for each loop and each hole.

Bring all the strings from one end together. Center the bundle over the middle string if there are an odd number of loops or between the two middle strings if there are an even number of loops. Pull the strings gently so that they all have approximately even tension when the bundle is held in the middle. It's important to get everything centered and even here so that the finished hammock will balance. When gathering the second end, measure the distance along the middle string from the edge of the fabric to where you are holding the bundle and tying it.
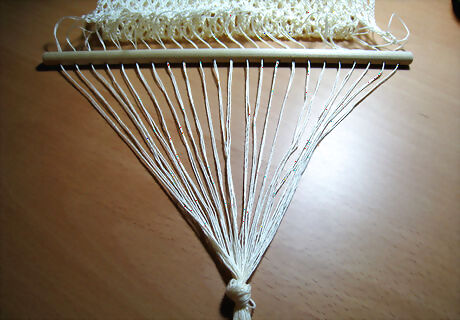
Twist the bundle of strings together and tie a knot.
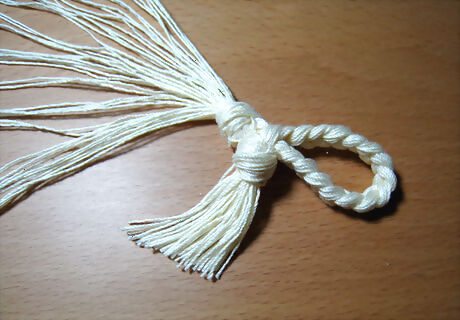
Create a loop or tie. For the one shown here, divide the strings into three (or more) groups and braid them. Wrap the loose ends of the braid back around the base of the braid. Tie another knot. Trim the ends to an even length.

Secure the hammock to hooks or build a frame for it.


Comments
0 comment