

Entering the Phantom Vortex
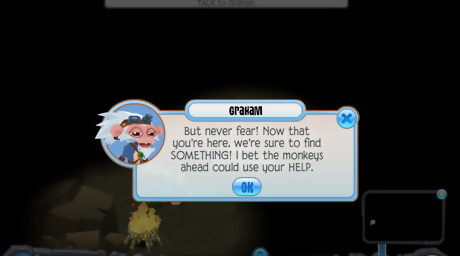
Speak to Graham. When you spawn into the adventure, Graham will appear. He'll tell you there are monkeys ahead who will help you enter the Phantom Vortex. When he's finished speaking, grab a torch from the pile and head down.

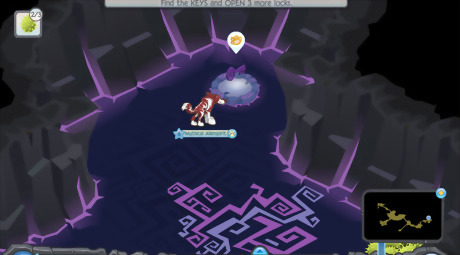
Light the fire drum. When you go down, you'll reach a fire drum - light it and move across the bridge. Then move down and right along the purple phantom tube. Follow the tube to the second phantom tube which leads up. Go up and encounter the first monkeys, Virgil and Philbert. Before you encounter the monkeys, to the right there will be a chest on a small purple bridge containing 200 gems in hard mode. Screen Shot 2020 02 02 at 9.32.14 PM.png
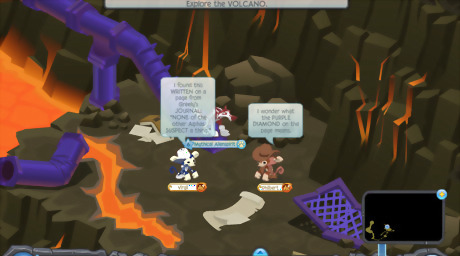
See what the first monkeys have to say. Click the exclamation point above Virgil's head. The monkeys will say that Greely has a suspicious entry in his journal with a purple diamond on the page as well. This, along with the clues the next two sets of monkeys provide, contribute to the puzzle you will have to solve later, so make note of what the monkeys discover.
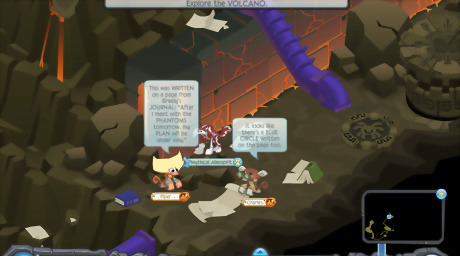
Find out what the second monkeys discovered. Go up the purple phantom tube above Virgil and Philbert. You'll find Piper and Charles. Click the exclamation point above Piper's head. The monkeys will mention that in Greely's journal, he writes of a certain plan he has with the phantoms and there is a blue circle on the page as well.
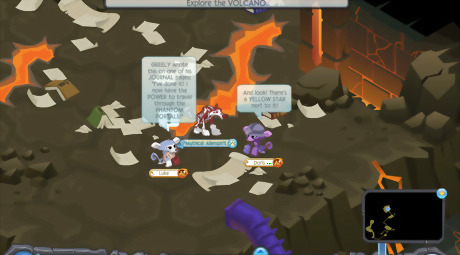
Discover what the third monkeys found. Head up the purple tube once again and encounter Luke and Doris. Click the exclamation point above Luke's head. The monkeys will say that on another one of Greely's pages, it says that he's discovered the power to travel through the phantom portals. There will also be a yellow star on the page as well.
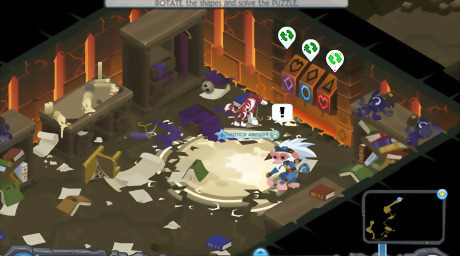
Follow the hallways right and then speak to Graham. He'll wonder, from what Greely was writing in his journal, if he was secretly working with the phantoms. Rotate the shapes to solve the puzzle. Based on the shapes that were mentioned by the monkeys who had discovered the pages from Greely's journal, rotate the hearts so that the blocks match the combination. You should come out with a purple diamond first, a blue circle second, and a yellow star third. This will unlock the gate. After speaking to Graham briefly, go through the gate and follow the hallway all the way right over a stone bridge to a closed phantom portal.

Retrieve the phantom crystal from Graham. When you reach the portal, Graham will tell you that he found a phantom crystal, but he's not sure what it's used for. He'll provide you with a purple glowing crystal. On the way to the bridge, you should have seen a phantom machine which needed a crystal to work. Grab the crystal, go back to the machine, and plug the crystal in. Goop will spill out of the machine. If you go into the goop, you will temporarily turn into a phantom. If you want, before moving on to the next step, you can go back to the passage you should have seen while finding out what Piper and Charles discovered. This passage is a Phantoms Only passage - once you become a phantom, you can unlock it and open the chest inside it, which may reward you with rare items such as worn blankets. Screen Shot 2020 02 02 at 9.45.35 PM.png Behind the Phantoms Only passage is a Wolves Only passage in hard mode. However, once you become a phantom, you can't turn back into your animal unless you go through the phantom portal, and then you can't come out of that portal again till the end of the adventure. So make sure you have another player with you who is a wolf if you want to open this passage and be sure they don't turn into a phantom by going through the goop. Screen Shot 2020 02 08 at 11.55.47 AM.png
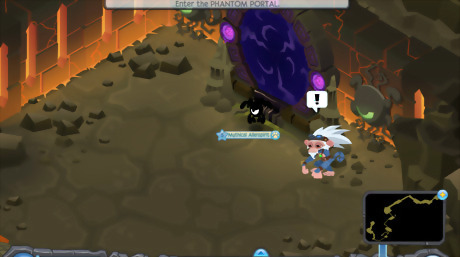
Enter the Phantom Vortex. Once you turn into a phantom, head to the Phantom Portal by Graham. Speak to him - he'll realize it's you and then instruct you to enter the vortex. Go through the Phantom Portal and enter the vortex.
Finding the Keys
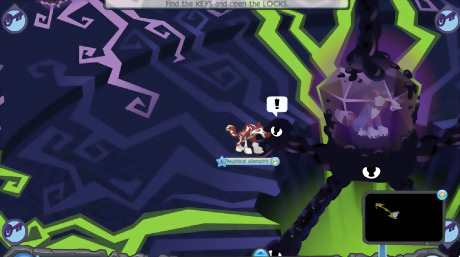
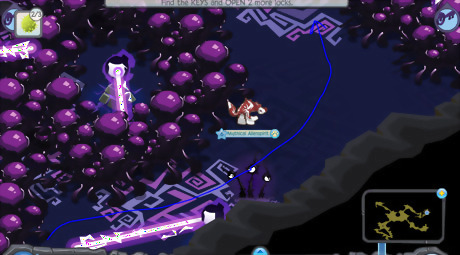
Arrive inside the Phantom Vortex. Explore the Vortex. When you reach the first phantom pod, the disguise will wear off. Destroy phantom pods blocking the path leading to the bottom right, and then enter the area with Greely in it. You'll see him trapped in a phantom prison. Throughout the adventure, you'll find large clumps of phantom pods. These pods can be destroyed for large amounts of courage and gems. Screen Shot 2020 02 03 at 5.37.35 PM.png Some items increase the damage your animal makes even if they don't have an animation when you attack a phantom obstacle, such as spiked collars, stegosaurus tails, gazelle horns, etc. These items can also increase the damage of other items as well as deal damage of their own, even if they don't have an animation when you attack. A list of items like these can be found here.Screen Shot 2018 12 03 at 6.59.09 AM.png
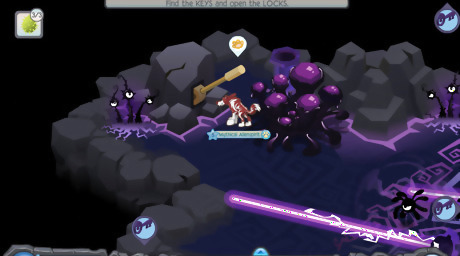
Find the first key. Head to the bottom left till you find a stone archway over a pathway that branches out from the area with Greely. Grab the pile of boomseeds next to the Zios check point. Destroy the phantom pods and move through the path, but be careful - there is a phantom watcher along with four phantoms circling it. Sneak past the phantoms and the watchers all the way to the left till you reach the phantom pods blocking the lever - you may have to destroy the phantoms first though. Break the pods before the lasers reach you and then click on the lever to turn off the phantom watcher. Then destroy the phantoms with boomseeds. You may be able to destroy all four phantoms with one boomseed if you place it in the center of the circling phantoms and let it drop at the right moment. Continue down the path to the bottom right now, away from the other phantom watcher - you'll deal with that one later. Destroy the phantom in your way. Destroy the phantom pods once the phantom watcher below them moves all the way to the right and leaves you a clear path. Grab boomseeds if needed. Hide in the area where the boomseeds are or were snugly till the watcher moves all the way left, once again leaving you a temporary clear path to run through. Quickly destroy the phantom and continue down the path. Destroy the next phantom. Screen Shot 2020 02 04 at 7.12.14 AM.png Continue moving down and destroy the phantom pod in your way. While waiting for the phantom watcher to move all the way to the left so you can have a clear path, kill the phantom near the chest in advance from the area with the boomseeds. Screen Shot 2020 02 04 at 7.14.42 AM.png Beside this boomseed pile, there is another phantom watcher and you should be able to see four more phantoms circling the key. However, you can't get past the phantom watcher till you continue through the path up and then come down to the key from the other side. In advance however, you can destroy these four phantoms to make it easier for yourself. Screen Shot 2020 02 08 at 12.01.31 PM.png Continue through the pathway up once the phantom watcher above you (not the one to the left of the boomseed pile) moves away to the left and leaves you a clear path. While in the chest area, destroy the phantom above you with a boomseed in advance once again. If the phantom watcher has moved right, away from where you should be, destroy the phantom pod and continue through the path. Once again, as you continue up the path, destroy phantoms before you destroy any pods. This will make it easier to sneak through the path without losing lives. Screen Shot 2020 02 08 at 12.05.18 PM.png Destroy the last phantom pod before you enter the area with the four phantoms circling. Destroy the phantoms - you should be able to do this with just one boomseed. Destroy the phantom pod that was behind those phantoms and click on the lever. A sprout will appear right beside you - destroy it quickly. Go down slightly and then left, destroying the phantom, and then destroy the pods below you - kill the phantom below them in advance to avoid losing hearts easily. Destroy the next pods. Sneak past the phantom watcher and then destroy the phantom or vice versa, depending on which of the two obstacles come near you first. You should now be in the area that you saw when you were beside the boomseed pile but you couldn't yet reach. Click on the lever to turn off the watcher. A sprouter will appear directly on the key. Destroy it, grab the key, and head back to Greely. Screen Shot 2020 02 08 at 12.10.58 PM.png
Find the second key. Head to the bottom right of where Greely is. Enter another path with an archway of stone over it. As you continue down this path, you'll encounter multiple phantoms safely blocked by phantom pods and webs - continuously destroy these phantoms and then make your way through the obstacles. Grab boomseeds when needed. It's best to destroy the phantoms before unblocking your path to lessen the chance of phantoms giving chase. Continue doing this till you reach the key. The path will eventually go up and then right again. You should then reach a place with a mass of phantom pods which you can destroy the two phantoms in advance from behind. After destroying them, go up slightly and you'll find the key. Grab it. As you head back to Greely, three sprouters will appear - be ready to destroy them as you advance through the path in the direction of the archway you entered from. At this point, in hard mode, there is a false wall where you encounter the third phantom of this path, in the area after you destroy the first phantom web. If you keep clicking into the wall and going down, eventually, your animal will go through a false wall through a pathway diagonally down and left, which is where you'll find a Pandas Only passage. Screen Shot 2020 02 08 at 12.15.44 PM.png
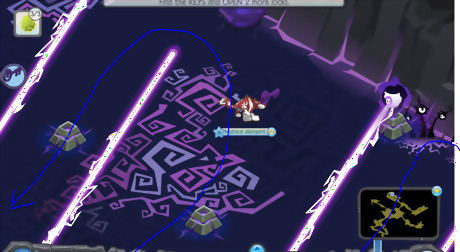
Find the third key. Head to the top right of where Greely is. Then go right. Destroy the phantom and then destroy the phantom web. You'll encounter many phantom watchers surrounded in large amounts of phantom pods. You'll have to destroy some of the phantom pods, exposing yourself to the watchers, in order to advance through the path. This requires some strategy - when phantom watchers are facing away from you, destroy the pods on the side they are not turned towards as fast as possible and sneak through the unblocked areas quickly. If you're new to the adventure, this may take some tries, since there will be multiple phantom watchers you may have to expose yourself to at once. At some points, you will simply need to sneak past already exposed phantom watchers while leaving others blocked with phantom pods. Continue doing this until you reach the key at the end of the path. You can also use phantom pods to protect you from other watchers. The already exposed watchers are slightly more challenging to get past. When destroying phantom pods, use them to block other lasers from reaching you, but be sure the lasers the phantom pods contain are also facing away from you at the time. When the coast is clear, continue through the maze of phantom pods and watchers. Avoid destroying all of the phantom pods as they can help come in handy when you need fast safety from any laser beams. Protection.png When sneaking past the watchers, you may have to encounter multiple at once. When you are, make sure each watcher is faced away from you and quickly sneak past, using phantom pods to protect you when necessary as shown in the image. Technique.png Destroy the sprouters. Once again, when you turn off the phantom watchers with the lever, sprouters will appear on the path you went through on the way back to Greely. Use the phantom pods to your advantage in blocking sprouted phantoms from reaching you while you destroy them and the sprouters safely. Then bring the third key to Greely's prison. Screen Shot 2020 02 08 at 12.27.28 PM.png
Find the fourth key. Head to the top right of where Greely is. Then go left. To get past this area to the fourth key, you will have to sneak through many phantom watchers. To do so, head to the top and click the first lever. This will turn off one of the watchers. Now, go all the way to the right wall of the room and you can wait for the rest of the watchers to move until you have a clear path to get to the other side of the area. You'll have to do this several times in a back-and-forth motion. Repeat, this time waiting for the next set of watchers to move so you can have a clear path to once again get to the right wall of the area. Repeat this pattern until you reach the key and lever. The key will be at the left and the lever will be at the right. When you click the lever, be ready to face four phantom sprouters on the way back to Greely.
Fighting the Phantom King

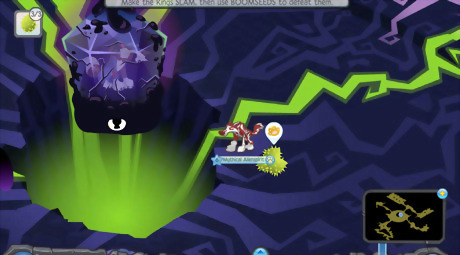
Go underneath one of the Phantom Kings. After watching the animation, you'll learn that there are actually two Phantom Kings that must be fought. You'll be returned to the area with Greely trapped in the center. This area will act as the battlefield. Move underneath the Phantom King. He will begin to stretch his legs as he prepares to slam down on the ground.
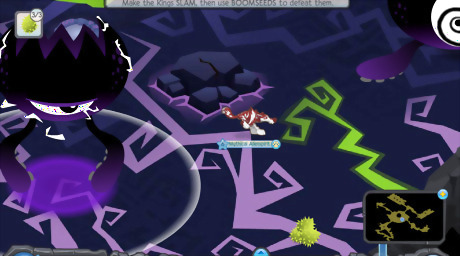
Get out from underneath the Phantom King's range. Just before the Phantom King slams down on the ground, you'll see a circle around him which indicates his range. If you are inside that range or very close to it when he slams down on the ground, you'll lose one and a half lives. When you go underneath him and he notices, get out as quickly as you can and far enough out of his range to still be close to the Phantom King.
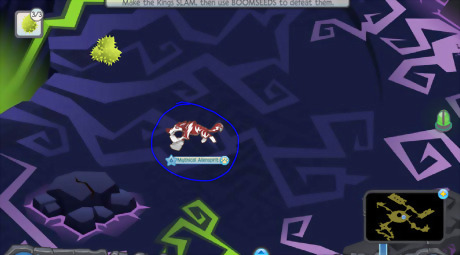
Drop a boomseed underneath the Phantom King. After the Phantom King slams down on the ground, he will become disoriented for about 10 seconds. In this time, drag a boomseed from the icon at the top left and drop it right underneath the Phantom King. You'll need to hit the Phantom King with boomseeds a total of 8 times to defeat him. Make sure you don't place the boomseed above the Phantom King's body or it won't affect him.
Kill any phantoms throughout the battle. Every two times you hit a Phantom King with a boomseed, he will summon phantoms to assist him. Each time, he will summon more and more phantoms. If you don't kill the phantoms, you'll run into them as you try to defeat the Phantom King throughout the battle, which will put you into a deep sleep several times. So when the Phantom King summons phantoms, it is better to kill all of them first and then continue with the battle. This also gives you more courage points. Try to target and defeat one of the Phantom Kings at a time. Otherwise, if you randomly hit both with boomseeds, you may end up with a large amount of phantoms complicating the battle since both will be summoning more and more phantoms as you continue to randomly target them.
Pick up boomseeds if you need any. There will be clumps of three boomseeds that randomly appear on the stone platform throughout the battle. Possible places that clumps of boomseeds can appear in are at the top, bottom, left, and right corners of the stone platform and on either side of the center, which is the hole where Greely is above.
Stay between the sides and the center of the platform as you battle the Phantom Kings. Though boomseeds appear in the corners of the platform and the center, it's better to stay between the center and the edges of the platform since it is easier to navigate the battlefield from the center, and if any boomseeds do appear, you'll still be able to easily grab them no matter where you are. Be sure not to stay in the edges or the corners of the platform either. If you aren't pressing against the edges or corners, you'll be able to pick up boomseeds more easily and staying around the center will make it easier for you to navigate. If you stay somewhere in a corner, phantoms or even the Phantom Kings may corner you, which will lead you into losing lives more easily.
Repeat the process. Keep dodging each Phantom King and dropping boomseeds underneath him when he is disoriented. Kill any phantoms that he summons as well. You'll need to drop boomseeds on him 8 times and then he will disappear in defeat. You will also gain 200 courage points per Phantom King once you have finished. Try to destroy one king at a time so it is much more simpler for you. If you didn't kill any phantoms, but you hit the Phantom King with boomseeds 8 times, the phantoms that that Phantom King summoned will not disappear. When a king is defeated, he will shoot up into the sky and disappear. When both kings are defeated, the fifth and final key to free Greely will be revealed and then all phantoms will disappear.
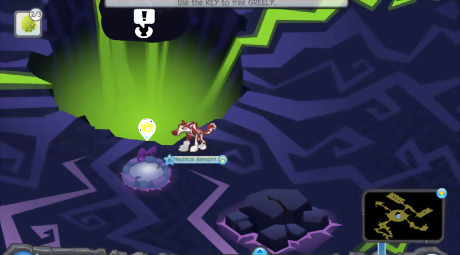
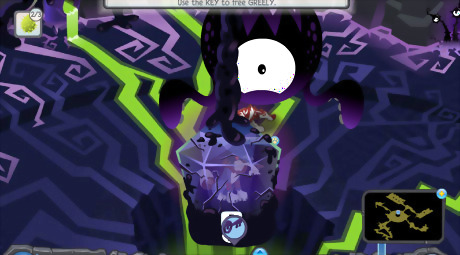
Grab the last key. Once both kings are defeated, the final key will appear on a tile below Greely's prison. Pick it up and free Greely by clicking on the exclamation point above his cell.
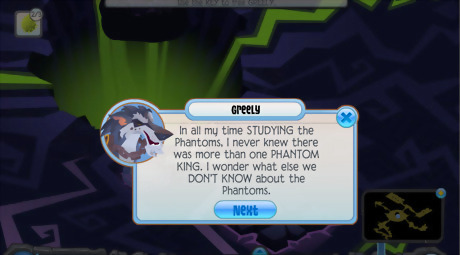
Speak to Greely. He'll tell you that he never realized the phantoms could have multiple kings. He also advises you to meet him at the portal before phantoms infest the vortex once again. Head to where Greely appears back at the phantom portal where you first entered the vortex.

Claim your prize. After you meet Greely at the portal, he'll realize he unlock the portal. However, the rest of the alphas appear and unlock the portal. At first, they'll believe Greely was a traitor and working with the phantoms, but Greely convinces them that they're wrong and that he discovered a place called the Phantom Fortress, where all phantoms work to take over Jamaa. Once the conversation is finished, claim your prize. The prizes for hard mode are shown in the image.


Comments
0 comment