
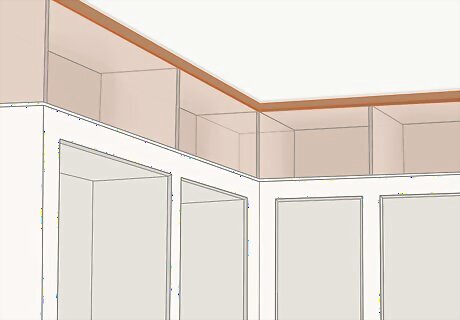
Covering the Space with Plywood
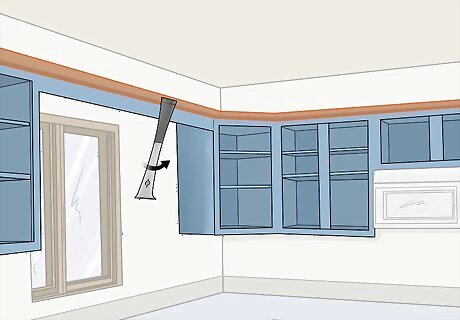
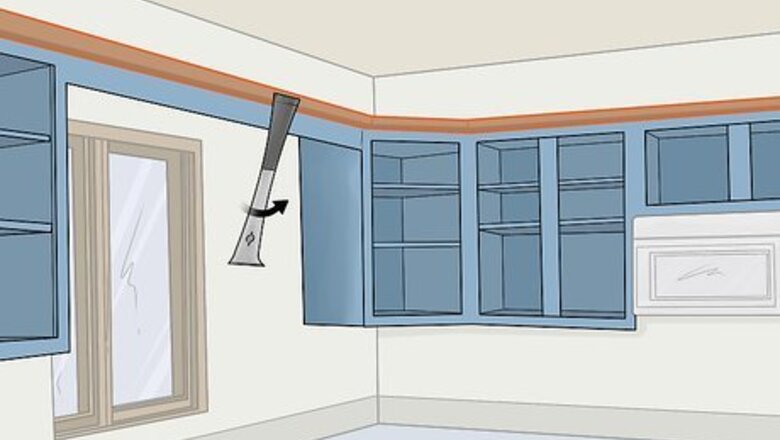
Remove any molding or trim along the top of the cabinets. This will get in the way of your new piece, and could also make your initial measurements inaccurate. Take a prybar or teeth of a hammer and tuck it between the molding and cabinets. Work around the cabinets and pull off all the trim. If you can’t get the prybar behind the trim, tap it with a hammer a few times first. If you want to reuse the molding, then be careful to avoid splitting the wood. If you don’t plan on reusing it, then don’t worry about being gentle.
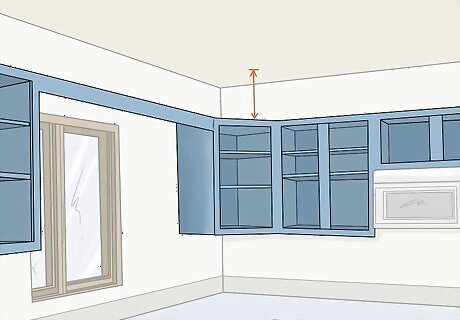
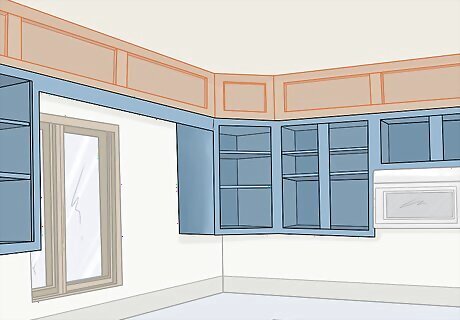
Measure the length and height of the space above the cabinets. Use a tape measure and check the distance between the top of the cabinets and the ceiling. Then, measure the length of the cabinets. Remember these measurements so you cut the wood correctly. If the cabinets are curved at any point, measure each straight piece individually. You’ll need separate plywood panels to cover each section. If the end of the cabinets float at any point, meaning they don’t reach another wall, also measure the space on the side to ensure that panels reach all the way around.
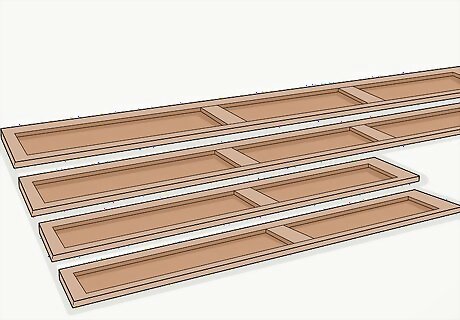
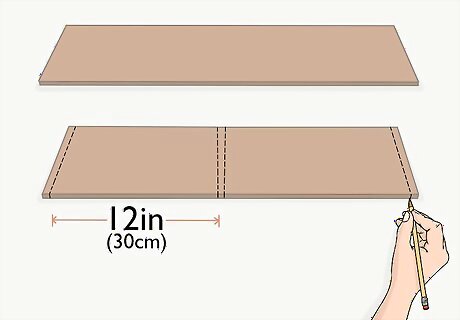
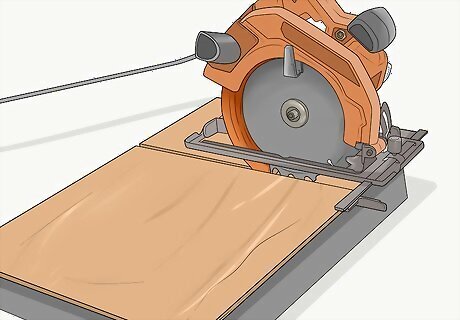
Cut plywood panels to fit in the space above the cabinets. Take a standard plywood board that’s ⁄2 in (1.3 cm) thick. Use a straightedge and mark lines on the board equal to the measurements you took for the space above the cabinets. Then, use a power saw and cut along those lines. Repeat this process for each piece of wood you need. If you only have one cabinet section that’s 48 inches (120 cm) long and 18 inches (46 cm) from the ceiling, then make these your measurements for the plywood. If you have multiple curved sections with different measurements, cut a board to the correct measurements for each section. It’s okay if you cut the boards a little shorter than your measurements. Any spaces will be covered up by molding. Use caution when operating a power saw. Wear goggles and gloves, and keep your fingers at least 6 inches (15 cm) away from the blade while it’s spinning.

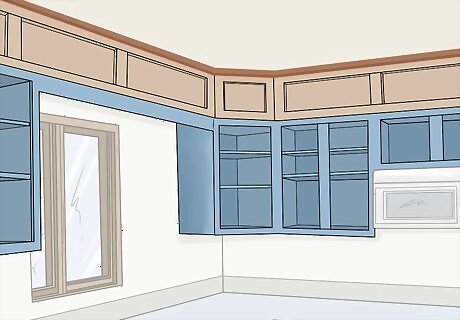
Install blocks along the ceiling and the top of the cabinets. Measure ⁄2 in (1.3 cm) in from the front of the cabinets. Mark this point. Then, take 1 in (2.5 cm) x 2 in (5.1 cm) wood strips and attach them to the top of the cabinets with wood glue. Place a block at regular intervals every 12 in (30 cm). Place blocks at the same points above the ceiling. Let the glue dry for 24 hours. These are anchors for the plywood coverings to attach to. The ⁄2 in (1.3 cm) is because this is the thickness of standard plywood boards. If you use a different type of plywood, measure the thickness and place the blocks at the matching location. For extra security, you can nail the blocks down. Be careful doing this along the top of your cabinets so you don’t drive nails through them.

Fit the panel above the cabinets before the glue dries. Confirm that you’ve placed the blocks correctly by trying to fit the boards above the cabinets. Lift the panel up and let it rest in the space between the cabinets and the ceiling. Make sure the front of the board is flush with the cabinets and that it fits into the space snuggly. If it fits, take it down and wait for the glue to dry. If the panel doesn’t fit well, take it back down and shave off a bit from the top with a saw. The gap will be covered with molding, so don’t worry about leaving space between the panel and the ceiling.
Attach the panel to the blocks after the glue dries. When 24 hours pass, lift the board into position. Then drive nails or screws into the spots where the blocks are on the top and bottom of the panel. Repeat this process for each plywood panel you install. For cleaner results, fill in drill or nail holes with putty after you’re done.
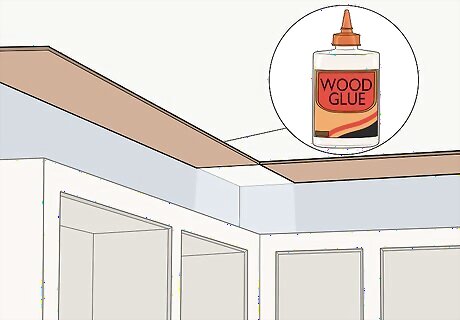
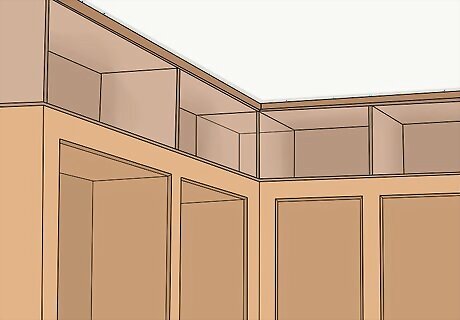
Attach molding along the top of the panel and the ceiling. Make the paneling look more natural with molding along the ceiling, which hides any spaces and gaps. Measure the distance you have to cover and cut the molding to the correct size. Place a line of wood glue along the molding and press it into position. Then, drive finishing nails into the molding to finish the installation. There are many types of decorative moldings available. Try to match the molding to the room. If there is molding in other spots, for example, try to get a similar design. Check your hardware store for options that appeal to you. If you prefer, you can also place molding along the point where the cabinets meet the panel to hide any gaps or lines.
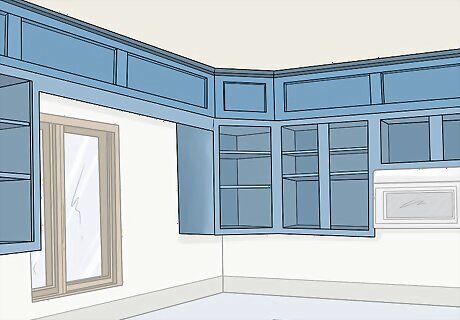
Paint the panel and cabinets the same color. It’s very likely that the plywood color won’t match the cabinets. Make your installation look natural by painting the cabinets and panel. Choose a color that you like. Then, sand the wood and apply a coat of primer. Paint all the pieces, let the paint dry for 24 hours, and apply a second coat. When you’re finished, the panels and cabinets will look like one continuous piece. You can also do a more decorative paint job by painting the molding a different color from the cabinets. This creates a simple but eye-catching design. If the plywood is rough, sand it smooth before painting.
Adding Cubbies Above the Cabinets
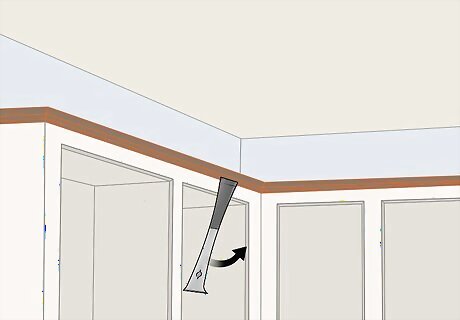
Remove molding or trim along the top of the cabinets. Any molding will be in the way of your new cubby. Take a prybar or teeth of a hammer and tuck it between the molding and cabinets, if there is any. Work around the cabinets and pull off all the trim. If you can’t get the prybar behind the trim, tap it with a hammer a few times first.

Measure the length, depth, and height of the space above the cabinets. Use a tape measure and check the distance between the top of the cabinets and the ceiling. Then, measure the length of each cabinet section. Finally, check the depth of the cabinets, meaning the distance from the front of the cabinets to the wall. Remember these measurements so you cut the wood correctly. If the cabinets are not straight for the entire length, then measure each straight piece individually. You’ll need separate cubbies for each section. Remember to measure all the cabinets in the kitchen, especially if you have them on separate walls. The measurements could be slightly different.

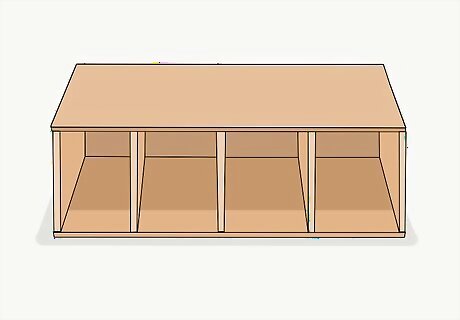
Cut 2 plywood boards to the length and depth of the space above the cabinets. These 2 pieces form the top and bottom for the cubby. Mark straight lines on each piece of plywood matching the length of the cabinets and the space between the front of the cabinets and the wall. Then, use a power saw to cut along those lines. Make sure each of these pieces is equal. Wear gloves and goggles when operating a power drill. Keep your hands at least 6 inches (15 cm) away from the blade while it’s spinning. This step makes a cubby for each straight cabinet section. If you have multiple cabinet sections, then repeat this step to make multiple cubby pieces matching the measurements of each section.
Mark the spaces on the base for cubby dividers. The space between the cubby dividers depends on how much storage room you want. Make each section at least 12 inches (30 cm) for storage. Start at one end of the base and measure in 12 inches (30 cm), then draw a straight line. Continue down until you’ve filled all the space on the board. Adjust your measurements to the size of the board. Divide the amount of sections you want by the length of the board to get the size for each section. Uniform cubby sections are best for decorations. However, you can also make the spaces different sizes for a different effect.
Cut the cubby dividers 1 inch (2.5 cm) shorter than the space above the cabinet. Since standard plywood boards are ⁄2 in (1.3 cm) and you’re using 2 of them for the cubby top and bottom, add these 2 measurements together so the cubbies fit above the cabinets. Subtract 1 inch (2.5 cm) from the space above the cabinets and mark that measurement on more plywood boards. Cut as many boards as you need to fill the cubby according to these measurements. If there is 10 inches (25 cm) of space above the cabinets, then cut the dividers 9 inches (23 cm) tall for the correct fit. Cut the dividers according to the thickness of the plywood. If the boards are a different thickness than ⁄2 in (1.3 cm), then adjust your measurements accordingly so the cubby fits above the cabinet.

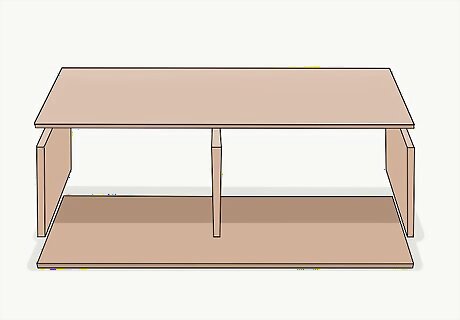
Attach the dividers onto the cubby base with wood glue. Apply a line of wood glue at both ends of the base and on each line you drew for the cubby dividers. Then press a divider onto each line of glue and press down so the glue adheres.
Glue the top of the cubby onto the dividers. Apply a line of wood glue onto the top of each divider. Then take the top of the cubby and press it down so it adheres to the glue. Let the whole cubby dry for 24 hours before installing it. For a stronger hold, drive nails into the dividers from the top and bottom of the cubby.
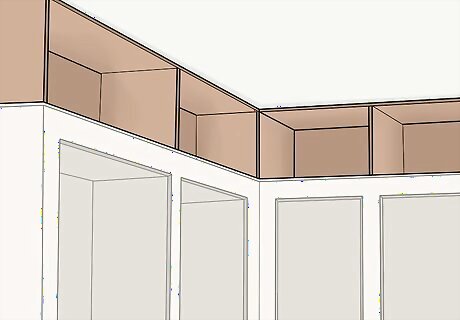
Lift the cubby onto the cabinets. Slide the piece into position above the cabinets. Adjust it so it’s flush with the front and sides of the cabinets. You’ll probably need a partner to help lift and position the cubbies. If the cubby doesn’t slide in easily, give it a few taps from the front with a rubber mallet. This should drive it into place.
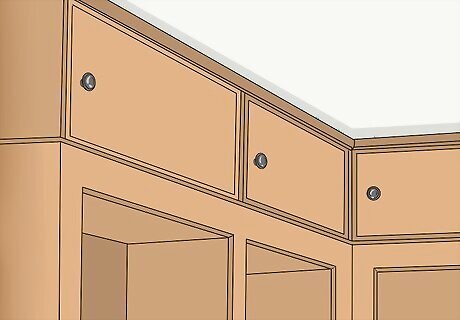
Install molding along the cubby top and ceiling. The molding will cover any gaps or spaces. Measure the length of the cubby and cut the mold to the correct size. Apply a line of wood glue to the molding and press it into the spot where the cubby meets the ceiling. Finish the job by driving finishing nails into the molding. You can also attach molding along where the cabinets meet the cubby. This may blend the installation better. For more security, you can drive nails through the cubbies and into the wall studs. If your cabinets are properly secured, however, they shouldn’t have any trouble supporting this extra weight.
Paint the cubby and cabinets the same color. A fresh coat of paint will blend the installation and make the cubbies and cabinets look like one solid piece. Choose a color you like and paint the cabinets and cubbies. Add a second coat in 24 hours. Then enjoy the new storage space you have above your cabinets. For a more decorative option, you can paint the molding and cabinets a different color. If you choose, you can also install doors on the cubbies. This is a more complicated project, but could add a new layer of decoration.
Installing Doors on the Cubbies
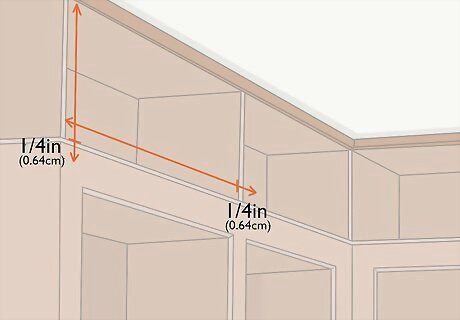
Measure the opening in each cubbyhole and add ⁄4 inch (0.64 cm) to the measurements. Take your tape measure and measure the length and height of each cubbyhole. Then add ⁄4 inch (0.64 cm) to each measurement so your doors cover the entire hole. If all the cubbyholes are uniform, then you don't have to measure each one individually. But measure a few to check for consistency. If you used a thicker type of plywood, you can increase the amount you add.
Buy pre-made cubby doors if you don't want to make your own. You have a choice between making your own doors or buying them already made. For pre-made ones, check the hardware store for doors that match the measurements you took. Buy as many as you need to cover all the cubbies. If no doors are the right size, see if the store will custom-make them for you. Pre-made doors come in a variety of designs. Pick one that matches the molding designs, or another type that appeals to you.
Cut plywood boards to cover the cubbies if you make your own doors. Use the measurements you took and draw lines on plywood board to the correct dimensions. Then, use a power saw to cut out each door. Cut as many doors as you need to cover each cubbyhole. If you have woodworking skills, you can cut designs into these boards so they don't look plain. Otherwise, they'll do the job fine if they're solid. Remember to wear gloves and goggles when using a power saw.
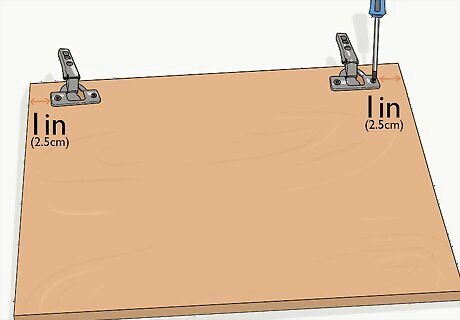
Screw hinges and knobs onto each door. Place the hinges 1 inch (2.5 cm) from the top and bottom of the door on the right side. Use a pencil and mark the screw holes through the hinge openings. Then take a drill and make a hole on each marker. Place the hinge back over the holes and screw them down. For the handle, drill a hole through the lower right corner of each door on the opposite side from the hinges. Hold the knob over the hole and insert a screw from the back. Repeat this process for each door. Hardware kits with hinges and knobs are available at hardware stores. With this configuration, the doors will open to the left. If you prefer them to open to the right, screw the hardware onto the other side. The doors will all open the same direction as well. If you want doors that open in the opposite direction next to each other, make an equal number of doors with the hinges on the left and right.

Attach the doors to each cubby with screws. Hold the door up so it covers the cubbyhole. Align it so it overlaps the cubby evenly on all sides. Then drill screws through all the holes on the hinge to attach the door. If the doors open from different sides, alternate their placement. Put one that opens left down first, then one that opens right next to it, then continue in that pattern.
Paint the doors to match the cabinets. Blend the doors to the cubby and cabinets with a thorough paint job. Find a color that matches the cubbies and cabinets. Sand each door and apply a coat of primer. Then apply the paint and let it dry for 24 hours. Add a second coat to complete the job. You could also paint the doors a different color from the rest of the cabinets for a decorative effect. Make sure the colors complement each other. For example, use a navy blue for the cabinets and cubbies and baby blue for the doors.


Comments
0 comment